
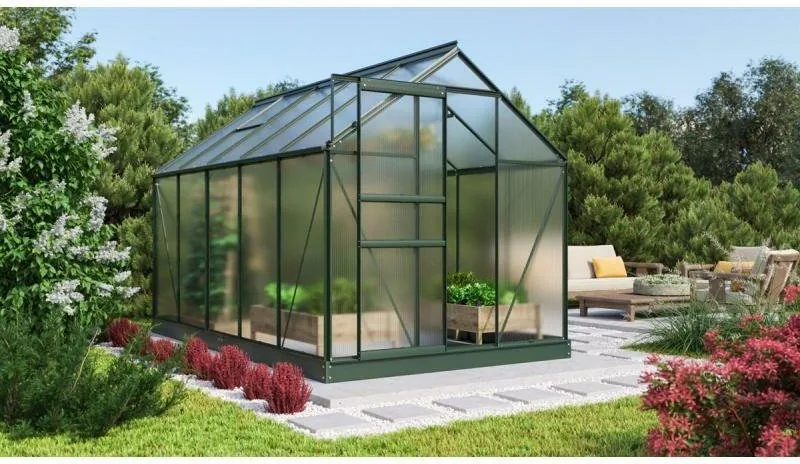
Vitavia Comet 6200 Manual
PDF manual · 48 Pages
English



Quick check
Incorrect answer, please try again.
Chat with your Vitavia Comet 6200 manual using AI
Get instant AI answers from your Vitavia Comet 6200 manual
Ask anything about the Vitavia Comet 6200. Answers come from this manual, with the pages they are based on.
Comet 6200 Maintenance Schedule
Thoroughly wash the greenhouse occasionally using a gentle or neutral detergent. Ensure the cleaner does not react aggressively with aluminium or glass fixing clips.
Ensure that the upper and lower door tracks are cleaned regularly to avoid a build-up of debris which can hinder door movement.
Regularly clear the roof of leaves and dirt to prevent blockages and maintain cleanliness.
Continuously check that the greenhouse is firmly anchored to the ground to ensure structural integrity against wind.
During heavy snowfall, regularly clear the roof or take suitable measures to support it so it can bear the weight of the snow.
In winter, remove the automatic window opener accessory and store it at temperatures above 0°C to prevent damage from frost.
Ask a Question
Do you recommend Comet 6200?
Yes NoFrequently Asked Questions
Select a sunny spot protected from strong winds as much as possible to ensure optimal growing conditions and structural stability.
Is this answer helpful?
It is highly recommended that two people work together during the construction process to manage large profiles safely and efficiently.
Is this answer helpful?
Essential tools include screwdrivers, socket spanners, and an adjustable drill with torque control capabilities to tighten bolts correctly.
Is this answer helpful?
Remove heavy snow accumulation from the roof quickly in winter to avoid structural collapse risks due to excessive weight.
Is this answer helpful?
Yes, the greenhouse must always be anchored firmly to prevent dangerous movement during sudden storm events or high winds.
Is this answer helpful?
Clean glass and frames with mild soap solutions periodically to remove dust and grime without damaging the material.
Is this answer helpful?
The greenhouse is tested to resist winds up to 75 kilometers per hour when doors and vents are kept fully closed.
Is this answer helpful?
Advantages and Disadvantages
Advantages

- Sturdy aluminum frame construction ensures long-term durability.
- UV resistant polycarbonate glazing protects plants from harsh rays.
- Automatic roof vent maintains healthy air circulation automatically.
- Sliding door design allows convenient access for all users.
- Suitable for year round planting and harvesting cycles.
Disadvantages

- Requires firm foundation anchor to prevent wind lifting risks.
- Assembly process needs two people for efficient handling.
- Roof panels require snow clearing in heavy winter storms.
- High wind speeds reduce stability if vents are left open.
- Sealing joints with silicone is optional and not included.
Product Specification
Glazing
Polycarbonate 0.16 in (Hollow Chamber Panels)
Frame
Aluminum
Color
Green
Area
66.74 sq ft
Special Features
Roof window, gutter, lockable
Door
Sliding door
Dimensions (LxWxH)
126.38x76.77x77.56 in
Weight
84.22 lbs
Product Description
Creating a Year Round Garden Space
Cultivating plants throughout the year requires a reliable shelter. Review the Vitavia Comet 6200 HKP 4mm Emerald Greenhouse Manual for specifications on this exceptional structure. Owners appreciate the sturdy aluminum frame combined with resilient polycarbonate panels. This combination ensures durability against changing weather conditions while allowing plenty of light for plant growth. The design prioritizes functionality and ease of access for gardeners looking to maximize their harvest potential annually.
Choosing the Right Location
Selecting an appropriate site is vital for structural integrity and plant health. Ideally, pick a sunny area shielded from strong winds as much as possible to optimize temperature retention. The foundation must be perfectly square and level before beginning assembly to ensure alignment. You may use a zinc coated steel base or pour your own concrete or stone foundation according to dimensions. Ensure the base extends below frost lines to keep the structure stable in winter months without shifting. Anchoring the unit properly prevents dangerous movement during sudden storm events.
Assembly and Safety Protocols
Construction involves connecting separate elements like side components and gable ends systematically. It is highly recommended that two people work together during the process to manage large profiles safely. Essential tools include screwdrivers, socket spanners, and an adjustable drill with torque control capabilities. Always wear protective glasses and gloves to handle metal profiles safely since edges can be sharp. Avoid forcing parts into place which could permanently damage the extruded aluminum material. Once assembled, tighten bolts carefully without exceeding the maximum torque rating specified in guides. Connect door rollers smoothly to ensure effortless opening and closing operations later.
Usage and Care Guidelines
Daily maintenance keeps the greenhouse in optimal condition for extended usability periods. Clean glass and frames with mild soap solutions periodically to remove dust and grime effectively. Check door tracks regularly to prevent debris buildup that hinders smooth movement of sliding panels. Winter management involves removing heavy snow accumulation from the roof quickly to avoid structural collapse risks. Close all doors and vents during high wind warnings to protect the delicate interior environment from damage. Heat the building during winter if you plan to store sensitive plants inside until spring arrives.
Final Recommendations
Safety labels should be placed inside the house after completion for future reference regarding hazards. Consider including the structure in your home insurance policy for added security against unforeseen accidents. Follow local building rules regarding positioning to stay compliant with regional zoning regulations immediately. Regular inspections ensure long term performance of the locking mechanisms and hinges located throughout the frame. Enjoy your thriving garden space with confidence knowing you followed proper construction guidelines thoroughly.
Search for 67,706 Manuals online


Type-in Brand or Model