
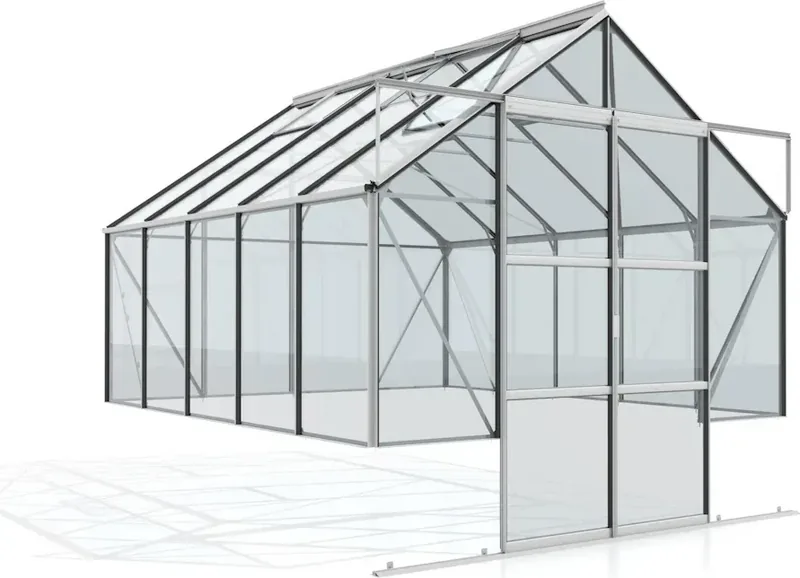


Vitavia Cassandra 8300 Manual
PDF manual · 37 Pages
English



Quick check
Incorrect answer, please try again.
Chat with your Vitavia Cassandra 8300 manual using AI
Get instant AI answers from your Vitavia Cassandra 8300 manual
Ask anything about the Vitavia Cassandra 8300. Answers come from this manual, with the pages they are based on.
Cassandra 8300 Maintenance Schedule
Thoroughly wash the greenhouse occasionally with a gentle detergent that does not react aggressively with aluminium or glass fixing clips.
Ensure that the upper and lower door tracks are cleaned regularly to avoid a build-up of debris. Lubricate with paraffin if needed.
Approximately 2 weeks after completion, check that all nuts are correctly tightened.
Ask a Question
Do you recommend Cassandra 8300?
Yes NoFrequently Asked Questions
Choose a sunny location sheltered from wind as much as possible. Ensure foundations extend below the frost level and allow room for door guide support at the front.
Is this answer helpful?
It is recommended that this greenhouse is assembled by two people to handle the profiles safely and avoid injury.
Is this answer helpful?
You will need screw drivers, socket spanner, knife, measuring stick, spirit level, and an Accu-drill with adjustable torque settings.
Is this answer helpful?
In the event of high winds, close all doors and vents. Ensure the structure is anchored firmly to the foundation.
Is this answer helpful?
Wash thoroughly with a gentle detergent occasionally. Ensure the detergent does not react aggressively with aluminium or the glass fixing clips.
Is this answer helpful?
Heating the building in winter is advised. Heat is not included in the kit but should be sourced for optimal winter growth.
Is this answer helpful?
Available models include 8300, 9900, and 11500 configurations allowing different capacity choices from start.
Is this answer helpful?
Advantages and Disadvantages
Advantages

- Robust aluminum frame resists rust effectively over many years of outdoor use.
- Double sliding doors provide wide access for large wheelbarrows and equipment moving.
- Roof vents allow excellent temperature regulation without electrical components required.
- Clear glass panes included maximize sunlight penetration for healthy plant growth.
- Modular design allows for potential expansion or replacement of individual sections easily.
Disadvantages

- Two people are required to assemble the structure safely and efficiently without risk.
- Heavy concrete wall foundation is recommended for stability in windy locations outdoors.
- Screws and plugs for anchoring to walls are not included in the standard package.
- Neutral silicone for sealing joints is not supplied so buyers must purchase separately.
- Sharp edges on glass and metal require protective gloves and careful handling during install.
Product Specification
Glazing
Safety glass 0.12 inches (Single pane)
Frame
Aluminum
Color
Silver
Area
89.34 sq ft
Features
4 Roof windows, Rain gutter
Door
Double sliding door
Dimensions (LxWxH)
101.18x127.17x98.03 inches
Weight
583.23 lbs
Product Description
Discover Your Ideal Gardening Sanctuary Today
Building a greenhouse is a significant investment for any plant enthusiast who wants to extend their growing season year round. The Vitavia Cassandra line provides a solution that balances cost effectiveness with professional grade durability. When you purchase this unit, accessing the Vitavia Cassandra 8300 ESG 3mm Greenhouse Aluminum Manual gives you the detailed roadmap needed for successful construction without guesswork involved. Every bolt and panel is engineered to fit precisely together ensuring structural integrity over long periods.
Superior Materials and Construction Quality
Aluminum profiles form the skeleton of this structure offering resistance against rust and corrosion typical of wooden alternatives. This material choice means lower maintenance costs annually while maintaining a sleek appearance suitable for modern gardens. The glazing utilizes three millimeter thick glass panels that transmit ample light while providing necessary impact protection from hail. Ventilation is managed via automatic roof windows capable of adjusting based on internal temperature readings. Sliding doors on the front allow convenient entry for gardeners carrying pots or watering cans.
Essential Setup and Safety Considerations
Site preparation requires a firm foundation that extends below the frost line to prevent shifting soil issues in winter climates. A stone wall base at least fifty centimeters high is suggested to keep the aluminum frame off damp ground effectively. Always wear protective eyewear and gloves when cutting seals or handling loose glass pieces carefully. Two adults are recommended for assembly to manage the weight of profiles safely on site. Tighten all nuts gradually to maximum torque specifications listed to avoid stripping threads. The different model sizes offer flexibility for varying garden dimensions while keeping the same core design principles consistent.
Long Term Care and Warranty Information
Regular maintenance involves washing frames with neutral soap solutions to remove debris accumulation on tracks. Ensure drainage channels remain clear so water flows freely away from the building structure completely. Inspect seals yearly for cracks that might let cold air enter during colder months unexpectedly. Contact local retailers for spare parts availability since the manufacturer encourages continuous improvement updates. Keep installation guides accessible in case you ever need to relocate components within the facility later. Protecting your investment through comprehensive home insurance policies is highly advised by experts. Snow loads on the roof must be cleared promptly to prevent structural failure risks during heavy winter precipitation events.
Conclusion
This greenhouse stands out as a reliable companion for serious horticulturists seeking quality and endurance. With proper setup following recommended guidelines, it serves as a productive environment for diverse crops regardless of outside weather fluctuations.
Search for 67,706 Manuals online


Type-in Brand or Model