
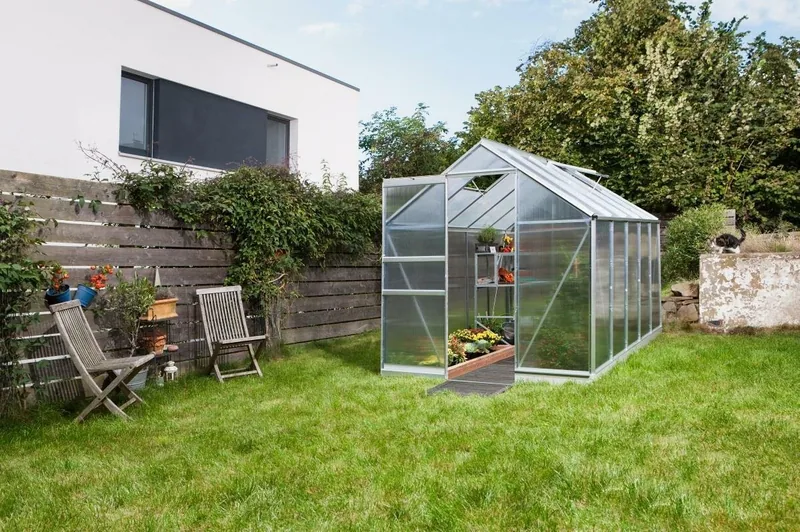


Vitavia Apollo 6200 Manual
PDF manual · 24 Pages
English



Quick check
Incorrect answer, please try again.
Chat with your Vitavia Apollo 6200 manual using AI
Get instant AI answers from your Vitavia Apollo 6200 manual
Ask anything about the Vitavia Apollo 6200. Answers come from this manual, with the pages they are based on.
Apollo 6200 Maintenance Schedule
Clean the upper and lower door tracks regularly to avoid debris buildup. In Danish version, also lubricate with paraffin/graftoil.
Wash the greenhouse thoroughly occasionally with a gentle detergent. Ensure the detergent does not react aggressively with aluminium or fixing clips.
Approximately 2 weeks after completion, check that all nuts are tightened correctly.
Free maintenance reminders
Timed to your purchase date. Always free, unsubscribe anytime.
Ask a Question
Do you recommend Apollo 6200?
Yes NoFrequently Asked Questions
It is designed for growing plants, starting seedlings, and protecting crops from weather changes. The aluminium frame, glazing, and venting help create a stable space for everyday gardening.
Is this answer helpful?
Yes. The structure should be installed on a square, level foundation. A steel base is included, and proper anchoring is strongly recommended for stability and safety.
Is this answer helpful?
Two people are recommended. The frame, glazing, and door sections are easier to align when one person supports parts while the other fastens them.
Is this answer helpful?
Yes, in versions that support it. The glazing method changes depending on panel thickness and material, so the matching glazing instructions should be followed carefully.
Is this answer helpful?
Common tools include screwdrivers, a 10 mm wrench or socket, a knife, measuring tape, spirit level, and an adjustable torque drill. A careful setup makes the job smoother.
Is this answer helpful?
Wash it occasionally with a mild detergent, clean the door tracks regularly, and avoid harsh cleaners that may damage aluminium or clips. Recheck fixings from time to time.
Is this answer helpful?
Close all doors and vents during strong wind. In heavy snowfall, clear the roof promptly or support it properly. Seasonal precautions help protect the structure.
Is this answer helpful?
Advantages and Disadvantages
Advantages

- Aluminium frame keeps the greenhouse lightweight, corrosion-resistant, and visually neat.
- 4 mm glazing supports efficient plant protection while remaining practical to install and maintain.
- Steel base and anchoring guidance help improve stability in exposed locations.
- Roof vent and sliding door support airflow and easier daily access.
- Clear assembly steps make the structure manageable with two people.
Disadvantages

- Assembly is detailed and time-consuming, especially for first-time greenhouse builders.
- The greenhouse must be carefully leveled and anchored, so groundwork is essential.
- Glass handling requires caution due to sharp edges and breakage risk.
- Fasteners must not be over-tightened, which adds precision to the build process.
- Extra care is needed in windy areas and heavy snowfall conditions.
Product Specification
Glazing
Polycarbonate 0.16 in (Twin-wall sheets)
Frame
Aluminum
Color
silver
Area
66.68 sq ft
Special features
2 Roof windows
Door
Sliding door
Dimensions (LxWxH)
127.24x76.77x53.54in
Weight
131.40 lb
Scope of delivery
Steel foundation
Product Description
Vitavia Apollo 6200 HKP 4mm Greenhouse Aluminium
The Vitavia Apollo 6200 HKP 4mm greenhouse aluminium is designed for gardeners who want a practical, durable growing space with a clean, modern look. Its aluminium frame keeps the structure light yet sturdy, while the 4 mm glazing helps create a protected environment for seedlings, herbs, and seasonal plants. If you are searching for the Vitavia Apollo 6200 HKP 4mm greenhouse aluminium Manual, the key takeaway is simple: this model rewards careful assembly, proper anchoring, and regular maintenance.
What makes this greenhouse appealing is its balanced design. The steel base adds stability, and the recommended foundation setup helps the structure sit square and level. That matters not only for safety, but also for the smooth movement of the sliding door and the correct fit of the roof vent. The layout is intended to improve everyday use, giving you access for watering, airing, and general plant care without making the greenhouse feel cramped.
The 4 mm glazing offers a useful middle ground for gardeners who want reliable weather protection without overcomplicating installation. Clear or frosted glass options, along with polycarbonate compatibility in some versions, give you flexibility depending on your growing needs and climate. The roof vent helps control airflow, which is especially valuable during warm periods when excess heat can build up quickly. A well-positioned vent and a secure door make it easier to manage temperature and humidity across the seasons.
Assembly is clearly structured, but it still benefits from patience. The instructions emphasize sorting parts carefully, using the right tools, and tightening fasteners only to the recommended torque. Two people are advised for the build, since aligning the frame, roof bars, and glazing is easier when handled together. Once finished, the greenhouse should be anchored securely and inspected again after the first weeks of use.
Overall, this model suits gardeners who want a dependable greenhouse with thoughtful engineering and a timeless aluminium finish. It is not just about looks; it is about creating a stable, efficient growing area that supports healthy plant growth throughout the year.
Notes
- Place it in a sunny, sheltered location for the best results.
- Keep the door tracks and vents clean for smooth operation.
- Close openings in strong wind and clear snow from the roof when needed.
- Recheck fixings after assembly and during the season.
Search for 67,706 Manuals online


Type-in Brand or Model