Manual.ly Logo

Silva Free 1200 Manual

0.0 · 0 Ratings

PDF manual · 3 Pages

English

M: QW-35-FL
page

/ 3

Loading...
d8b52f11eb4009c2b7ee0f636b50f568dc4e page 1
PRODUCT OVERVIEW
ONE LAMP FOR ALL YOUR ACTIVITIES
Silva Free is a lamp series with the possibility to create your ideal lamp according to your
needs and your dierent activities. The series range includes 3 dierent lamp units, 4 batter-
ies and several mount accessories. All parts are interchangeable, so you don’t need to buy a
new lamp for your dierent activities.
FREE TECHNOLOGY: LESS HASSLE - MORE COMFORT
Silva Free has the power cord integrated in the headband. You never need to bother with
distracting cords ever again. Feeling free is now a more comfortable experience.
AIRFLOW TECHNOLOGY: LESS HEAT - MORE LIGHT
Cooling is essential for how well the lamp performs. The Free Airflow technology is designed
together with experts within thermodynamics. The result is an optimized aluminum cooler
together with a protective plastic case that provides maximum ventilation and cooling, even
when standing still. This gives you great light regardless of the activity, even if the airflow or
cooling conditions are not optimal.
MODULAR TECHNOLOGY: LESS COMPLEXITY – MORE FLEXIBILITY
All parts and accessories are interchangeable which means that you can complement or
upgrade your lamp with a dierent battery, lamp unit or mount kit. The lamp unit and battery
can easily be disconnected from the headband to instead be mounted on your helmet, your
bike bar or frame.
BEFORE USE
CHARGE THE BATTERY
The battery needs to be charged before first use.
1. Remove the protective film from the battery connector before charging it the first time.
2. Disconnect the battery from any accessory (headband, extension cable, lamp unit).
3. Connect the battery to a USB-port (either from a computer, car or a USB charger/adapter)
using the included USB-charge cable.
4. Connect the charger to the wall outlet.
5. On the battery, there are 5 LEDs showing battery status during charging:
• Green light (all 5 LEDs) = battery is fully charged
• Red light blinking = battery is charging
Approximated charge time (depending on input source): See Technical specifications.
Note! When the battery is fully charged the charger automatically switches to maintenance mode.
Note! Never leave a battery unattended during charging.
Note! The battery can not be charged while connected to the accessories.
ADJUST THE HEADBAND
The headband is ergonomically shaped to give
comfortable fit. Use the 2 buckle adjustments to fit it
perfectly to your head. Adjustment is easiest when not
wearing the headband on the head. To tighten: Pull the
headband through the buckles following step 1,2,3 in the
illustration. To loosen: follow the steps in reverse order.
ATTACH THE LAMP UNIT
Align the white arrow on the lamp with the white arrow
on the headband front bracket. Attach the lamp unit by sliding the connector part into the
snap-in socket of the headband. To detach - slide the lamp unit up and out of the socket.
ATTACH THE BATTERY
Make sure to remove the protective film from the battery connector.
Align the white arrow on the battery with the white arrow on headband rear bracket. Slide
the battery connector socket onto the connector of the headband bracket. To detach - slide
the battery up and o the connector.
Note! Read more under "Accessories and mount options" about alternative ways to mount
the lamp and battery .
Note! Do not leave connected while not in use.
ACCESSORIES AND MOUNT OPTIONS
Free is designed for multiple activities and can easily be switched between the dierent
mount accessories. The battery can also be carried in multiple ways by using the dierent
battery accessories and cables. The included accessories vary between the dierent Free
model kits. All accessories can be bought separately.
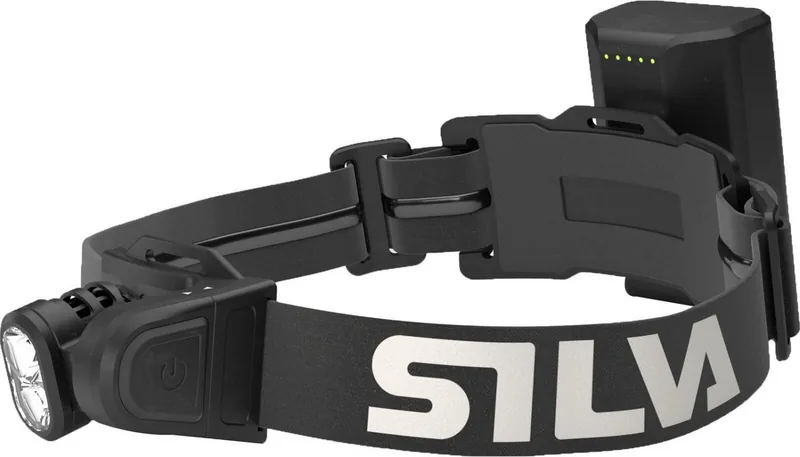
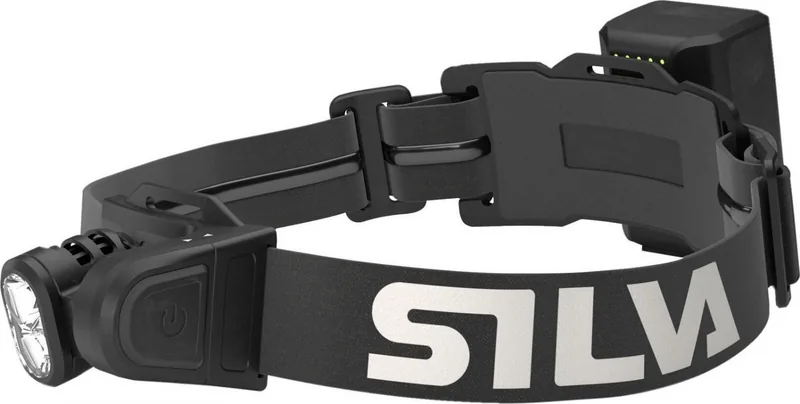
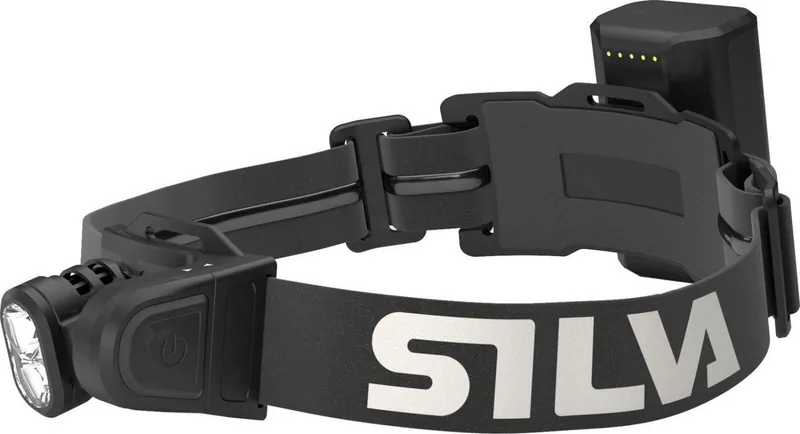
HEADBAND
The Free Headband has the power cord integrated in the textile for a smoother experi-
ence without distracting cords or tangled wires. The headband has silicone on the inside to
prevent it from slipping. The double sided adjustment allows for a perfect fit and the foam
padding on the front and back plate ensures good comfort. The headband is developed to be
ergonomic and comfortable to wear even with a larger battery at the back of your head. The
front and back connection interface is compatible all lamp units/batteries in the Free series.
A rear safety light is integrated in the back of the headband. Read more about how to oper-
ate the light under "Rear safety light".
TOP BAND
When having a medium or bigger sized battery attached to the rear bracket of the headband,
or when wearing a beanie or if you need extra support during fast paced activities - the top
band can be attached to the headband for extra stability.
EXTENSION CABLES 130/40 cm
The Free Extension cable is made from textile and is flat, soft and flexible. It gives you extra
cable length - allowing you to place the battery where you want it. By carrying the battery in
your pocket - you keep the weight on your head to a minimum but also increase the battery
time by keeping the battery warm.
The extension cable transmits power from the
battery but also works as a link for attaching the
lamp and battery to the dierent accessories.
Please note that the cable has a female side that
fits the lamp units and a male side that fits the
batteries. Align the white arrows on each part to
connect. The extension cable also has a second-
ary interface that snaps into all the accessories.
The cables are available in two adjustable lengths; 50-130 cm and 22-40 cm.
Compatible with all lamp units, batteries and accessories in the Free series.
BAR MOUNT
The bar mount is designed to fit bars with a diameter of 31.8-35 mm. Attach the bar mount by
placing it around the bar, screw the lever until it has the right tension and then snap the lever
into position (no tools needed). The bar mount can be used either with or without the rubber
inserts to better adapt to the specific bar diameter. Once the bar mount is attached to the
bar - slide the female connector of the extension cable into the bar mount, pull the cable
through the cable guide clip on the back of the bar mount and then snap the lamp into the
socket of the extension cable. To release the extension cable from the bar mount - use the
lever on the side of the bar mount.
The bar mount is compatible with all lamp units in the Free series.
Note! Learn about "Deactivated Flow Light" below to get the most out of the lamp when
using the bar mount.
FRAME MOUNT
The battery sleeve lets you mount the battery to your bike frame or wherever you find suit-
able. It can be attached in various ways to fit most frames and configurations. The sleeve is
made of neoprene and it has silicone friction prints on the inside to stay in place.
1. Connect the battery to the extension cable before placing the battery in the frame mount.
2. Wrap the 2 small elastic straps around the battery.
3. Wrap the large strap of the frame mount around battery and the frame. Tighten the strap
and make sure that it is locked into place with the Velcro closing.
The frame mount is compatible with all batteries in the Free series.
HELMET MOUNT KIT
Use the Free helmet mount kit to mount your Free lamp unit and battery onto your helmet.
The kit includes:
• 1 x helmet bracket for the lamp unit (with male Velcro)
• 1 x helmet bracket for the battery (with male Velcro)
• 2 x adhesive pad (with female Velcro)
• 1 x extension cable (40 cm)
The helmet mount is soft and flexible and adapts to most helmet types.
The following procedure applies to both the lamp bracket (placed in the front of the helmet)
and the battery bracket (placed in the back of the helmet).
1. Make sure that the Velcro part of the bracket is attached to the Velcro part of the adhe-
sive pad.
2. Make sure that the surface of the helmet is clean and dry.
3. Remove the protective film from the adhesive pad and firmly press the bracket in correct
position onto the helmet. For optimal eect - you should leave the attachment in this
state for at least 24 hours before using it.
Once the brackets are in place, the extension cable is slided into each of the brackets. Then
the lamp unit/battery can be slided in and out of the snap socket of the extension cable with
just a click. To release the extension cable from the bracket, use the small lever on the side.
The helmet mount kit is compatible with all lamp units and batteries in the Free series.
GoPro MOUNT KIT
Use the Free GoPro mount kit to mount your Free lamp unit onto a standard GoPro interface
and to mount your battery onto your helmet.
The kit includes:
• 1 x GoPro adapter for the lamp unit
• 1 x helmet bracket for the battery (with male Velcro)
• 1 x adhesive pad (with female Velcro)
• 1 x extension cable (40 cm)
The adapter makes the interface of the Free series fit into the interface of a GoPro mount.
The helmet mount is flexible and adapts to most helmet types.
1. Snap the GoPro adapter into a standard GoPro interface.
2. Once the adapter is in place - slide the female connector of the extension cable into the
adapter.
3. Now the lamp unit can be slided in and out of the snap socket of the extension cable with
just a click.
4. To release the extension cable from the adapter - use the small lever on the side.
For mounting the helmet bracket for the battery: read more under "Helmet mount kit".
Compatible with all lamp units/batteries in the Free series and standard GoPro camera
mounts.
MANUAL
FREE SERIES

Chat with your Silva Free 1200 manual using AI

Get instant AI answers from your Silva Free 1200 manual

Ask anything about the Silva Free 1200. Answers come from this manual, with the pages they are based on.

Free 1200 Maintenance Schedule

Regularly
Clean the lamp with a damp cloth

Clean the lamp regularly to ensure maximum performance. Make sure there is no dirt in the heat sink or on the front glass.

Regularly
Rinse textile details in warm water

Textile details such as the headband can be rinsed in warm water for cleaning.

M: qwen/qwen3.8-flash

Ask a Question

0/1000

Do you recommend Free 1200?

Yes No

Frequently Asked Questions

A

Remove film from connector. Disconnect from accessories. Connect USB cable to port and outlet. Charge until all five green LEDs indicate full status.

Is this answer helpful?

A

Tilt lamp down for wide beam slow movement. Tilt up for long reach fast movement. Deactivate for fixed distribution on helmets or bars.

Is this answer helpful?

A

Yes. Use the bar mount or extension cable to attach lamp to handlebars securely. Ensure rubber inserts fit bar diameter properly.

Is this answer helpful?

A

Varies by battery size. Options range from 4 hours to 12 hours depending on wattage and usage settings selected.

Is this answer helpful?

A

Flash once warning then enter reserve mode at 80 lumens providing approx one hour remaining runtime automatically.

Is this answer helpful?

A

Yes. Rated IPX5 water resistance allows operation in rain and wet conditions safely without damage to electronics.

Is this answer helpful?

A

Yes. Covered for two years against material defects. Proof of purchase required for service claims processed at original store.

Is this answer helpful?

M: QW-35-FL

Advantages and Disadvantages

Advantages

  • Integrated power cord eliminates distracting wires for a cleaner experience.
  • Modular design allows swapping units, batteries, and mounts for any activity.
  • Airflow technology optimizes cooling to maintain high brightness levels continuously.
  • Rear safety light integrated in headband increases visibility during night runs.
  • Compatible with extension cables to minimize weight on head during long treks.
VS

Disadvantages

  • Lamp body gets very hot during operation requiring careful handling of the lens.
  • Cooling issues may cause automatic dimming if used stationary indoors in heat.
  • Battery cannot be charged while connected to accessories limiting convenience.
  • Protective film removal required on both battery connector and lens before use.
  • High initial cost compared to basic non-modular headlamp systems available.
M: QW-35-FL

Product Specification

Type

Headlamp

Colors

black, white

Light Source

5x LED

Max Light Output

1,200 lm

Min Light Output

80 lm

Throw Distance

492.13 ft

Light Modes

3

Features

water-resistant (IPX5), rechargeable, USB-C

M: QW-35-FL

Product Description

Experience Freedom with the Silva Free 1200 Headlamp

Unmatched Versatility

The Silva Free 1200 Headlamp represents a leap forward in outdoor lighting technology designed for adaptability. This series allows users to configure their ideal lamp according to specific needs and activities. All parts are interchangeable, eliminating the necessity to purchase separate lamps for different adventures. Whether you are hiking, biking, or running, the system adapts to your requirements seamlessly. The range includes various lamp units and batteries to suit specific distances.

Advanced Cooling Technology

Performance relies heavily on thermal management. The Free Airflow technology features an optimized aluminum cooler paired with a protective plastic case. This combination maximizes ventilation and cooling, even when standing still. Consequently, users receive great light regardless of activity level or airflow conditions. The electronics reside in the lamp arm to allow space for the cooler. A plastic mesh cover ensures comfortable touch without feeling the internal heat. Heat dissipation keeps LEDs running at higher lumen levels for longer durations.

Modular and Cord-Free Design

Freedom from cables enhances comfort significantly. Silva Free integrates the power cord directly into the headband textile. There are never any distracting cords or tangled wires to manage. The headband fits ergonomically with silicone inside to prevent slipping. Double sided adjustment and foam padding ensure a perfect fit even with larger batteries attached at the back. Users can switch mounts quickly between head, helmet, bike bar, or frame systems.

Comprehensive Guidelines

To optimize performance, users should follow setup instructions typically found in the Silva Free 1200 Headlamp Manual resources. Charging the battery before first use is critical. Removing the protective film from connectors ensures electrical integrity. The system supports multiple mount options including helmet kits, bar mounts, and frame sleeves. Each accessory connects via standardized interfaces compatible across the entire Free series range. Always disconnect the battery when storing the lamp in closed compartments to prevent fire risks.

Intelligent Lighting Control

Intelligent Light combines spot and flood beams for balance. Some models feature Flow Light for seamless tuning. Tilting the lamp adjusts the beam pattern dynamically unless deactivated. A rear safety light adds visibility from behind. Temperature sensors prevent overheating by reducing power if necessary. Low battery warnings alert users well before total depletion occurs. Power reserve mode kicks in automatically after a single flash notification.

Storage and Maintenance

Lithium-ion batteries require proper care to maintain capacity. Store in dry environments within specified temperature ranges. Do not leave connected while not in use to conserve energy. Clean regularly with a damp cloth ensuring no dirt enters the heat sink. Textile details can be rinsed in warm water. Adhere to these practices to extend the lifespan of your investment effectively.

Final Thoughts

This headlamp system offers high lumen output with robust durability. Water resistance meets IPX5 standards suitable for varied weather. The modular approach encourages upgrading components rather than buying new units. Overall, it delivers reliable illumination for serious outdoor enthusiasts seeking flexibility and safety. Two year warranty coverage applies for defects under normal use conditions.

M: QW-35-FL

© Copyright 2026 Manual.ly