Manual.ly Logo

Shuttle XPC all-in-one X50V8 / X50V8U3 Manual

0.0 · 0 Ratings

PDF manual · 2 Pages

English

M: QW-35-FL
page

/ 2

Loading...
9abca16f5a028cd84e7db604cbbe1e112c6d page 1
Incorrectly replacing the battery may damage this computer. Replace only with the same or equivalent as recommended by Shuttle. Dispose of used batteries according to the manufacturer’s instructions.
󲤤󲘋󵤫󲺐󲟩󲄿󵕟󴳔󱘟󴌭󲤳󲘽󱬎󲥜󵤫󴎖󱄕󱗺󲅅󳢬󳐶󳋨󰆍󳊛󳊭󲑆󱎦󱄆󱖡󵣚󰆎󱋵󴌭󱇍󳢴󲄪󴶠󱄕󳤨󱘼󲑆󱘼󳵹󳢴󵤫󲺐󲤤󲘋󰆎󴳻󱇍󳎗󴬭󵉐󱝶󳢴󱆯󳝘󴳚󲠾󴢅󳘶󲄒󵤫󲺐󰆎
Das unkorrekte Austauschen der Batterie kann diesen Computer beschädigen. Ersetzen Sie die Batterie nur durch den von Shuttle empfohlenen Typ oder ein gleichwertiges Modell. Entsorgen Sie gebrauchte Batterien gemäß den Herstellerangaben.
Ne pas replacer correctement la pile peut endommager l'ordinateur. Remplacez-la uniquement par un modèle identique ou un équivalent comme recommandé par Shuttle. Débarrassez-vous des piles usagées d’après les instructions du constructeur.
La sustitución incorrecta de la batería puede dañar este equipo. Sustituya la batería únicamente por una igual o equivalente recomendada por Shuttle. Deseche las baterías usadas según las instrucciones del fabricante.
󰉎󰉁󰉄󰉨󰈖󵟃󵊅󰇧󰇪󰈹󰉁󰉆󰇝󰈏󰇬󰆍󰇗󰇲󰈱󰉱󰉒󰉣󰉺󰈽󰇐󲘽󱋧󰇝󰈏󱗏󱤐󰇬󰇮󰈎󰈂󰇝󰆎󱃔󲘋󰇝󰈏󵣋󰇳󰆍󰇐󲗘󱮘󰇝󰈏󰉎󰉁󰉄󰉨󰇬󱘼󰇜󰈆󰇲󰈂󰇣󰇳󱘼󳵹󰇲󰈆󰇲󰇤󰇕󰈖󱆯󳝘󰇝󰈏󰈌󰇊󰇯󰇛󰇪󰇓󰇤󰇙󰇈󰆎󱆯󳝘󳀸󰈃󰉎󰉁󰉄󰉨󰇳󰆍󰉟󰉺󰈩󰉺󰇲󲔷󳭪󰇯󲇃󰇧󰇪󱐖󱐶󰇛󰇪󰇓󰇤󰇙󰇈󰆎


󲤤󲖒󳝥󲺐󲟩󲄿󵝉󴸟󱘟󴌭󱅊󲖏󱥿󲥜󳝥󴍁󰆎󱃵󴌭󱇍󳢴󲄪󴷞󱄕󳤨󱘼󲑆󱘼󳵹󳢴󳝥󲺐󲤤󲖒󰆎󴸧󱇍󳎗󱑦󵉐󱝶󳢴󱆯󳝘󴸤󲠾󱬴󳘶󲃏󳝥󲺐󰆎
!
This device complies with Part 15 of the FCC Rules. Operation is subject to the following two conditions: (1) this device may not cause

This device meets the requirements for the EU conformity in accordance to the currently valid EU directives.
Dieses Produkt erfüllt die Anforderungen für die EU-Konformität entsprechend der aktuell geltenden EU-Richtlinien.
Ce produit répond aux exigences de la conformité UE suivant les directives européennes actuellement en vigueur.
󶾄󶼸󶢢󳝒󱛱󲥜󵴄󰆍󶽁󲠾󲤨󶘓󶚗󶗶󶻃󲱉󳭪󱆯󳝘󷀫󶝲󶟆󱋧󶛬󶻰󱓋󰆎
󲼘󶟞󱂻󵨵󶢢󳝒󱛱󶽁󲠾󶽁󶘓󶚗󶗶󶻃󲱉󳭪󱆯󳝘󱐶󷃐󶽋󱅁󲊟󱐶󷃐󰆎󶥯󱄕󱀻󶝥󱎂󱀽󳤻󴧒󶝟󱎙󶥯󱄕󱀺󶦁󶈶󳤻󴧒󶝟󱀽󴮱󴾵󷀫󱸿󲡲󰆎
󲼘󶟞 󱃵󷀆󳝘󱂾󱥘󷄵󳌝󲁖󲹄󱉉󲦑󱄦󱀻󶛙󶇰󱆯󳝘󱥘󳌝󲁖󲹄󱉉󲦑󱄦󱀻󱆯󳝘󲠦󱘟󶳬󲤹󶛙󶇰󵣀󲋓󰆎
󲼘󶟞 󶖼󴷨󱃗󱛱󱆯󳝘󳢴󶣟󷆫󳗟󶚃󳁙󶝲󱁪󰆎

󳝒󱛱󶛥󱙺󶣟󱭗󷀼󳝘󶪫󶚃󳃛󶝲󳋪󰆎
󲼘󶟞 󱃵󷀆󳝘󱂾󶦵󲔄󱄕󱀻󶛙󶇰󱆯󳝘󱥘󶦵󲔄󱄕󱀺󱆯󳝘󲠦󱘟󶳬󲤹󶛙󶇰󵣀󲋓󰆎

󵤫󳃀󰈯󰉺󰉔󰉩󳵹󰆍󰇝󰇽󰇪󰇲󱄈󱺎󱛱󰇳󲥜󶥍󱄕󶚗󰇫󰇳󰇘󱆯󳝘󰇯󰇮󰈐󰈂󰇟󰈗󰆎
2000m
Placing on a desk
A. Begin Installation

󲈛󷀗󶛙󶻃󲔷󱖇󰆌󰆌󰆌󰆌󰈭󰈢󰉁󰈭󰈪󰈢󰉇󰆌

󰆌󲈛󷀗󶛙󶻃󲔷󱖇
󳝒󱛱󶚗󶻵󶻍󱛱󶤮󴮱󱃗󱛱󶚗󴯲
Hardware Installation
󳪜󵴄󶛙󶻃󰉍󰉺󰉇󰈤󰈥󰈠󰇲󰈢󰉱󰈷󰉆󰉺󰉩󳪜󱄦󶛙󴫵
L
The product’s colour and specifications may vary from the actually shipping product.
1. Locate the SO-DIMM slots on the motherboard.
 Align the notch of the memory module with the one of the relevant memory slot.


until it snaps into the locking mechanism
and put the mylar back in place.
5. Repeat the above steps to install an

Notch
Cutout
SO-DIMM slot

angle
a
b
Latch Latch
!
How to use the Touch Panel
Cleaning the screen
Follow these guidelines for cleaning the outside and handling the screen of the computer:

damp to gently wipe the screen surface. Do not spray liquids directly onto the device.
!

󲤤󱭊󲥜󳝒󱛱󴻷󶻽󶽋󴛎󴐘󰦗



󲥜󶻍󱛱󰇲󶼩󶰌󰇮󲋵󶙷󰇯󰇨󰇈󰇪󰇳󰆍󲵑󰇲󰈌󰈎󶭉󶼲󵨲󰇕󰈂󰇝󰆎

󲤤󱭊󲥜󱃗󱛱󶖆󲊟󴸧󴷯󵠞󰦗

Safety Information
󶛙󶇰󴻷󶻽󶛙󶇰󰇯󵟒󰇝󰈏󲋵󶙷󶛙󶇰󶖆󲊟

C. HDD or SSD Installation
Experience the ease of managing your digital life with a few touches by using the stylus.

󰉹
󰉹
1








Unscrew four screws of the stand mount and remove the stand.

Please refer to the user guide of the wall/arm mount kit
you bought separately to install it.
75 x 75mm


wall/arm bracket.
!
Touch
Hold OK

on-screen calibration.



to continue.
E

Touch and hold the center of the target.
Repeat on four corners and the screen will adjust
automatically.










11. Kensington
®
Lock Hole







HDMI



DC-IN


02
04
03
05
07
13
14
07
06
09
08
12
10
11
15
16
17
181521 19202223
01

four screws of the stand mount and remove the stand.

E. Complete

with the screw.
1.


B. Memory Module Installation



b
Serial ATA and power cable
a
1. Unscrew four screws of the bracket and
remove it.

with four screws.
c
d

a
b
Powering on the system

1. Replace the back cover. Refasten the stand
and the back cover with eight screws.

b

d

f
c
a
e
d

b

a
c
e
a
b
Slope angle

!


effectively reduce its temperature.
!
Thermal Pad

Chat with your Shuttle XPC all-in-one X50V8 / X50V8U3 manual using AI

Get instant AI answers from your Shuttle XPC all-in-one X50V8 / X50V8U3 manual

Ask anything about the Shuttle XPC all-in-one X50V8 / X50V8U3. Answers come from this manual, with the pages they are based on.

Ask a Question

0/1000

Do you recommend XPC all-in-one X50V8 / X50V8U3?

Yes No

Frequently Asked Questions

A

Yes, the X50V8 supports SO-DIMM memory upgrades. You can access the slots by removing the back cover and inserting modules at a forty-five-degree angle.

Is this answer helpful?

A

Yes, it supports standard VESA mounts of 75x75mm or 100x100mm. However, you will need to purchase a separate wall or arm mount kit.

Is this answer helpful?

A

Use a soft, lint-free cloth slightly dampened with water. Do not spray liquid directly onto the screen or use harsh chemicals.

Is this answer helpful?

A

It supports both traditional SATA HDDs and fast M.2 SSDs, allowing for flexible storage configurations based on your needs.

Is this answer helpful?

A

Yes, but you must use the same or equivalent battery type recommended by Shuttle to prevent damage to the computer.

Is this answer helpful?

M: QW-35-FL

Advantages and Disadvantages

Advantages

  • Highly upgradable with easy access to memory and storage slots
  • Supports VESA mounting for flexible placement options
  • Comprehensive connectivity including USB 3.2 and HDMI
  • Touchscreen interface enhances user interaction
  • Compact design saves desk space while delivering power
VS

Disadvantages

  • Wall mount kit must be purchased separately
  • Battery replacement requires careful handling to avoid damage
  • Screen cleaning requires specific non-abrasive cloths
  • Stand adjustment angles may be limited for some users
  • Color variations may occur between production batches
M: QW-35-FL

Product Specification

Wireless

Wi-Fi 5 (WLAN 802.11a/b/g/n/ac, 1x1, Realtek RTL8821CE), Bluetooth 5.0

Note

serial/parallel only with adapter (Shuttle PCL71)!

M: QW-35-FL

Product Description

Shuttle XPC all-in-one X50V8 / X50V8U3 Review

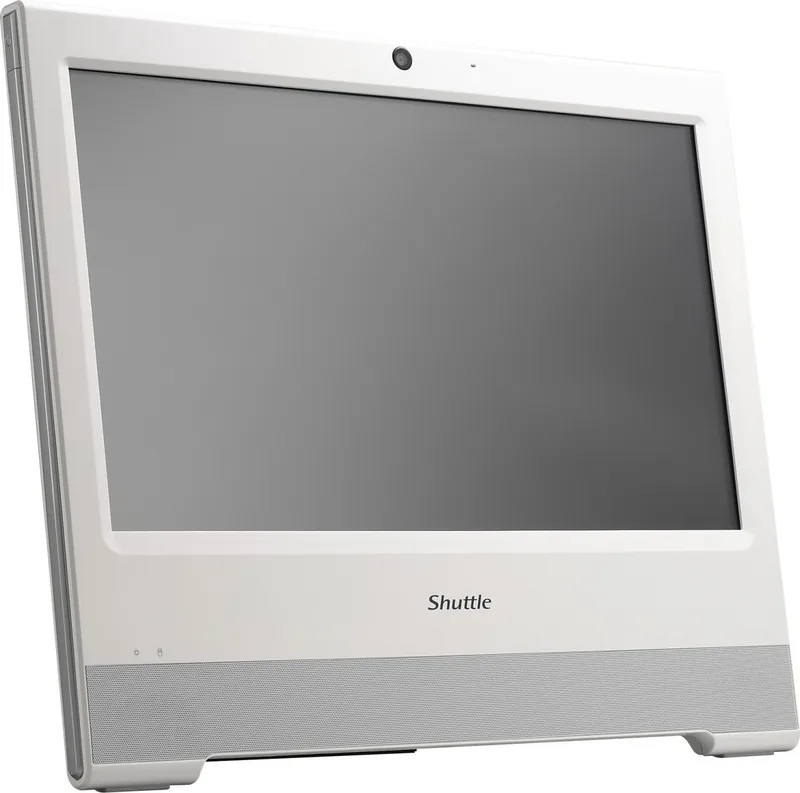
The Shuttle XPC all-in-one X50V8 and X50V8U3 represent a powerful solution for users seeking high performance in a compact footprint. This versatile device combines the functionality of a desktop computer with the sleek design of an all-in-one system, making it ideal for home offices, creative studios, and professional environments. The unit features a large display that supports touch interaction, allowing for intuitive control via finger or stylus input.

One of the standout capabilities of the X50V8 series is its upgradability. Unlike many modern all-in-ones that are sealed shut, this model allows users to easily access internal components. You can install additional SO-DIMM memory modules by simply removing the back cover and sliding new sticks into the available slots at a forty-five-degree angle. Storage upgrades are equally straightforward, supporting both traditional HDDs and modern M.2 SSDs. The M.2 slot is designed to accept drives securely within a dedicated bracket, ensuring stability and optimal thermal performance.

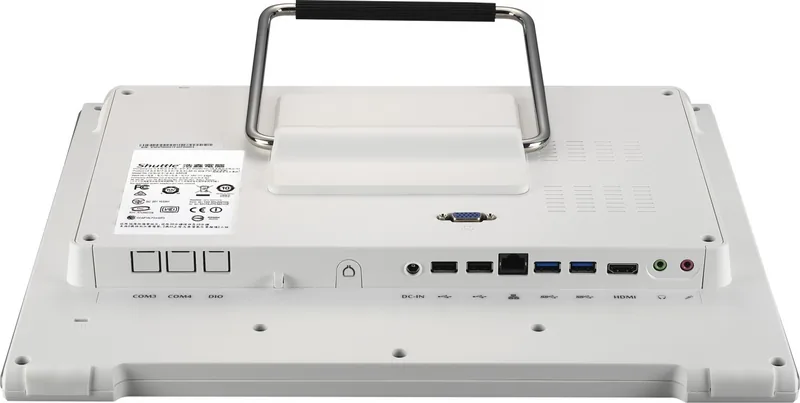
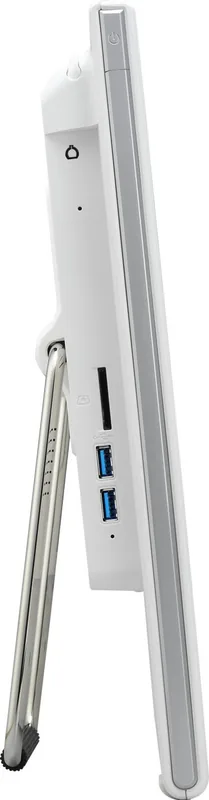
Connectivity is robust, featuring a comprehensive array of ports including USB 3.2 Gen 1, USB 2.0, HDMI output, and a LAN port for reliable networking. For audio needs, there are dedicated headphone and microphone jacks. The system also includes an integrated webcam and stereo speakers, providing a complete multimedia experience out of the box. Security is not overlooked, with a Kensington lock hole available to prevent theft in public spaces.

Installation and maintenance are user-friendly processes. The device comes with a stand that can be adjusted to various angles, but it also supports VESA mounting standards (75x75mm or 100x100mm) for wall or arm mounting if space is limited. Users should ensure the power cord is disconnected before opening the chassis to replace batteries or install hardware. Proper cleaning of the touchscreen involves using a soft, lint-free cloth slightly dampened with water, avoiding direct spraying of liquids on the screen.

Important Notes

  • Always disconnect power before installing or replacing internal components.
  • Use only Shuttle-recommended battery types to avoid damage.
  • The product color and specifications may vary from images shown.
  • Wall mount kits are sold separately and require specific installation guides.
  • Touchscreen calibration can be performed via the included CD-ROM or on-screen tools.
M: QW-35-FL

© Copyright 2026 Manual.ly
