
Shutter Precision PD-8X Manual
PDF manual · 4 Pages
English


Quick check
Incorrect answer, please try again.
Chat with your Shutter Precision PD-8X manual using AI
Get instant AI answers from your Shutter Precision PD-8X manual
Ask anything about the Shutter Precision PD-8X. Answers come from this manual, with the pages they are based on.
Ask a Question
Do you recommend PD-8X?
Yes NoFrequently Asked Questions
Typical components include the dynamo front wheel with 32-hole hub, quick-release skewer, connector cap, and connector cover. Additional small parts like springs and nuts for the quick-release assembly are usually included.
Is this answer helpful?
The connector terminal is positioned on the right (drive) side of the bike. For easier cable access, orient the terminal upward before tightening the quick release; if you must rotate it, open the quick release first to avoid stressing the terminal.
Is this answer helpful?
Strip approximately 14 mm of insulation from each conductor, insert each wire through the two holes in the connector cap, bend and seat the wires into the grooves so they do not touch, fit the cap into the connector cover, then press the assembly fully into the hub terminal until secure.
Is this answer helpful?
Recommended conductor (stranded) diameter is at least 0.8 mm, with insulation outer diameter near 1.8–2.0 mm. These sizes help ensure solid mechanical and electrical contact inside the connector.
Is this answer helpful?
Do not rotate the connector terminal while the quick release is closed. Open the quick release first, remove the connector cover if needed, then reposition the terminal to avoid damaging the connector or hub.
Is this answer helpful?
Keep wiring neatly routed along the fork, use the connector cover to secure the lead, and ensure the cable is fastened away from the rotating spokes and rim to prevent entanglement or wear.
Is this answer helpful?
Yes. Its durable construction, protected connector, and balanced 32-hole build make it well suited for commuting and touring where dependable, maintenance-light power for lights and small electronics is valuable.
Is this answer helpful?
Advantages and Disadvantages
Advantages

- Reliable passive power generation for lights without batteries or charging.
- Quick-release compatible design for easy installation and wheel removal.
- Protected connector cover reduces exposure to moisture and dirt.
- 32-hole spoke pattern balances strength for commuting and touring.
- Clear rotation direction marking prevents incorrect installation.
Disadvantages

- Requires basic wiring skills to strip, seat, and secure connector leads.
- Connector orientation must be set before tightening quick release.
- Not plug-and-play with incompatible light connectors without modification.
- Adds slight weight and rolling resistance compared with non-dynamo hubs.
- Connector and wiring need careful routing to avoid contact with the wheel.
Product Specification
Type
Hub dynamo
Power
6V, 3W
Front installation dimension
0.59x3.94 QR
Brake type
Disc brake (6-hole)
Number of spokes
32 front
Weight
1.03 lb
Product Description
Shutter Precision PD-8X 32-hole hub dynamo Manual
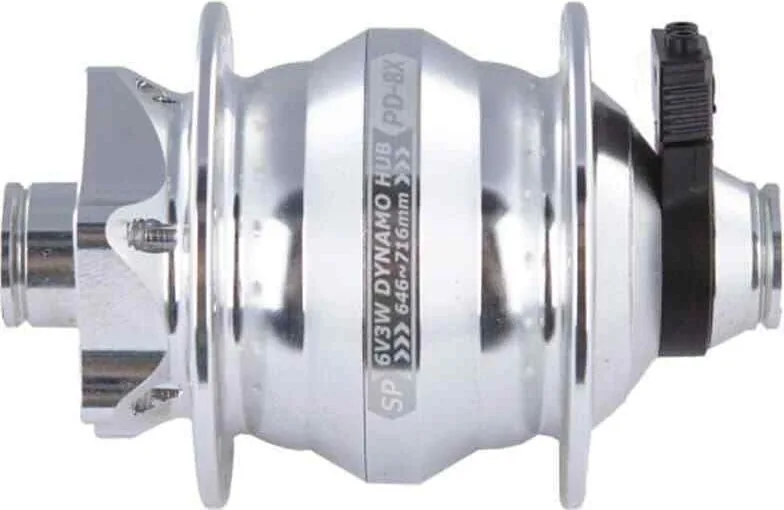
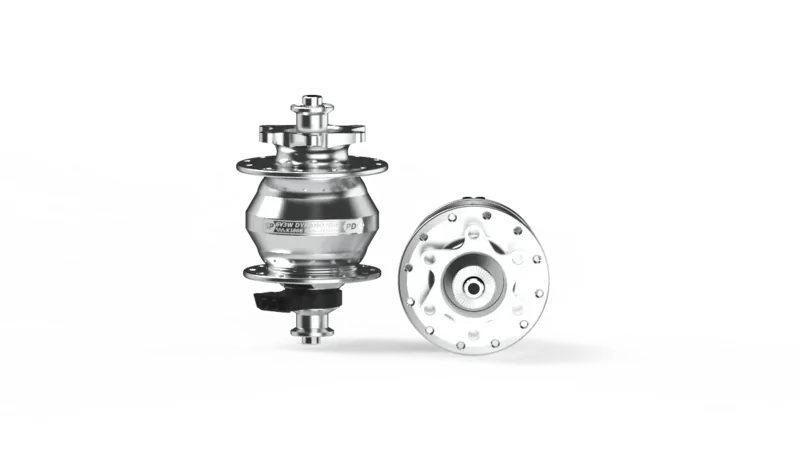
The Shutter Precision PD-8X 32-hole hub dynamo is a robust front-hub electrical generator designed for reliable bicycle lighting and low-maintenance power delivery. Engineered for quick-release front wheels, the PD-8X integrates cleanly with modern bikes, offering a durable hub shell, clear rotation-direction marking, and a protected connector system that keeps wiring tidy and secure. Its 32-hole spoke pattern balances strength and weight for everyday commuting, touring, and long-distance riding.
Installation is straightforward for riders familiar with quick-release front wheels. The hub is designed so the dynamo connection terminal sits on the right (drive) side when the bicycle moves forward. For easier cable routing and connector insertion, orient the terminal upward before tightening the quick release. If you need to rotate the terminal for neat cable management, open the quick-release first to avoid stressing the terminal or connector. The package typically includes the dynamo wheel, front quick release skewer, connector cap, and connector cover.
Wiring and connector assembly are practical but precise. Strip approximately 14 mm of insulation from the two cable leads, feed each conductor through the dedicated holes in the connector cap, and seat them into the grooves so the wires do not touch. Once properly placed, fit the connector cap into the connector cover and press it fully into the hub terminal until secure. Suggested cable dimensions help ensure reliable contact: stranded conductor diameter at least 0.8 mm, with overall insulation around 1.8–2.0 mm. Tidying cables along the fork and ensuring the wiring cannot contact the rotating wheel are important safety steps.
The PD-8X’s mechanical details help longevity: a clear rotation arrow on the hub shell ensures correct orientation; the quick-release-compatible axle and spiral spring assembly provide familiar serviceability; and the connector cover protects terminals from moisture and road debris. These features make the hub suitable for commuters, bikepackers, and anyone who values dependable, passive electricity generation without battery dependence.
Notes:
- Always match the hub’s rotation direction marking to the bicycle’s forward direction during installation.
- Never rotate the connector terminal with the quick release closed; open the quick release first.
- Keep stripped wire length near 14 mm and avoid conductor contact inside the connector.
- Use recommended cable diameters for secure connections and long-term reliability.
Search for 67,706 Manuals online


Type-in Brand or Model