

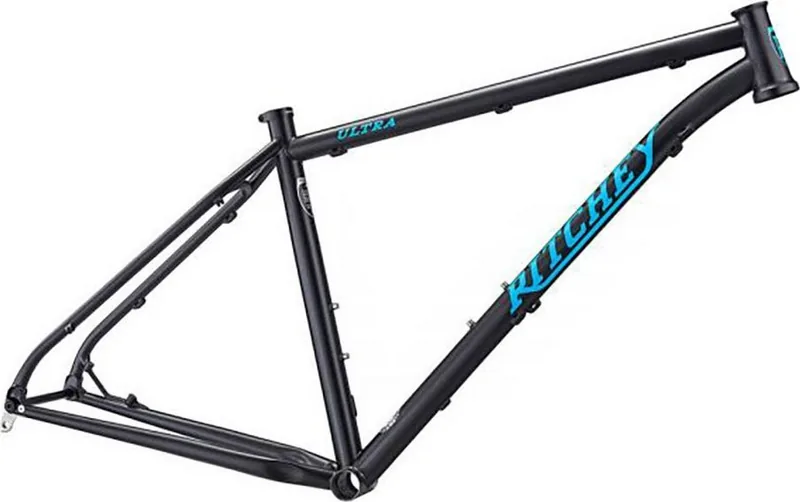
Ritchey Ultra Manual
PDF manual · 45 Pages
English



Quick check
Incorrect answer, please try again.
Chat with your Ritchey Ultra manual using AI
Get instant AI answers from your Ritchey Ultra manual
Ask anything about the Ritchey Ultra. Answers come from this manual, with the pages they are based on.
Ultra Maintenance Schedule
Inspect brake pads for wear and check cables for rust, kinks, or fraying. Have dealer adjust or replace if needed.
Take bike to dealer for a full inspection after 25 hours of hard off-road or 50 hours of on-road riding.
Routinely check condition of bicycle before every ride including nuts, bolts, tires, wheels, brakes, and seat post.
Clean the bike and lightly lubricate chain rollers with quality bicycle chain lube if exposed to water, grit, or every 100 miles.
Check headset for clunking or binding, inspect pedals for looseness, and examine wheel spokes for tension.
Check inflation as some tires may need topping up every week or two; ensure correct pressure before every ride.
Free maintenance reminders
Timed to your purchase date. Always free, unsubscribe anytime.
Ask a Question
Do you recommend Ultra?
Yes NoFrequently Asked Questions
Perform a Mechanical Safety Check: inspect fasteners, tire pressure and condition, wheel true and retention, brakes operation, seatpost and saddle security, and handlebar alignment. Address any looseness or damage before riding.
Is this answer helpful?
Check standover height (2–4 inches clearance depending on riding surface), saddle height and fore-aft position, and handlebar reach/height. Have a dealer set and confirm Minimum Insertion marks and correct torque on clamps.
Is this answer helpful?
Adjust the tension nut so the cam lever closes with strong force — you should need to wrap fingers around the fork or stay for leverage and feel an imprint in your palm. Ensure dropout embossing and re-check before each ride.
Is this answer helpful?
Ride slower, apply brakes earlier and more gradually, practice progressive modulation to avoid wheel lockup, shift weight rearward under braking, and ensure brake pads and rims/rotors are clean and in good condition.
Is this answer helpful?
After any crash or significant impact, when brakes or shifting do not perform correctly, at 25–50 hours of riding for full checkups, after initial break-in (~30 days or 10–15 hours), or whenever you lack tools/experience for a repair.
Is this answer helpful?
Yes, if used with compatible shoes and cleats and after practicing in a safe area. Adjust release tension to an easy setting until engagement/disengagement is instinctive; improper use can cause falls.
Is this answer helpful?
Follow tire sidewall pressure ranges and dealer recommendations for terrain and rider weight. Use a quality pump with gauge. Presta and Schrader valves require matching pump fittings or adapters; never exceed the tire’s max pressure.
Is this answer helpful?
Advantages and Disadvantages
Advantages

- Extensive safety guidance covering helmet use, riding behavior, and legal compliance.
- Detailed mechanical checks and step-by-step wheel removal/installation procedures.
- Clear explanations of brakes, drivetrains, pedals and suspension with practical tips.
- Fit and adjustment instructions for standover height, saddle, handlebars and controls.
- Recommended service intervals and emphasis on dealer/qualified mechanic support.
Disadvantages

- Not a comprehensive repair manual — many repairs require dealer or specialist service.
- Extensive warnings may overwhelm beginners seeking quick start instructions.
- Technical procedures assume access to special tools (torque wrench, truing stand).
- Some procedures require dealer adjustment; limited do-it-yourself scope for complex tasks.
- Lengthy text can be dense; finding a single specific instruction may require searching.
Product Specification
Type
MTB Hardtail
Material
Steel
Wheel sizes
29"
Max. tire width
2.40 in
Brake
Disc brake
Brake mount
Flatmount
Headset
1 1/8" straight
Seat tube diameter
1.13 in
Cable routing
external, on down tube
Weight
5.25 lb
Special features
2x water bottle mounts
Product Description
Ritchey Ultra Frame Rahmenset Manual
The Ritchey Ultra Frame Rahmenset Manual is a comprehensive guide aimed at riders who demand performance, safety and proper setup from their Ritchey Ultra frame. It covers everything from initial fit and first-ride checks to advanced technical guidance on wheels, brakes, suspension and drivetrain. The manual emphasizes rider responsibility: correct bike fit, routine mechanical inspections, and adherence to safe riding practices. It guides new owners through standover height, saddle position, handlebar and control adjustments — all critical to comfort and control on road or off-road rides.
The manual dedicates large sections to pre-ride mechanical safety checks: inspecting fasteners, tire pressure and condition, wheel trueness, brake operation and wheel retention. It explains different axle and retention systems (cam-action skewers, through-bolts, bolt-on axles and through-axles), plus secondary retention devices, and step-by-step wheel removal and installation for rim and disc brakes.
Brake systems are explored in depth, describing rim, disc and internal hub brakes, brake modulation techniques, brake quick releases and risks from improper adjustment. Gear systems — both derailleur and internal hub types — are explained with practical shifting advice and troubleshooting tips. Pedal systems (flat, toeclips, straps, and clipless) are addressed with safety warnings and best-practice guidance for learning to engage and disengage.
For bikes with suspension, the manual stresses following manufacturer setup and maintenance instructions, warns about handling changes (such as front-end dive under braking) and the potential for increased risk if used improperly. Tire selection, valve types (Schrader and Presta), recommended pressure practices and the hazards of improper inflation are covered. The manual also outlines owner-level maintenance tasks and service intervals, and repeatedly advises using a qualified dealer or mechanic for complex repairs.
Safety is the manual’s throughline: wearing certified helmets, obeying traffic laws, riding defensively, avoiding risky stunts without training, and ensuring children are properly supervised and fitted. It includes clear warnings about the consequences of improper maintenance, component incompatibility, and stress-related fatigue in structural parts.
Notes
- The manual is not a complete repair guide; dealers should handle major service.
- Follow component manufacturers’ instructions for brakes, suspension and hubs.
- After impacts or crashes, have the bike inspected before riding again.
Search for 67,706 Manuals online


Type-in Brand or Model