Manual.ly Logo

REV Ritter MH-14 Manual

0.0 · 0 Ratings

PDF manual · 15 Pages

English

M: OA-GPT-54-NAN
page

/ 15

Loading...
a7535c7245efc75e2c4d4bc4a97a900c0378 page 3
Smoke Detector Operating Manual
Type: 205003
This product has been tested according to EN 14604:2005 + AC: 2008
We recommend consulting a certified specialist for smoke detectors
for the planning and installation.
1. Technology / operation
• Power supply: 9V DC Block battery
• Sound power level: ≥85 dB / 3m
• Temperature range: -10 ° C - + 40 ° C
• Humidity: ≤95% RH
• Recommended battery types: GP1604A / PAIRDEER 6LR61 / 6F22
General:
• In areas where ventilation and/or air conditioning systems are used, is must
be ensured that air movement does not affect the function of the smoke
detector.
• Smoke detectors must be permanently fixed on the ceiling. Mounting
instructions must be observed.
• Choose a mounting method that ensures a holding force of at least 20N in
vertical direction.
• The smoke detector is designed for monitoring residential buildings or
residential premises (not for industrial or commercial usage).
• A function test must be performed on each smoke detector after installation.
• The functionality of each installed smoke detector must be regularly checked
and maintenance measures must be ensured. Perform function test 1 x per
week, clean every 3 months.
• The smoke detector indicates its readiness for operation by the LED flashing
every 60 seconds.
• Smoke detectors must be taken out of service at the latest after 10 years and
replaced with a new device.
• In standard smoke detectors, the battery must be replaced annually, at the
latest however when the smoke detector reports a battery failure. Only the
battery types specified on the rating plate may be used.
2. Mounting locations
Mounting locations for smoke detectors:
• Bedrooms, children’s rooms and corridors must be equipped (basic
requirement) with smoke detectors.
• Always on the ceiling
• 50cm from the wall (or beam)
• If the room is subdivided by ceiling-high furniture etc., a smoke detector must
be installed in each room partition
• In rooms with a floor area of ≤ 60m², divided into ceiling boxes by beams or
joists, the following applies:
• In ceiling boxes > 36m² a smoke detector must be installed per ceiling box
(see Figure 6a))
In rooms with a floor area of > 60m², an additional smoke detector must be
installed per 60m².
3. Planning examples
For apartments and single family homes
a) Example for use in an apartment
a) Example for use in a single-family home
Minimum requirements
Optimal installation
Restricted installation
bedroom
kitchen
living room
children's roomchildren's room
bathroom
work room
kitchen
children's room
bedroom
living room
boiler room
4. Arrangement in special room geometries
Following distance ratios and arrangements are recommended for detector
positioning:
a) Linear corridor
b) Rectangular corridor
c) Detector arrangement in large corridors
d) Detector arrangement in large corridors with corners
5. Constructional features
• If a room is divided in height by a podium or a gallery, a smoke detector is
required beneath these installations if the area exceeds 16m² and the length
and width exceed each 2m.
• In rooms with ceiling slopes > 20° to the horizontal, a heat pocket can form at
the top of the ceiling which prevents smoke entry into the smoke detector.
• Therefore, smoke detectors in these rooms must be mounted at least 0,5m
but not more than 1m from the ceiling top, see the following two illustrations.
Example of mounting with pedestal-shaped ceiling with a ceiling
slope > 20°
Legend
1 = smoke detector
Remarks: Smoke detectors can be attached on the position left (1) or on the
position right (2).
>20°
0,5m
1
1
2
>20°
0,5m
• In rooms with a slope ≤ 20° smoke detectors must be mounted centrally on
the ceiling.
• In ceiling boxes ≤ 36m² and with ceiling slopes ≤ 20° as well as beams or
joists with a height ≤ 0.2m, the individual ceiling boxes are not taken into
account (see Figure 6b)). Install smoke detectors as centrally as possible in
the room, in a ceiling box or on the joist.
• In these rooms have beams or ceiling joists with a height > 0.2m, the smoke
detector must be installed on a beam or girder, as centrally as possible in the
room (see section 6 Figure c).
6. Notes for ceiling installation
For ceiling with joists – (height (h) of the joist ≤ 0.20m
and an area of the ceiling box >36m² or ≤36m²)
a) Example for ceiling >36m²
Legend:
1 - Ceiling box
2 - Joist
b) Example of ceiling box ≤36m ²
Legend:
1 - Ceiling box
2 - Joist
c) Example of ceiling with joist (height (h) of the joist > 0,20m)
Legend:
1 - Ceiling box
2 - Joist
In corridors with a maximum width of 3m, the distance between two smoke
detectors may not exceed 15m. The detector distance to the front face of the
corridor must not exceed 7.5m. A detector must be arranged in crossings,
junctions and corners (mitre line) of corridors. An example of an arrangement is
shown in section 4.
7. Mounting
• Loosen the mounting plate on the rear side of the device by turning it
clockwise.
• Fix the mounting plate with the help of the enclosed mounting material to the
ceiling or wall. Check first whether the supplied mounting material is suitable
for the structural quality of the wall/ceiling.
• Insert the smoke detector in the mounting bracket and rotate the smoke
detector anti-clockwise direction until it audibly engages.
• Caution: Smoke detectors with replaceable battery can only be attached with
inserted battery because the latter have a locking mechanism.
8. Commissioning
Remove the enclosed battery and remove the plastic film.
Connect the plug connector of the device with the battery contacts until they
audibly engage.
9. Functional testing
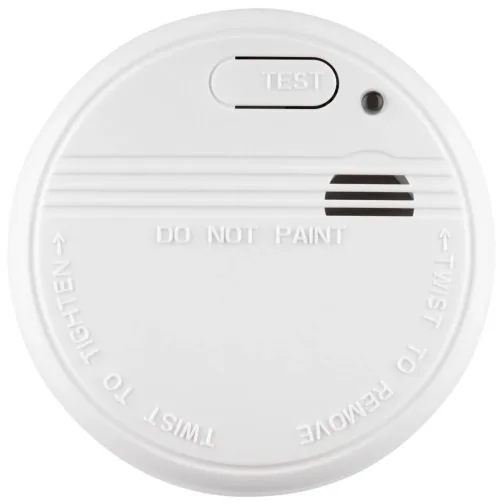
Press and hold the test button on the unit. The LED
flashes quickly and the alarm is activated after about
3 seconds. Approx. 3 seconds after the test button
is released, the smoke alarm device and is ready for
use again.
10. Fraud alarm / false alarms
False alarms can be triggered by the following, for example:
• welding and cutting work;
• soldering and other hot work;
• sawing and sanding work;
• dust due to construction or cleaning;
• water vapour, cooking vapours and odours;
• extreme electromagnetic influences;
• temperature fluctuations which lead to the condensation of the humidity in the
smoke detector.
In the event of works in the environment of the installed smoke detector which
trigger false alarms (e.g. renovation), the detector should be temporarily
covered or removed. After completion of the work, the original functionality of
the installed smoke detector must be restored as described in section 9.
Should the system report an alarm, please check whether the fire really exists. If
so, call the fire brigade.
If not, please check whether the mentioned reasons could have raised the
alarm. We would like to point out that we are not liable for the consequences of
false alarms. We do not cover any costs incurred by false alarms, such as from
deployment of police, fire, or key services.
Test
LED
11. Maintenance / cleaning
This includes at least a check of whether the smoke penetration openings are
clear (e.g. covers, contamination from fluff and dust), whether there is any
function-related damage to the smoke detector and whether the 0.5 m area
around the smoke detector is free of obstacles (such as furniture) which inhibit
fire smoke penetrating into the smoke detector. Remove the smoke detector
from the retaining plate if the smoke penetration openings are dirty. Use a
vacuum cleaner nozzle to vacuum all openings both at the periphery and back of
the housing. Then again lock the smoke detector on the retaining plate and carry
out a a functional test. Replace the smoke detector if there is any functional-
related damage to it. If the clearance around the smoke detector is insufficient,
then the mounting location must be checked and a new location determined, if
necessary.
12. WEEE-reference of disposal
In accordance with European defaults used electrical and electronics
devices may no more be given to the unsorted waste. The symbol of the
waste bin on wheels refers to the necessity of separate collection.
Please help with environmental protection and see to it that this device
is given to the for this purpose designated systems of waste sorting if
you do not use it any longer.
GUIDELINE 2012/19/EU of the EUROPEAN PARLIAMENT AND the COUNCIL of
July 04th 2012 about electrical and electronics old devices.
Batteries and accumulators are not to be disposed of in the normal
house waste bin. Every user is legally obliged, to hand over all batteries
and accumulators, irrespective of whether or not they contain harmful
substances to a communal collection point in the local town area or to
a trade dealer so that they can be disposed of in an orderly environmentally
friendly manner.
Batteries and accumulators should only be handed over when they are
completely discharged!
REV Ritter GmbH
Frankenstr. 1-4
D-63776 Mömbris
Service-Phone: +49 900 117-1070
E-Mail: service@rev.biz
www.rev.biz
Declaration of performance “LE 205003” available at www.rev.biz.
15
1134-CPR-166
EN 14604:2005/AC:2008
GB
5
ceiling
Click
3
ceiling
4
2
ceiling
1
ceiling
Click
1
Mounting opening
Battery compartment
2
ANL_205003.indd 3 26.07.2017 14:13:12

Chat with your REV Ritter MH-14 manual using AI

Get instant AI answers from your REV Ritter MH-14 manual

Ask anything about the REV Ritter MH-14. Answers come from this manual, with the pages they are based on.

MH-14 Maintenance Schedule

Remind me when maintenance is due
Monthly
Check battery weekly

Check the battery weekly. Replace immediately if a low battery warning signal sounds.

Show in the manual (page 10)
Every 3 months
Clean smoke detector

Remove the detector and vacuum all openings on the front and back using a vacuum cleaner nozzle to minimize false alarms.

Show in the manual (page 10)
Semiannual
Conduct fire safety drill

Perform a fire safety drill with your family at least every six months.

Show in the manual (page 11)
Yearly
Replace battery

Replace the 9V battery annually or immediately when a low battery warning signal is heard.

Show in the manual (page 10)

Free maintenance reminders

Timed to your purchase date. Always free, unsubscribe anytime.

By submitting you agree to the privacy policy. Unsubscribe with one click in any email.
M: QW-35-FL

Ask a Question

0/1000

Do you recommend MH-14?

Yes No

Frequently Asked Questions

A

It is a photoelectric smoke alarm for residential use. The detector is meant to warn people early when smoke or soot particles enter the sensing chamber, giving them time to escape and call for help.

Is this answer helpful?

A

The manual recommends bedrooms, children’s rooms, hallways, and stairways, with at least one detector per floor. It should be mounted on the ceiling, ideally centered, and at least 50 cm from walls and corners.

Is this answer helpful?

A

Avoid kitchens, garages, areas near heating or air-conditioning units, and places with very high or very low temperatures. These locations can cause false alarms or reduce the detector’s effectiveness.

Is this answer helpful?

A

Press and hold the test button for about 4 seconds until the alarm sounds. This confirms that the electronics, horn, and battery are working properly.

Is this answer helpful?

A

A low-battery warning is signaled by a repeated beep pattern. When that happens, the battery should be replaced as soon as possible so the alarm remains fully operational.

Is this answer helpful?

A

Keep the detector clean and avoid exposure to steam, dust, welding fumes, and renovation debris. If work is being done nearby, temporarily cover or remove the unit and restore it afterward.

Is this answer helpful?

M: OA-GPT-54-NAN

Advantages and Disadvantages

Advantages

  • Photoelectric sensing is well suited for early smoke detection in living spaces and escape routes.
  • Ceiling-mounted design and included fixing parts make installation relatively simple.
  • Weekly test routine and LED status indication help users keep the alarm ready.
  • Clear cleaning and battery guidance supports consistent, low-effort maintenance.
VS

Disadvantages

  • Not suitable for kitchens, garages, or dusty work areas where false alarms are more likely.
  • Works as a standalone alarm and cannot alert firefighters or connect to other devices.
  • Requires regular battery checks and replacement to stay reliable.
  • Correct placement is important, so poor installation can reduce performance.
M: OA-GPT-54-NAN

Product Specification

Type

Smoke Detector

Sensors

Smoke Particles

Alarm Zones

1

Standard

N/A

Power Supply

Battery (1x 9V Block)

Operating Temperature

14F to +104F

Special Features

Siren (85dBA)

Manufacturer's Warranty

two years

M: OA-GPT-54-NAN

Product Description

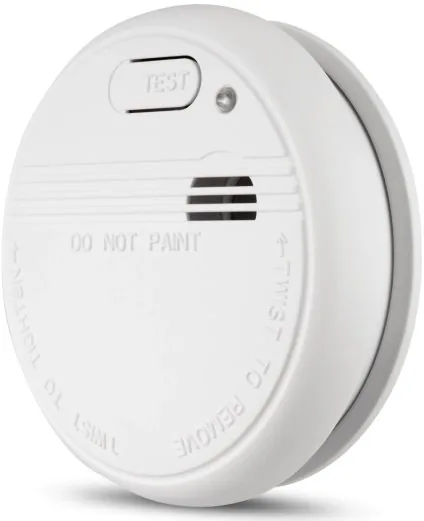
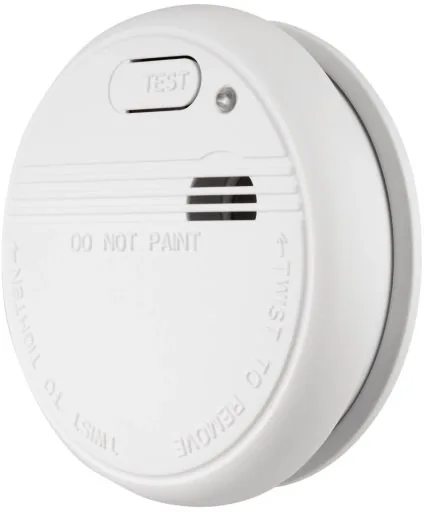
REV Ritter MH-14 Smoke Detector: Smart, Simple Home Safety

The REV Ritter MH-14 Smoke Detector Manual presents a practical smoke alarm designed for everyday residential protection. This photoelectric detector is built to recognize smoke and soot particles quickly, giving occupants an early warning before a situation becomes dangerous. Its main purpose is simple but essential: alert people in time to escape and call for help.

One of the strongest points of the MH-14 is its clear focus on home use. It is intended for bedrooms, hallways, stairways, and other escape routes, with at least one unit recommended per floor. The manual also highlights smart placement: the detector should be mounted on the ceiling, centered in the room whenever possible, and kept at least 50 cm away from walls and corners. That positioning helps smoke reach the sensor more effectively.

The installation process is straightforward and includes the necessary mounting parts. Once the base is fixed, the unit locks into place and activates when the battery is correctly inserted. A red LED flashes at regular intervals to show the device is ready, while the test button allows quick functional checks. The manual recommends testing weekly, which is a helpful habit for maintaining confidence in the alarm.

Maintenance is equally practical. Dust and dirt can affect performance, so the detector should be cleaned regularly with a vacuum nozzle around the openings and housing. The battery is a core part of the system, and the low-battery warning gives users time to replace it before protection is lost. The manual also gives clear guidance on avoiding false alarms caused by cooking steam, garage fumes, welding, dust, or extreme temperature changes.

Notes

  • Best suited for bedrooms, corridors, and escape routes
  • Not ideal for kitchens, garages, or very hot/cold areas
  • Weekly testing and routine cleaning are strongly advised
  • The alarm is for warning and escape, not for contacting emergency services

Overall, the MH-14 feels like a dependable, no-nonsense smoke alarm for households that want basic fire safety with minimal complexity. It combines a proven sensing principle, battery-powered flexibility, and easy user maintenance in a compact, home-focused design.

M: OA-GPT-54-NAN

© Copyright 2026 Manual.ly