Manual.ly Logo

REV Ritter EMT2500ET Manual

2.0 · 1 Ratings

PDF manual · 2 Pages

English

M: qwen/qwen3.5-flash-20260224
page

/ 2

Loading...
ea0c0faa48fddfbd066200b6344bd5644a88 page 1
DE
Digitale Zeitschaltuhr (EMT2500ET)
Montage- und Gebrauchsanweisung
VERWENDUNGSZWECK
Zeitschaltuhr zum zeitgesteuerten Ein- und Ausschalten von Elektrogeräten.
SICHERHEIT
Gebrauchsanweisung beachten und aufbewahren!
Gebrauchsanweisung an Nachbesitzer weitergeben!
Nicht für den Gebrauch durch Kinder bestimmt!
Beschädigtes Gerät nicht in Betrieb nehmen!
Spannungsfrei nur bei gezogenem Stecker!
Nicht hintereinander stecken!
Nur zur Verwendung in trockenen Räumen!
Nicht für das unbeaufsichtigte Schalten von Elektrogeräten mit
Gefährdungspotenzial verwenden (z.B. Heizgeräte oder sich bewegende
Elektrogeräte)!
Nicht für den Einsatz als Sicherheitseinrichtung geeignet!
Nicht für den Einsatz in explosionsgefährdeter Umgebung geeignet!
LIEFERUMFANG
Abb. 1: Zeitschaltuhr
Prüfen Sie das Gerät auf einwandfreien Zustand.
Bei Beschädigungen: Verwenden Sie das Gerät nicht!
ANSCHLIESSEN UND AKKU LADEN
Beachten Sie die technischen Daten!
Anschließen
Abb. 2: Stecken Sie die Zeitschaltuhr in die Netzsteckdose. Das
Display zeigt kurz den Selbsttest an.
Akku laden
Warten Sie 1 Stunde, bis der eingebaute Akku geladen ist.
AKKU NUTZEN UND PFLEGEN
Handhabung beim Programmieren erleichtern
Bei geladenem Akku: Ziehen Sie die Zeitschaltuhr aus der Netzsteckdose.
Bei schwachem Akku: Lassen Sie die Zeitschaltuhr in der Netzsteckdose.
Einstellungen speichern
Wenn bei geladenem Akku die Zeitschaltuhr aus der Netzsteckdose gezogen wird,
dann bleibt für die Dauer der Gangreserve die eingestellte Uhrzeit erhalten und die
programmierten Schaltzeiten bleiben gespeichert.
Akku pflegen
Wird die Zeitschaltuhr nicht verwendet, beachten Sie, dass der Akku gelegentlich
nachgeladen werden muss, um die Programmierung zu erhalten.
Bei entladenem Akku gehen alle Einstellungen verloren und das Display erlischt.
PROGRAMMIERUNG VORBEREITEN
Beachten Sie beim Programmieren:
Gehen Sie zügig vor. Wenn Sie die Programmierung länger als
10 Sekunden unterbrechen, dann müssen Sie neu beginnen.
AKTUELLE UHRZEIT EINSTELLEN
Abb. 3a: Drücken und halten Sie „+“, bis die Stundenanzeige blinkt.
Abb. 3b: Stellen Sie mit „-/+“ die Stunde ein
Abb. 3c: Drücken Sie „OK“. Die Minutenanzeige blinkt.
Abb. 3d: Stellen Sie mit „-/+“ die Minute ein.
Abb. 3e: Drücken Sie „OK“.
Abb. 3f: Das Display zeigt die aktuelle Uhrzeit. Der Pfeil zeigt auf die
aktuelle Uhrzeit.
SCHALTZEITEN PROGRAMMIEREN
Display-Symbole kennelernen
Abb. 4a: Der Pfeil zeigt auf die Zeitspanne, die programmiert werden
soll. Beispiel 23:00 bis 23:30 Uhr
Abb. 4b: Der Balken markiert die Zeitspanne, die als Einschaltzeit
programmiert ist.
Beispiel 02:30 bis 03:30 Uhr
Schaltzeiten programmieren
Abb. 5a: Drücken und halten Sie „-“, bis der Pfeil blinkt.
Die Programmierung beginnt.
Abb. 5b: Bewegen Sie den Pfeil mit „-/+“, um auf die gewünschte
Zeitspanne zu zeigen.
Um mehrere Zeitabschnitte gleichzeitig zu speichern, oder zu löschen, drücken und
halten Sie die + oder - Taste bis die Pfeilmarkierung vervielfacht wird.
Mit OK speichern Sie die markierten Zeitabschnitte.
Abb. 5c: Markieren Sie die Zeitspanne mit „OK“ als Einschaltzeit
(Balken) bzw. als Ausschaltzeit (kein Balken).
Programmieren Sie weitere Zeitspannen genau so.
Programmierung beenden
Abb. 5d: Warten Sie, bis der Pfeil aufhört zu blinken.
Die Programmierung ist beendet.
BETRIEBSART WÄHLEN
Abb. 6: Wählen Sie die gewünschte Betriebsart, um das
angeschlossene Elektrogerät wie folgt zu schalten:
AUTO: Automatisch zeitgesteuert
ON: Dauerhaft eingeschaltet
OFF: Dauerhaft ausgeschaltet
ELEKTROGERÄT ANSCHLIESSEN
Abb. 7: Stecken Sie die Zeitschaltuhr in die Netzsteckdose.
Abb. 8: Schließen Sie das Elektrogerät an die Zeitschaltuhr an und
schalten Sie es ein.
ALLES LÖSCHEN
Abb. 9: Um die aktuelle Uhrzeit und alle programmierten Schaltzeiten
zu löschen, drücken Sie „R“ (Reset) mit einem nicht
leitenden Gegenstandn
Das Display zeigt kurz den Selbsttest an. Alles ist gelöscht.
Alternativ können Sie auch im Zeitmodus die OK Taste für mehr als 5 Sekunden
drücken. Dies bewirkt ebenfalls, dass alle gespeicherten Programme auf einmal
gelöscht werden.
REINIGEN
Ziehen Sie die Zeitschaltuhr aus der Netzsteckdose. Reinigen Sie das Gehäuse mit
einem leicht angefeuchteten Tuch. Verwenden Sie keine scheuernden und keine
aggressiven Reinigungsmittel.
REPARIEREN
Die Zeitschaltuhr enthält keine reparablen Teile. Führen Sie keine eigenmächtigen
Reparaturversuche durch!
TECHNISCHE DATEN
Betriebsspannung/Netzfrequenz: 230V~/50Hz
Betriebsstrom: max. 8A
Schaltleistung: max. 1.800W
Kürzester Schaltabstand: 30 Minuten
Schutzart: IP20, nur zur Verwendung in trockenen Innenräumen
Pufferakku: R100h, Ni-MH 1.2V 80mAh
Mikroabschaltung µ
Schutzkontaktsteckdose mit Kinderschutz
SERVICE
Haben Sie Fragen zu unserem Produkt oder eine Beanstandung, dann informieren
Sie sich bitte im Internet unter www.rev.de über die Kontaktaufnahme und
Retourenabwicklung oder senden eine E-Mail an service@rev.biz. Wir weisen darauf
hin, dass wir keine Sendungen ohne Retourennummer bearbeiten können und deren
Annahme verweigern müssen.
SYMBOLERKLÄRUNG
CE-Zeichen
(Konformität mit europäischen Sicherheitsnormen)
Gerät und Verpackung recyclebar
Gebrauchte Elektro- und Elektronikgeräte dürfen gemäß
europäischer Vorgaben nicht mehr zum unsortierten Abfall
gegeben werden. Das Symbol der Abfalltonne auf Rädern weist auf die
Notwendigkeit der getrennten Sammlung hin. Helfen auch Sie mit beim
Umweltschutz und sorgen dafür, dieses Gerät, wenn Sie es nicht mehr
nutzen, in die hierfür vorgesehenen Systeme der Getrenntsammlung zu
geben. RICHTLINIE 2012/19/EU DES EUROPÄISCHEN PARLAMENTS
UND DES RATES vom 04. Juli 2012 über Elektro- und
Elektronik-Altgeräte.
Batterien und Akkus dürfen nicht in den Hausmüll. Jeder Verbraucher
ist gesetzlich verpflichtet, alle Batterien und Akkus, egal ob sie
Schadstoffe enthalten oder nicht, bei einer Sammelstelle seiner
Gemeinde/seines Stadtteils oder im Handel abzugeben, damit sie einer
umweltschonenden Entsorgung zugeführt werden können. Batterien und
Akkus bitte nur in entladenem Zustand abgeben!
Distibutor:
REV Ritter GmbH
Frankenstr. 1 - 4
D-63776 Mömbris
Tel. +49 900 1 17 1070 (0,36 €/Min. aus dem deutschen Festnetz, Mobilfunkpreise abweichend)
Fax +49 180 5 007410 (0,14 €/Min.)
www.rev.de
service@rev.biz
1
2
3
4
5
6
7
8
9
10
11
13
14
15
16
17
18
19
20
21
22
23
88:88
R
PROG ON/OFF/AUTO
1
2
3
4
5
6
7
8
9
10
11
13
14
15
16
17
18
19
20
21
22
23
00:00
R
PROG ON/OFF/AUTO
1
2
3
4
5
6
7
8
9
10
11
13
14
15
16
17
18
19
20
21
22
23
14:00
R
PROG ON/OFF/AUTO
1
2
3
4
5
6
7
8
9
10
11
13
14
15
16
17
18
19
20
21
22
23
14:36
R
PROG ON/OFF/AUTO
1
2
3
4
5
6
7
8
9
10
11
13
14
15
16
17
18
19
20
21
22
23
14:36
R
PROG ON/OFF/AUTO
1
2
3
4
5
6
7
8
9
10
11
13
14
15
16
17
18
19
20
21
22
23
14:00
1
2
3
4
5
6
7
8
9
10
11
13
14
15
16
17
18
19
20
21
22
23
14:36
1
2
3
4
5
6
7
8
9
10
11
13
14
15
16
17
18
19
20
21
22
23
14:36
1
2
3
4
5
7
8
9
10
11
13
14
15
16
17
18
19
20
21
22
23
14:36
1
2
3
4
5
6
7
8
9
10
11
13
14
15
16
17
18
19
20
21
22
23
14:36
R
PROG ON/OFF/AUTO
1
2
3
4
5
6
7
8
9
10
11
13
14
15
16
17
18
19
20
21
22
23
14:36
R
PROG ON/OFF/AUTO
1
2
3
4
5
6
7
8
9
10
11
13
14
15
16
17
18
19
20
21
22
23
14:36
R
PROG ON/OFF/AUTO
1
2
3
4
5
6
7
8
9
10
11
13
14
15
16
17
18
19
20
21
22
23
14:36
R
PROG ON/OFF/AUTO
ON/OFF/AUTO
ON/OFF/AUTO
ON/OFF/AUTO
14:36
14:36
14:36
R
PROG ON/OFF/AUTO
1
2
3
4
5
6
7
8
9
10
11
13
14
15
16
17
18
19
20
21
22
23
14:36
PROG ON/OFF/AUTO
R
2
3a
3b
3c
3d
3e
3f
8
9
1 4a
5a
5b
5c
5d
6
7
4b
GB
Digital Timer (EMT2500ET)
Installation and Operating Instructions
INTENDED USE
Timer for timed switching on and off of electrical appliances.
SAFETY
Observe these Operating Instructions and keep them available for reference!
Pass on the Operating Instructions to future owners!
Not intended for use by children!
No not use damaged device!
Voltage-free only with pulled plug!
Do not plug in a row!
For use in dry rooms!
Do not use for the unattended switching of potentially hazardous electrical
appliances (e.g. heaters or moving electrical appliances)!
Not suitable for use as a safety device!
Not suitable for use in hazardous areas!
BOX CONTENTS
Fig. 1: Timer
Check if the device is in good condition.
In case of damage: Do not use the device!
CONNECTING AND CHARGING
Observe the technical data!
Connecting
Fig. 2: Plug the timer into the wall outlet. The display briefly shows the self-test.
Charging the battery
Wait for 1 hour until the built-in battery is charged.
USING AND MAINTANING THE BATTERY
Facilitate handling during programming
With charged battery: Pull the timer from the power outlet.
Low battery: Leave the timer in the power outlet.
Save Settings
When the timer is disconnected from the power outlet after the battery has been
charged, the set time remains for the duration of the power reserve and programmed
switching times are saved.
Battery Maintenance
If the timer is not used, note that the battery needs to be recharged occasionally for
the programming data to be retained.
If the battery discharges, all settings will be lost and the display goes out.
PREPARING THE PROGRAMMING
Note when programming:
Work quickly. If you interrupt the programing process for longer than 10 seconds, you
must start again from scratch.
SETTING THE CURRENT TIME
Fig. 3a: Press and hold „+“ until the hour indicator flashes.
Fig. 3b: Use „-/+“ to set the hour
Fig. 3c: Press „OK“. The minute indicator flashes.
Fig. 3d: Use „-/+“ to set the minutes.
Fig. 3e: Press „OK“.
Fig. 3f: The display shows the current time. The arrow points to the
current time.
PROGRAMMING TIMES
Getting to know the display icons
Fig. 4a: The arrow shows the time period to be programmed.
Example 23:00 bis 23:30 clock
Fig. 4b: The bar indicates the period of time that is programmed as ON time.
Example 02:30 bis 03:30 clock
Programming switching times
Fig. 5a: Press and hold „-“ until the arrow flashes. The programming starts.
Figure 5b: Move the arrow with the „-/+“ until it points to the desired length of time.
To display several time periods, press and hold „-/+“.
Figure 5c: Select the time period with „OK“ as switch-on period (bars) or as
switch-off period (no bars).
Program other periods like that.
Ending the programming
Figure 5d: Wait until the arrow stops blinking. The programming is finished.
MODE SELECT
Fig. 6: Select the desired mode to switch the connected appliance as follows:
AUTO: Automatic timing
ON: Permanently ON
OFF: Permanently OFF
CONNECTING ELECTRICAL APPLIANCES
Fig. 7: Plug the timer into the wall outlet.
Fig. 8: Connect the power adapter to the switch and turn it on.
DELETE ALL
Fig. 9: To delete the current time and all programmed switching times, press
„R“ (reset).
The display briefly shows the self-test. Everything is deleted.
CLEANING
Pull the switch from the power outlet. Clean the
housing with a slightly damp cloth. Do not use
abrasive and aggressive cleaning agents.
REPAIR
The timer does not contain repairable parts. Do not perform any unauthorized
attempts to repair!
TECHNICAL DATA
Operating voltage/frequency: 230V ~/50Hz
Operating current: max. 8A
Switching capacity: max. 1,800W
Minimum interval: 30 minutes
Protection class: IP20, only for use in dry indoor areas.
buffer battery: R100h, Ni-MH 1.2V 80mAh
micro shutdown µ
Protective contact socket with child protection
Manufacturer:
Zhejiang EverFlourish Electrical Co., Ltd.
Renjiu Village, Wuxiang Town, Yinzhou,
Ningbo 315111, P. R. China
02.18
ANL_EMT2500ET.indd 1 01.02.2018 07:09:26

Chat with your REV Ritter EMT2500ET manual using AI

Get instant AI answers from your REV Ritter EMT2500ET manual

Ask anything about the REV Ritter EMT2500ET. Answers come from this manual, with the pages they are based on.

EMT2500ET Maintenance Schedule

Occasionally
Recharge battery if not used

If the timer is not used, recharge the battery occasionally to retain programming data.

As needed
Clean housing

Pull plug and clean housing with a slightly damp cloth. Do not use abrasive or aggressive agents.

M: QW-35-FL

Ask a Question

0/1000

Do you recommend EMT2500ET?

Yes No
0
User Pic

Nyasia Hane

8 months ago

Does this timer switch support loads higher than 1800W? I need it for a kettle and the specs seem unclear. Is 1800W the hard limit?

0
User Pic

Manual.ly

8 months ago

Yes. The maximum supported load is strictly 1800W. This limit is fixed due to the internal components of the timer switch. Appliances exceeding this wattage, such as standard electric kettles, may cause overheating or failure. We recommend checking the power rating of any device before connecting it. If you need higher power capacity, please consider a different model designed for heavy loads.

M: qwen/qwen3.5-flash-20260224

Frequently Asked Questions

A

Press and hold minus until arrow flashes. Move arrow with plus minus. Mark time with OK as on or off. Wait for arrow stop blinking.

Is this answer helpful?

A

No, it is IP20 rated for dry indoor use only. Wet conditions damage electronics and risk shock.

Is this answer helpful?

A

About 100 hours. After that power settings may be lost if not recharged.

Is this answer helpful?

A

No, do not use for unattended heating devices or hazardous equipment per safety rules.

Is this answer helpful?

A

Press R button with non conductive object, or hold OK for 5 seconds in time mode.

Is this answer helpful?

A

Plug in occasionally during storage to keep programming data active and functional.

Is this answer helpful?

A

No, internal parts are not serviceable. Do not open the casing or attempt repairs.

Is this answer helpful?

M: qwen/qwen3.5-flash-20260224

Advantages and Disadvantages

Advantages

  • Easy LCD display programming with clear time interval indicators.
  • Built-in Ni-MH battery retains settings for 100 hours during power outages.
  • Three operation modes offer flexibility for constant or timed switching.
  • Child protection socket adds safety for homes with young children.
  • Reset function allows quick clearing of all schedules if needed.
VS

Disadvantages

  • Not suitable for use in wet areas due to IP20 protection rating.
  • Not designed for safety critical applications or hazardous machinery use.
  • Requires a full hour to charge battery when first connected to power.
  • Maximum switching limit of 1800 Watts restricts high power appliances.
  • Programming resets if paused for longer than ten seconds during input.
M: qwen/qwen3.5-flash-20260224

Product Specification

Type

digital outlet timer

Operation

Buttons, LCD

Specifications

230V, 1800W, 8A

Functions

48 switching programs stored, manual override, minimum switching interval 30 min

Special Features

integrated backup battery (1.2V NiMH), child safety

Color

white

Manufacturer Warranty

2 years

M: qwen/qwen3.5-flash-20260224

Product Description

Enhance Home Energy Efficiency Today

Introduction

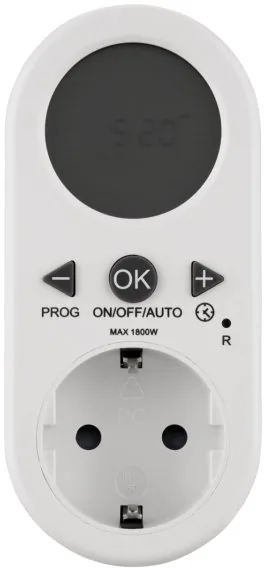
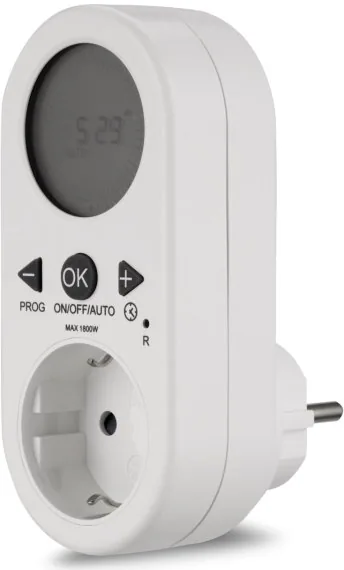
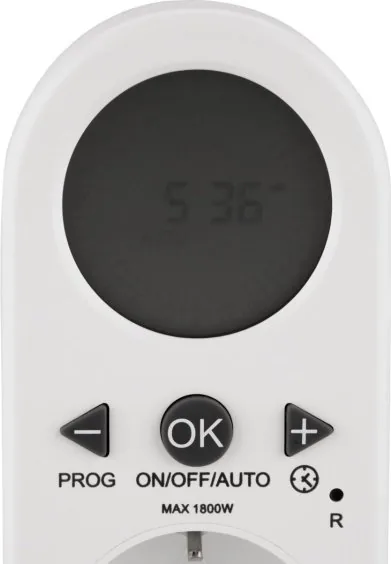
Managing household power usage requires smart tools. The REV Ritter EMT2500ET digital time switch with LCD display, white Manual provides a seamless solution for automated control. This device helps you program electrical appliances to switch on and off according to your schedule. By using timers effectively, you can reduce energy waste. It is designed for dry indoor spaces. The white finish blends well with most home decor. The LCD screen ensures settings are highly visible at a glance. The interface uses simple bars to mark switch-on periods clearly.

Programming and Setup

Setup begins by plugging the unit into a standard socket. A self-test sequence confirms operation before you start. You must wait one hour for the internal battery to charge fully. This ensures data retention during power cuts. To program, press the plus or minus buttons to adjust hours and minutes. The arrow on the display indicates the current selected time interval. Remember to work quickly. If you pause programming for over ten seconds, the process resets. This feature prevents accidental partial configurations. Use the OK button to confirm each setting change step by step.

Modes and Safety

The switch offers three distinct modes. Auto mode follows your programmed schedule automatically. The On position keeps the outlet permanently live regardless of the timer. The Off position cuts all power permanently. The switching capacity supports up to 1800 Watts. This handles most standard home electronics. However, safety is a core focus. Do not use this device for heating equipment. It is unsuitable for unattended operation of dangerous machinery. The IP20 rating means it is strictly for dry conditions. It includes a micro switch protection and child safety socket. Never attempt to repair the unit yourself if it breaks.

Battery Maintenance

The Ni-MH buffer battery retains data for up to 100 hours. If the power source is disconnected, the timer remembers your time settings. However, if the battery drains completely, all programs delete. Therefore, if you store this device for long periods, plug it in periodically to replenish the charge. This is crucial for maintaining the schedule without re-entry. To clear all data at once, use the reset button. A soft object like a pen tip works best for this function.

Cleaning and Disposal

Keep the device clean for longevity. Unplug before cleaning. Wipe the housing with a soft damp cloth. Do not use aggressive chemicals. This protects the plastic finish. When the device reaches end-of-life, do not throw in general trash. It contains electronics that need recycling. Follow local guidelines for WEEE disposal. Ensure any batteries removed are discharged before disposal. This protects the environment and maintains safety standards.

Conclusion

This timer brings convenience and control to your daily routine. You should always store the instruction guide for future reference. Share the guide with new owners if you ever sell the device. With proper care, this tool remains a reliable part of your home infrastructure. Start saving energy and automating your tasks now. The minimum interval between switches is 30 minutes. This limit ensures the internal components do not overwork. Reliable performance is key for long term automation needs.

M: qwen/qwen3.5-flash-20260224

© Copyright 2026 Manual.ly