


Rega Planar 10 Manual
PDF manual · 25 Pages
English



Quick check
Incorrect answer, please try again.
Chat with your Rega Planar 10 manual using AI
Get instant AI answers from your Rega Planar 10 manual
Ask anything about the Rega Planar 10. Answers come from this manual, with the pages they are based on.
Ask a Question
Do you recommend Planar 10?
Yes NoFrequently Asked Questions
Connect the mains lead from the supplied power cable to the PSU socket marked “Power In”. Then link the turntable to the PSU using the supplied XLR interconnect to the PSU “output” socket. Make all audio and interconnects first, and keep the PSU as far from the turntable as the cable allows to minimize hum risk.
Is this answer helpful?
External phono connections from the tonearm must go to a suitable phono stage. If your cartridge is moving magnet (MM), you need an MM input stage. If it is moving coil (MC), you need an appropriate MC stage. If your amplifier has no integrated phono stage, you must use an external one sold separately.
Is this answer helpful?
With the stylus guard removed, set the tracking force and bias controls to zero, then adjust the tungsten balance weight until the arm is balanced. After balancing, rotate the tracking force dial to the required tracking force, using the cartridge manufacturer guidance. Bias is then set using the bias adjustment control, referencing the required value for your cartridge type.
Is this answer helpful?
The most reliable method is using the Rega Strobe kit and stroboscopic disc. Place the disc on the platter, switch on the 100 Hz LED, and hold it about 2 cm above the rotating disc. If the bars appear stationary, the speed is correct. If they drift, adjust using the P10 PSU until the bars freeze properly.
Is this answer helpful?
The guidance mentions the iPhone “RPM” app as a helpful tool, but it also warns that third-party app readings cannot be guaranteed due to phone age, condition, and operating system differences. If you are unsure, verify the app calibration using a suitable reference.
Is this answer helpful?
Select 33 1/3 rpm, then press and hold the “speed program” switch until the “program mode” LED blinks, and keep holding until it stays solid. With the LED solid, press the “speed program” switch once more to fully reset and return to “run mode”.
Is this answer helpful?
Do not unplug the P10 PSU while it is on; switch off the power first. Do not operate the PSU unless the turntable is connected. Never expose the unit to rain or moisture, and do not open the case covers. Also, the strobe kit includes a strong warning for people with photo-induced epilepsy due to the stroboscopic effect.
Is this answer helpful?
Advantages and Disadvantages
Advantages

- P10 PSU provides electronic speed control, fast switching between 33 1/3 rpm and 45 rpm
- Anti-vibration design and electronic control support stable performance
- Accurate strobe method (Rega Strobe kit) makes speed tuning straightforward
- Clear tonearm procedure: balance, tracking force, and bias adjustments
- Guidance for hum reduction by keeping PSU away from the turntable
Disadvantages

- Proper setup requires careful cartridge alignment and dial-by-dial adjustments
- You may need the correct external phono stage (MM or MC) depending on cartridge
- Strobe use includes a specific health warning for photo-induced epilepsy
- Third-party mobile speed apps cannot be guaranteed without reference calibration
- Drive belts should be replaced regularly (about every five years) to preserve speed stability
Product Specification
Drive Type
Belt
Tonearm
straight
Audio Connections
Phono Out (RCA)
Special Features
Dust Cover
Dimensions
16.54x4.92x12.40in (WxHxD)
Weight
10.36lb
Product Description
Rega Planar 10: a Precision Vinyl Experience, Tuned for Speed and Tracking
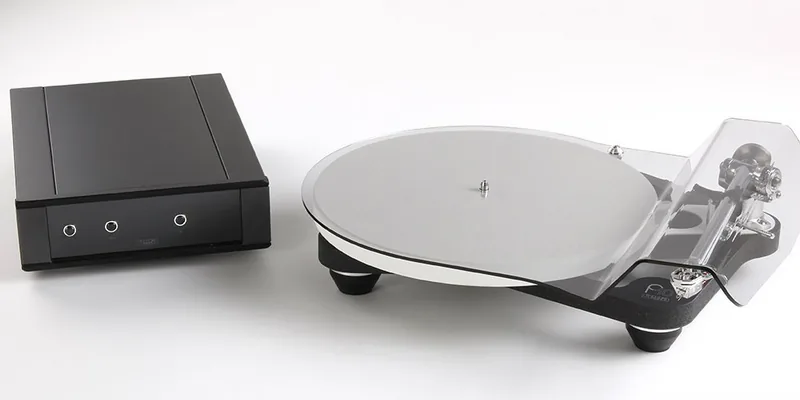
The Rega Planar 10 is a high-performance belt-drive turntable built for serious listening, pairing a ceramic platter and rigid plinth with the RB3000 tonearm to deliver stable, detailed playback. To get the most from it, the included approach in the Rega Planar 10 Manual-style guidance focuses on correct setup fundamentals: leveling the deck, installing the belt properly, aligning the cartridge accurately, and dialing in tracking and bias so the stylus behaves as intended.
At the heart of the experience is the P10 PSU. Instead of relying on basic motor switching, it provides advanced anti-vibration handling plus electronic, user-adjustable speed control. Power and signal connections are made first, using the supplied mains lead to the PSU and an XLR link from the turntable to the PSU. To reduce hum risk, the manual recommends placing the power supply as far from the turntable as the interconnect cable allows. The PSU also enables quick speed selection between 33 1/3 rpm and 45 rpm, with the Rega logo illuminating when powered.
Tonearm setup centers on cartridge positioning and correct force settings. After mounting the cartridge and using the supplied protractor, overhang is automatically set for three-point Rega cartridge systems. With the stylus guard removed, you start by setting tracking force and bias controls to zero, balance the arm by adjusting the tungsten balance weight, then set the required tracking force according to the cartridge manufacturer range. The process also accounts for normal arm movement during balancing, advising gentle handling to prevent unwanted horizontal drift.
Because real-world speed matters, the Planar 10 setup supports both strobe-based verification and fine electronic adjustment. For best accuracy, the Rega Strobe kit uses a stroboscopic disc and a quartz-locked 100 Hz LED to visually “freeze” the bars. If the bars appear stationary, the speed is correct; drifting left or right indicates fast or slow, letting you correct using the P10 PSU. Alternatively, the iPhone “RPM” app can help with speed checks, but the guidance stresses that third-party readings depend on phone conditions and should be verified against a reference if you are unsure.
Key takeaways
- Electronic speed control via the P10 PSU supports precise, quick rpm changes.
- Cartridge alignment and correct tracking force and bias settings are critical for clean performance.
- Use the Rega Strobe kit for the most reliable speed verification.
- Phone apps may assist, but confirm calibration with a proper reference.
Notes
- For optimum results, replace Rega drive belts about every five years.
- Ensure you power down before unplugging the PSU, and avoid moisture or opening the unit.
- Due to the stroboscopic effect, people with photo-induced epilepsy are strongly advised not to use the strobe device.
Search for 67,706 Manuals online


Type-in Brand or Model