
Pioneer AVH-A7100BT Manual
PDF manual · 52 Pages
English


Quick check
Incorrect answer, please try again.
Chat with your Pioneer AVH-A7100BT manual using AI
Get instant AI answers from your Pioneer AVH-A7100BT manual
Ask anything about the Pioneer AVH-A7100BT. Answers come from this manual, with the pages they are based on.
AVH-A7100BT Maintenance Schedule
Wipe discs with a soft cloth from the center outward. Do not use chemicals or attach labels.
Turn off the product and wipe the screen with a soft dry cloth. Do not use abrasive cleaners.
Ask a Question
Do you recommend AVH-A7100BT?
Yes NoFrequently Asked Questions
Pioneer advises professional installation due to electrical risks and integration with vehicle systems. If you attempt DIY, disconnect the negative battery terminal, follow wiring diagrams exactly, observe fuse ratings, and avoid interfering with airbags or vehicle controls.
Is this answer helpful?
When the reverse-gear input (violet/white) and REAR VIEW CAMERA IN are correctly wired, the display automatically switches to the camera feed when the vehicle is put into reverse. Only connect a compatible reverse or mirror-image camera and configure required settings in the unit.
Is this answer helpful?
For four-channel speaker output, use speakers rated over 50 W (max input) with impedance between 4 Ω and 8 Ω. If using a 2 Ω subwoofer on the rear output, use speakers over 70 W. When adding external amplifiers, use the blue/white remote output (max 300 mA) and proper RCA cabling.
Is this answer helpful?
Supported interface cables include specific Pioneer USB/iPod cables and standard USB A–micro B (max 2 m) or USB A–C (max 4 m) per USB specifications. Using unsupported cable types or lengths may cause unreliable operation.
Is this answer helpful?
Mount the microphone where driver voice pickup is optimal: typically on the sun visor (in the up position) or steering column. Ensure the unit is off (ACC OFF) during connection and secure the cable away from moving parts.
Is this answer helpful?
Leave ample space (about 5 cm recommended) behind the unit for heat dissipation, avoid covering ventilation areas, and ensure the LCD panel can open/close without contacting the dashboard. Install on a surface within 0–30° tolerance.
Is this answer helpful?
Secure all wiring with clamps or insulating tape, do not directly connect the yellow lead to the battery, ground this unit separately from high-current devices, insulate unused speaker leads, and replace fuses only with the specified rating.
Is this answer helpful?
Advantages and Disadvantages
Advantages

- Comprehensive connectivity: USB for iPhone/Android, RCA outputs, AUX, and camera inputs.
- Flexible audio routing: front/rear/sub outputs and selectable speaker modes (STD/NW).
- Automatic rear-camera switching via reverse-gear input for safer backing maneuvers.
- Supports external power amp control with blue/white system remote lead (300 mA max).
- Detailed installation guidance for front/rear DIN mounting and microphone placement.
Disadvantages

- Professional installation strongly recommended; DIY installation carries risk.
- Strict speaker impedance and power requirements; improper matching can damage equipment.
- USB cable length/type restrictions may limit convenient device connections.
- Requires ACC position on ignition switch; not usable in vehicles without ACC.
- Complex wiring with many leads—proper grounding and isolation of high-current devices required.
Product Specification
Type
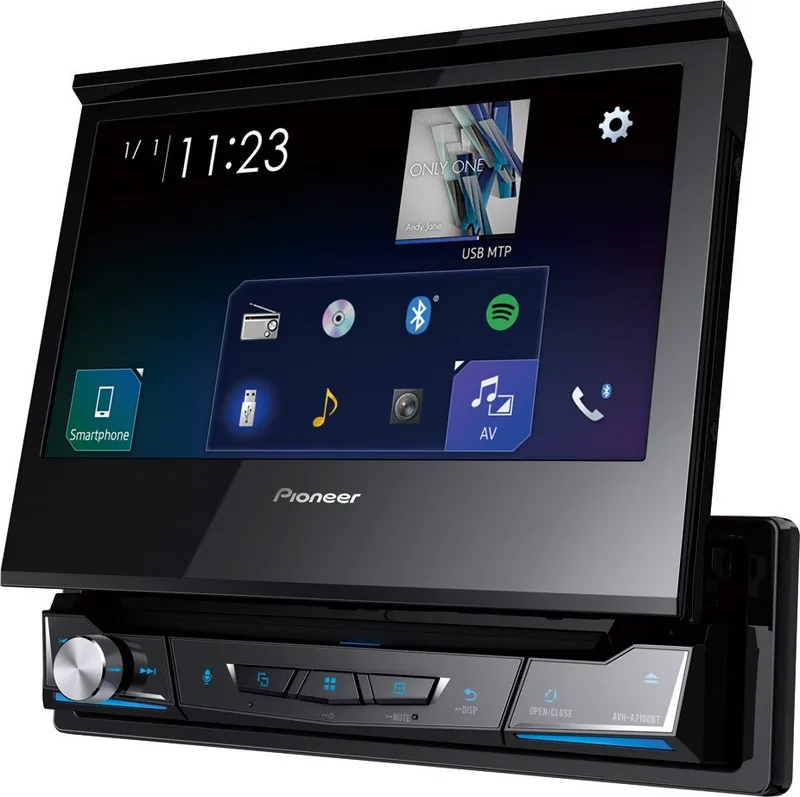
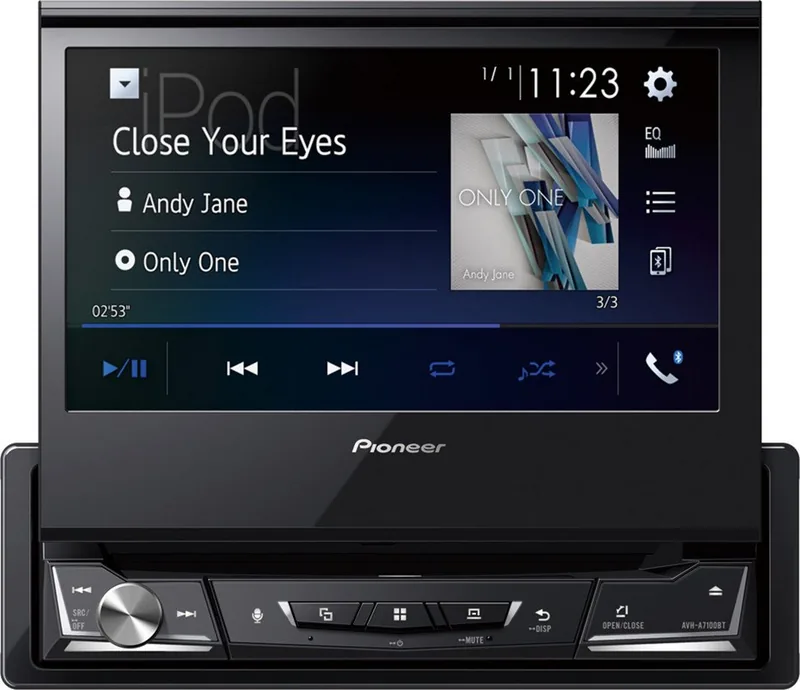
Moniceiver, 1-DIN with retractable monitor
Display
7.0", LCD, 800x480 pixels, Touchscreen
Navigation
no
TMC
no
Tuner
FM, MW, LW
Media
CD (CD-R/RW), DVD (DVD-R/RW), USB storage
Audio formats
AAC, FLAC, MP3, WAV, WMA
Video formats
DivX, FLV, MKV, MPEG-1, MPEG-2, MPEG-4, Xvid
Image formats
JPG
Power
4x 50W Peak, MOSFET
Connections
3x Pre-amp output (4V), 1x AUX In (Rear), 2x Video In, 1x Video Out, 1x USB 2.0 (Rear), Bluetooth
Anti-theft protection
detachable control panel
Special features
Hands-free system, variable illumination, USB charging function (1A), 13-band equalizer
Product Description
Pioneer AVH-A7100BT Manual - Overview and Product Description
The Pioneer AVH-A7100BT is a versatile double-DIN in-dash multimedia receiver designed for drivers who want a robust combination of audio, video, smartphone integration, and camera support. With a motorized touchscreen, multiple input and output options, and flexible speaker configurations, the unit targets users seeking an upgrade from factory radios to a feature-rich aftermarket system.
Key features and capabilities
The AVH-A7100BT supports USB connections for iPhone and Android devices (with appropriate interface cables), allowing playback, charging, and certain device controls. It includes dedicated RCA outputs for front, rear, and subwoofer channels and supports connection to external power amplifiers via a system remote lead. The unit provides selectable speaker modes (standard or network), multilayer wiring arrangements for compatibility with varied vehicle ISO connectors, and specific lead assignments for power, accessory, ground, illumination, reverse signal, and parking-brake detection.
A notable convenience is rear-view camera integration: when wired to the reverse-gear input, the display automatically switches to the camera feed when the vehicle is put in reverse. Rear-monitor output and auxiliary video inputs enable connection of external displays or video components for passengers. The AVH-A7100BT also features a microphone input for hands-free calling and voice pickup, with recommended mounting locations and cable routing guidance.
Installation and safety notes
Pioneer emphasizes professional installation due to electrical and safety considerations. The manual cautions against installing the unit where it obstructs driver vision or interferes with airbags or vehicle controls. Proper grounding practices are stressed—ground leads for this unit must be separate from high-current components like power amplifiers. The guide warns about cable routing away from moving parts and heat sources, correct fuse ratings, and disconnecting the negative battery terminal before installation to avoid shorts. There are detailed instructions for front-mount and rear-mount DIN installation, bracket positioning, and maintaining ventilation gaps for heat dissipation.
Audio and connectivity guidance
The receiver warns about speaker impedance and power limits when using internal amplifier outputs (recommended 4–8 Ω, >50 W when using four-channel outputs; subwoofer guidance for 2 Ω loads). USB cable length limits and supported cable types are specified to ensure reliable operation. The manual outlines wiring for stereo and mono outputs, RCA connections for external amplifiers and displays, and the function of the blue/white system remote lead.
Practical user tips
Mount the external microphone for optimal voice pickup (sun visor or steering column) and secure wires with clamps or tape, avoiding wrapping cables around the steering column or gear lever. Configure speaker mode during initial setup when using a subwoofer. For rear camera use, only connect a compatible reverse or mirror-image camera input and be aware that on-screen images may appear reversed or distorted relative to real-world distance perception.
Notes
- Professional installation is strongly recommended.
- Observe fuse ratings and wiring insulation precautions.
- Keep ventilation clear and allow space behind the unit for heat dissipation.
Search for 67,706 Manuals online


Type-in Brand or Model