
Pewag Snox Pro Manual
PDF manual · 52 Pages
English



Quick check
Incorrect answer, please try again.
Chat with your Pewag Snox Pro manual using AI
Get instant AI answers from your Pewag Snox Pro manual
Ask anything about the Pewag Snox Pro. Answers come from this manual, with the pages they are based on.
Snox Pro Maintenance Schedule
Clean the snow chains after every use to remove dirt and salt.
Allow the snow chains to dry completely before packing them away.
Ask a Question
Do you recommend Snox Pro?
Yes NoFrequently Asked Questions
Check that the blue quick release lock is closed and the green car indicator is visible. Ensure the red ring is between the tire and street, and drive 1/4 rotation to settle it. Recheck the fit after fifty meters.
Is this answer helpful?
Clean the chains immediately after every outing to remove road salt and debris. Let them dry completely before packing them away to prevent rust and corrosion. Do not store them while wet.
Is this answer helpful?
No, you should drive at walking speeds initially to check fit. Follow manufacturer limits for snow chain usage on roads. Prolonged use on dry pavement is discouraged to avoid damage to the tire and road.
Is this answer helpful?
When the blue lock is open, you will see a red crossed-out car symbol in the window. This shows the tension is released and you can proceed to remove the chain from the tire.
Is this answer helpful?
The red box must be positioned on the inner side of the tire. Place it from the top over the tire and ensure it sits correctly before pulling the red ring down firmly.
Is this answer helpful?
If the chain twists during removal, stop and pull it firmly forward to release the ring. Ensure links are not jammed in the tire tread before trying again.
Is this answer helpful?
Advantages and Disadvantages
Advantages

- Visual feedback system with blue lock indicates proper closure
- Designed specifically for passenger cars with easy tensioning
- Red box mechanism secures chain firmly on inner side
- Minimizes need for complex tools during mounting
- Requires minimal force for quick installation
Disadvantages

- Must be dried thoroughly to prevent corrosion
- Plastic clips may break if forced incorrectly
- Requires walking speed check after fifty meters
- Not suitable for extended driving on dry asphalt
- Tire size compatibility must be verified beforehand
Product Specification
Vehicle Type
Car
Type
Snow Chain
Tensioning
Automatic
Rim Protection
Yes
Product Description
Mastering Winter Driving with Pewag Snox Pro Chains
Navigating snowy roads requires reliable equipment to ensure safety and control throughout the winter season. The Pewag Snox Pro Manual provides comprehensive guidance for vehicle owners looking to purchase and operate high-quality snow chains. These chains are specifically designed for passenger cars and offer a significantly user-friendly experience compared to traditional, more cumbersome options. Understanding the specifics of installation, removal, and ongoing care is crucial for maintaining longevity and performance on icy routes. Winter weather can be unpredictable, making preparation vital for every driver planning a trip in cold conditions. Proper preparation can turn a hazardous drive into a manageable journey through snow and ice.
Why Choose Pewag Snox Pro Chains?
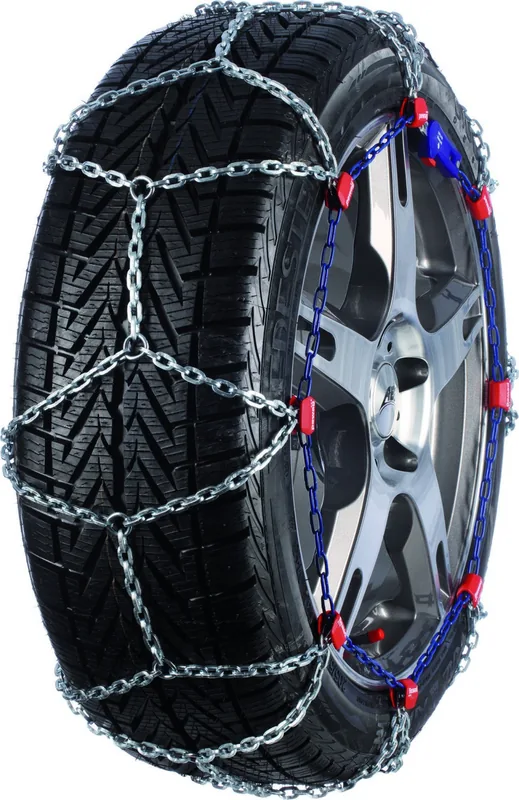
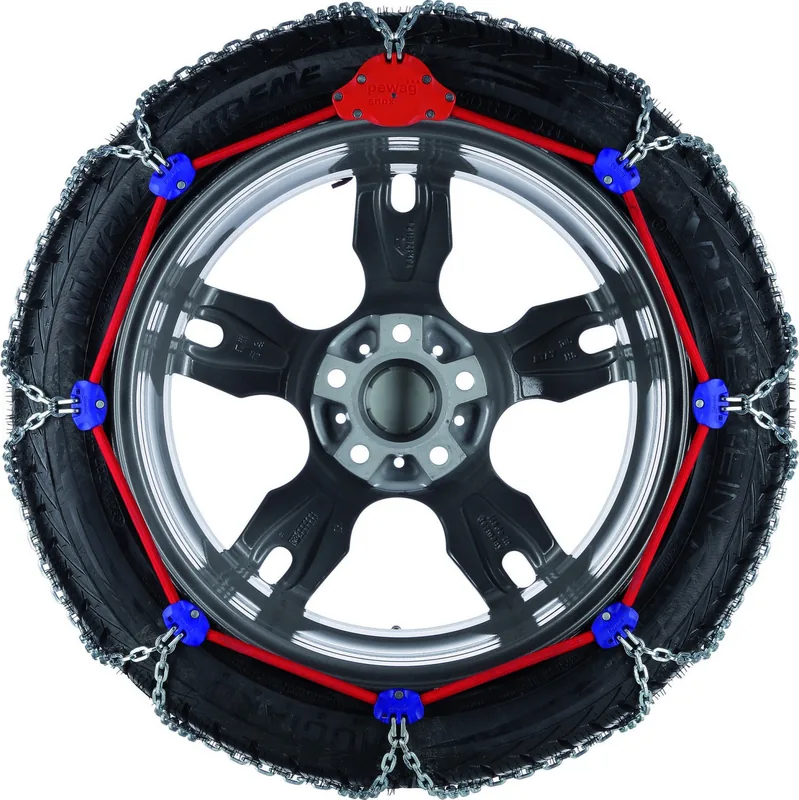
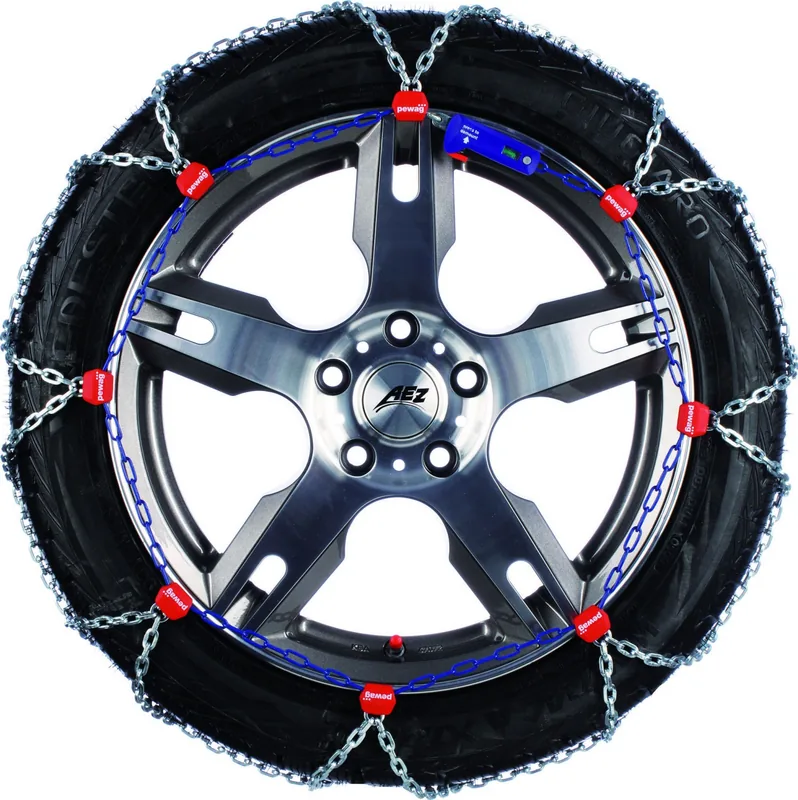
The overall design focuses heavily on ease of use for drivers needing quick deployment. Key identifiers include the durable blue quick release lock and the distinct red tensioning ring system. When the blue lock is secured properly, a green car indicator becomes visible within the window, confirming readiness for travel. This visual feedback system simplifies the process, reducing human error during cold mornings when visibility might be compromised. The red box mechanism sits on the inner tire side, securing the chain firmly between the tire and the roadway surface. This design reduces the need for complex tools or excessive force during mounting.
Installation Overview Step by Step
Proper setup is absolutely essential for safe driving conditions on slippery surfaces. Begin by ensuring the blue lock is fully closed before handling the rest of the assembly. Next, pull the red ring apart near the red box and position it from the top over the tire. It must rest securely on the inner side of the wheel. Firmly pull the red ring downward behind the tire using both hands to ensure even tension. Ensure all blue clips remain untwisted during this step. Watch out for plastic clips laying on the tread of the tire. Pull the ring until it is positioned between the tire and the street.
Once positioned, drive the car approximately a quarter of a wheel rotation. This movement settles the chain into the correct profile. It is recommended to move the vehicle slightly downhill during this process to ensure better tension. Always recheck the fit after traveling about fifty meters at walking speed to confirm safety. This ensures no links have snagged on the tread. Regular inspections prevent accidents caused by loose chains during high-speed travel situations.
Removal and Care Guidelines
Removing the chains follows a similar logic but requires specific steps. Stop your vehicle and release the blue lock until a red crossed-out car is visible. Pull the chain firmly forward to release the tensioning ring from the tire. Ensure the chain is not twisted on the tread when moving the ring. After use, cleaning is mandatory to prevent damage. Rinse off road salt and debris immediately after every outing to prevent corrosion. Dry the chains completely before storing them in a dry environment. Checking vehicle manuals for specific tire size requirements helps ensure compatibility before purchase. Safety remains the priority when adapting to changing weather patterns. Do not let the unit freeze if possible, as this could hinder the mechanism. Follow these steps for optimal performance every time. Contact a specialist if repairs are needed later. Manufacturer warnings must be read before driving.
Search for 67,706 Manuals online


Type-in Brand or Model