
Palram Hybrid 6x6 Manual
PDF manual · 108 Pages
English



Quick check
Incorrect answer, please try again.
Chat with your Palram Hybrid 6x6 manual using AI
Get instant AI answers from your Palram Hybrid 6x6 manual
Ask anything about the Palram Hybrid 6x6. Answers come from this manual, with the pages they are based on.
Hybrid 6x6 Maintenance Schedule
Use a mild detergent solution and rinse with cold clean water. Do not use acetone or abrasive cleaners.
Keep the roof and gutters free of snow, dirt, and leaves to prevent heavy load damage and safety hazards.
Free maintenance reminders
Timed to your purchase date. Always free, unsubscribe anytime.
Ask a Question
Do you recommend Hybrid 6x6?
Yes NoFrequently Asked Questions
The manual strongly recommends assembly by at least two people due to part sizes and some sharp metal edges; teamwork improves safety and makes handling frames and panels easier.
Is this answer helpful?
Choose a perfectly flat, level, sunny spot away from overhanging trees and excessive wind. Prepare a solid foundation (concrete, asphalt, or similar) and use the greenhouse base's predrilled holes to anchor it securely.
Is this answer helpful?
All panels stamped "THIS SIDE OUT" must face outward to ensure full UV protection. Remove plastic stickers as panels are locked in place; avoid spraying polycarbonate panels with lubricant.
Is this answer helpful?
Screws 411 and nuts 412 & 466 are used throughout. Initially, install screws only 2–3 turns (do not fully tighten) until panel assembly is complete, then tighten all screws as the final step to avoid misalignment.
Is this answer helpful?
Clean with a mild detergent solution and rinse with cold water. Do not use acetone, abrasive cleaners, or special detergents on panels. Keep roof and gutters clear of snow, leaves and debris to prevent damage and maintain safety.
Is this answer helpful?
Yes—the door can be installed as left- or right-hand hinged. The manual demonstrates a right-hand assembly but provides instructions for either orientation by locating part 987 for hinge placement.
Is this answer helpful?
Yes—anchoring the greenhouse to a leveled, solid foundation is essential for stability and is required to validate the warranty according to the manual.
Is this answer helpful?
Advantages and Disadvantages
Advantages

- Compact 6x6 footprint ideal for small gardens and patios.
- Aluminum frame with multiwall polycarbonate panels offers good durability and insulation.
- Flexible door and window installation (left/right door; multiple window positions).
- Clear assembly manual with predrilled base holes and parts guidance.
- Low-maintenance cleaning using mild detergent; panels resist UV when oriented correctly.
Disadvantages

- Requires at least two people and careful handling due to sharp metal edges.
- Must be anchored to a solid, level foundation; anchors and screws depend on foundation type.
- Panels require correct orientation ("THIS SIDE OUT") and cautious handling to avoid damage.
- Some screws must remain loosely fitted until final assembly, which may confuse inexperienced builders.
- Not suitable for extremely windy or exposed locations without robust anchoring.
Product Specification
Glazing
Polycarbonate 0.16in
Frame
Aluminum
Color
silver
Area
36.57ft2
Special Features
Opening window, lockable
Door
Swing door
Dimensions (LxWxH)
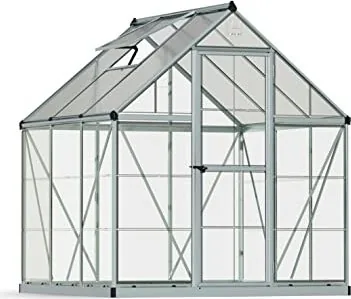
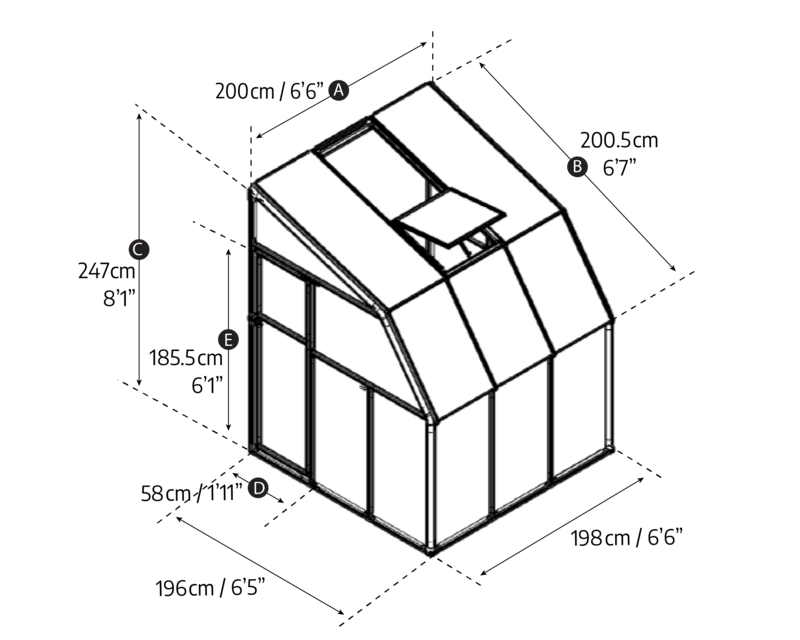
72.83x72.83x81.89in
Included
Steel foundation
Product Description
Palram Hybrid 6x6 Greenhouse Silver Manual
The Palram Hybrid 6x6 Greenhouse Silver is a compact, durable greenhouse designed for hobby gardeners who want a reliable year-round growing space. Built with an aluminum frame and multiwall polycarbonate panels, this model balances light transmission, insulation and structural strength. The Hybrid design pairs solid framing with high-transparency panels to create a stable microclimate ideal for seedlings, potted plants and seasonal cultivation.
Assembly is a two-person job and the Palram Hybrid 6x6 Greenhouse Silver Manual provides step-by-step guidance to ensure safe, correct installation. The manual emphasizes site selection—choose a flat, level, sunny spot away from overhanging trees and excessive wind—and stresses anchoring the greenhouse to a solid foundation for stability and to preserve the warranty. Pre-assembly preparation includes sorting parts, checking inventories, and keeping small hardware contained and organized.
The greenhouse uses predrilled holes in the steel base for fastening and requires compatible screws and anchors based on your foundation type. Panels are marked "THIS SIDE OUT" and must face outward to ensure full UV protection. The manual advises using silicone lubricant sparingly to ease panel insertion into profiles (do not spray panels), and a rubber mallet where needed. It also clarifies door and window installation options: the door can be fitted left- or right-handed, and the window location is flexible with guidance for adjustment if it does not close properly.
Safety is a consistent focus: wear gloves, eye protection and long sleeves; avoid assembly in windy or wet conditions; keep children away; and do not attempt assembly while impaired or fatigued. The manual cautions about sharp metal edges, proper handling of tools, and clearing roof gutters of snow, leaves and debris to prevent dangerous loads. It repeatedly notes that screws 411 and nuts 412 & 466 are used throughout assembly and should only be initially turned a few turns until panel assembly is complete, with final tightening at the end.
Maintenance and cleaning are simple: use a mild detergent solution and rinse with cold water; never use acetone, abrasive cleaners, or special detergents on polycarbonate panels. Regularly clear debris and snow from the roof and gutters to maintain safety and longevity. After assembly, anchor the greenhouse firmly to a level surface to ensure rigidity and warranty validity.
Notes:
- Follow the assembly sequence in the manual; some steps require installers inside the greenhouse, others outside.
- Use a soft surface under parts during assembly to avoid scratches.
- Keep plastic bags away from children and dispose of packaging safely.
Search for 67,706 Manuals online


Type-in Brand or Model