
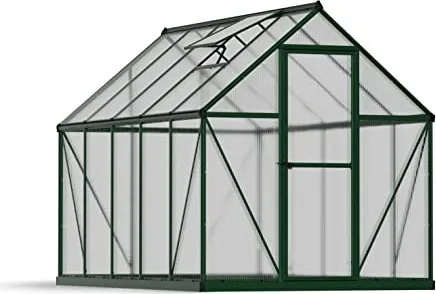
Palram Canopia Mythos 6x10 Manual
PDF manual · 64 Pages
English



Quick check
Incorrect answer, please try again.
Chat with your Palram Canopia Mythos 6x10 manual using AI
Get instant AI answers from your Palram Canopia Mythos 6x10 manual
Ask anything about the Palram Canopia Mythos 6x10. Answers come from this manual, with the pages they are based on.
Ask a Question
Do you recommend Canopia Mythos 6x10?
Yes NoFrequently Asked Questions
It is designed to create a protected growing space for plants, seedlings, herbs, and vegetables. The structure helps retain warmth and light while offering shelter from weather changes, making it useful for year-round gardening support.
Is this answer helpful?
The instructions strongly suggest two people for the build. The parts are multi-piece, the frame needs careful alignment, and certain steps are easier and safer with an extra set of hands.
Is this answer helpful?
Yes, a flat and level foundation is strongly recommended. A solid concrete base is preferred because it improves stability, makes anchoring easier, and helps the greenhouse withstand wind and everyday use.
Is this answer helpful?
Yes, the door can be set up as a left-hand or right-hand opening door. The assembly steps help you choose the direction before final tightening, so you can match the layout to your space.
Is this answer helpful?
Use mild detergent with cold, clean water. Avoid acetone, abrasive cleaners, and strong special detergents, since these can damage the clear panels and reduce their appearance over time.
Is this answer helpful?
After assembly, all screws should be tightened properly, the greenhouse should be securely anchored, and the roof panel caps should be checked periodically to make sure they remain in place.
Is this answer helpful?
Advantages and Disadvantages
Advantages

- Twin-wall polycarbonate panels help diffuse light and support a more stable growing climate.
- Aluminum frame offers a lightweight but durable structure for long-term garden use.
- Spacious 6x10 layout gives room for seedlings, pots, and compact shelving.
- Door and window setup can be adjusted to suit the site and preferred access.
Disadvantages

- Assembly is detailed and time-consuming, so it is best handled by two people.
- Strong anchoring is required; a weak base can reduce safety and stability.
- Some panel and screw steps require careful attention to avoid alignment issues.
- Cleaning must be gentle, so harsh products cannot be used on the clear panels.
Product Specification
Glazing
Polycarbonate 4mm
Frame
Aluminum
Color
silver
Special features
Roof window, Rain gutter
Door
Swing door
Dimensions (LxWxH)
120.47x72.83x81.89in
Weight
101.21lb
Scope of delivery
Base frame
Product Description
Tepro Mythos 6x10 Greenhouse
The Tepro Mythos 6x10 Greenhouse is a practical choice for gardeners who want a reliable space for seedlings, herbs, and seasonal plants. Built with a sturdy aluminum structure and twin-wall polycarbonate glazing, it is designed to balance light transmission with added insulation. Its size, around 306 x 185 x 208 cm, gives you enough room for organized growing without taking over the whole yard.
What makes this greenhouse appealing is its focus on everyday usability. The frame is made for steady performance, while the clear panels help create a bright growing environment that supports healthy plant development. The roof and wall design also encourages a more stable internal climate, which can be useful when starting plants early or extending the growing season later into the year. If you are comparing options and reading a Tepro Mythos 6x10 Greenhouse Manual, the main takeaway is that this model is built for careful, step-by-step assembly and long-term placement on a level base.
Assembly is clearly intended to be a two-person job, and the instructions emphasize patience, order, and proper anchoring. The greenhouse should be fixed to a solid foundation, ideally concrete, to improve stability and safety. There are also helpful details about door orientation, window placement, and screw handling, which makes it easier to customize the setup to fit your space. These small choices can make a big difference in daily use, especially if you want smoother access and better airflow.
Maintenance is straightforward. Gentle cleaning with mild detergent and cold water is recommended, while abrasive cleaners and acetone should be avoided to protect the panels. Periodic checks on roof panel caps and fasteners help keep the greenhouse secure and performing well over time. In practice, this is a greenhouse that rewards careful installation and light routine upkeep.
For home gardeners, the Tepro Mythos 6x10 offers a solid mix of space, protection, and practical construction. It is not a flashy product, but it delivers the kind of dependable growing environment many gardeners need for vegetables, flowers, and propagation work.
Notes
- Best installed on a flat, sunny location.
- Anchoring is strongly recommended for safety.
- Door direction can be chosen during assembly.
- Regular checks help maintain panel stability.
Search for 67,706 Manuals online


Type-in Brand or Model