
Omnitronic TUNA-NET-CD 19 Manual
PDF manual · 48 Pages
English



Quick check
Incorrect answer, please try again.
Chat with your Omnitronic TUNA-NET-CD 19 manual using AI
Get instant AI answers from your Omnitronic TUNA-NET-CD 19 manual
Ask anything about the Omnitronic TUNA-NET-CD 19. Answers come from this manual, with the pages they are based on.
TUNA-NET-CD 19 Maintenance Schedule
Disconnect from mains. Wipe with a soft, lint-free, moistened cloth. Do not use alcohol or solvents.
Replace two AAA batteries when the remote stops working or its range decreases.
Remove batteries if the device is not used for a longer period to prevent leakage and damage.
Ask a Question
Do you recommend TUNA-NET-CD 19?
Yes NoFrequently Asked Questions
Connect the rod antenna to the Wi-Fi jack. Navigate to the settings menu on the device or use the remote to select network options. You can choose to add an access point via scan for manual password entry or use the WPS button on your router if available.
Is this answer helpful?
Yes, the device features a microSD card slot for playback of MP3 and FLAC files. To use this, insert the card, select the Storage option in the main menu, and browse the available files to start playback.
Is this answer helpful?
Yes, it includes both digital optical Toslink outputs and analog stereo Cinch outputs. You can connect these to an external amplifier or active speakers to route the audio signal for higher volume or better sound quality.
Is this answer helpful?
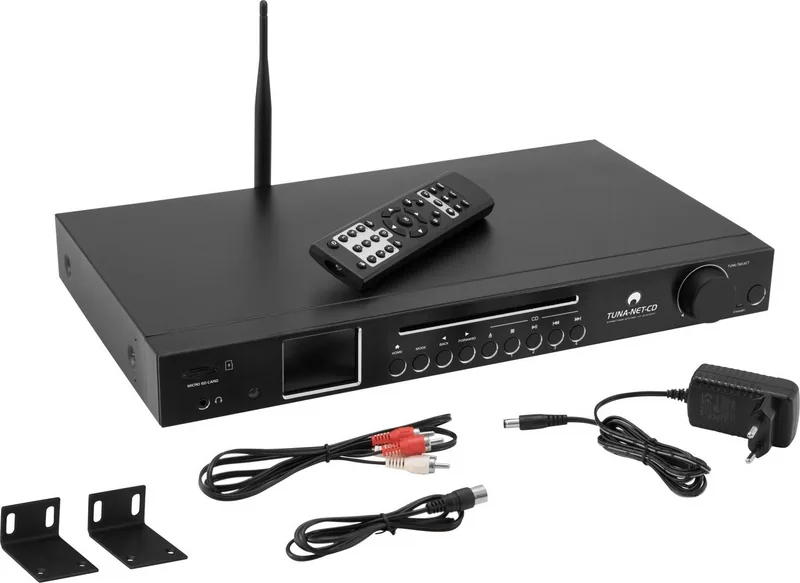
Yes, the product delivery includes an infrared remote control along with the unit. You will need to insert two AAA batteries into the compartment on the back of the remote to operate it for basic functions like volume and menu navigation.
Is this answer helpful?
The device fits into a standard 19-inch rack and requires one HE of space. You must attach the supplied mounting brackets to the sides of the chassis. Secure the unit with M6 screws in the rack slots to ensure stability.
Is this answer helpful?
No, this unit does not have recording capabilities for a CD player. It is designed for playback of CDs, internet streams, and stored media but cannot capture audio input from the disc drive to save files.
Is this answer helpful?
Navigate to the system settings or configuration menu on the device. Select the option to reset to default settings. Note that this will delete all saved network information and favorite station presets, so ensure you have a backup if needed.
Is this answer helpful?
Advantages and Disadvantages
Advantages

- Versatile playback options including Internet, DAB+, FM, Bluetooth, and physical media.
- High-quality digital and analog outputs suitable for external amplification systems.
- Large 2.4-inch TFT display for easy viewing of station and track information.
- Flexible installation with standard 19-inch rack mount compatibility and brackets.
- Integrated Skytune service allows access to global internet radio stations easily.
Disadvantages

- Alarm function cannot operate when the power supply is switched off entirely.
- No folder navigation is available on the SD card and CD playback modes.
- Antenna connections are required for optimal DAB+ and FM radio reception.
- Manual setup of Wi-Fi network keys can be complex without smartphone app.
- Display information for stations depends on data provided by the broadcaster.
Product Specification
Audio Formats
CD-Audio, CD-R/RW, DVD-R/RW, DVD+R/RW, MP3
Tuner
FM, DAB, DAB+, Internet Radio
Audio Connections
Digital Audio Out (coaxial), Digital Audio Out (optical), Headphones (0.25 inch jack)
Additional Connections
Card Reader (SD)
Wireless
Bluetooth, Wi-Fi 4 (WLAN 802.11b/g/n)
Features
Remote Control
Color
Black
Dimensions
16.93x1.85x10.63 in (WxHxD)
Weight
5.47 lbs
Product Description
Omnitronic TUNA-NET-CD 19 Audio Experience
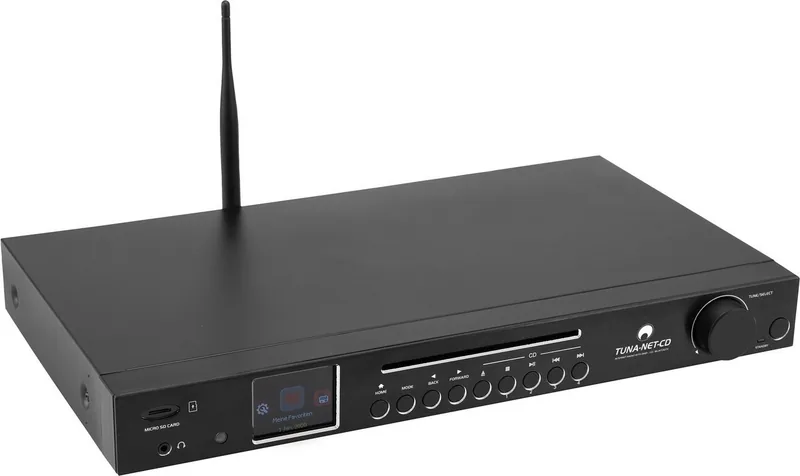
The Omnitronic TUNA-NET-CD 19 represents a versatile addition to any modern audio enthusiast collection. It combines classic CD playback with advanced streaming capabilities. This device allows users to access thousands of internet radio stations worldwide via Skytune integration. You can stream music directly from a local media server using UPnP or DLNA protocols. Bluetooth connectivity enables wireless streaming from smartphones, tablets, and notebooks without cable complexity.
Sound Quality and Control
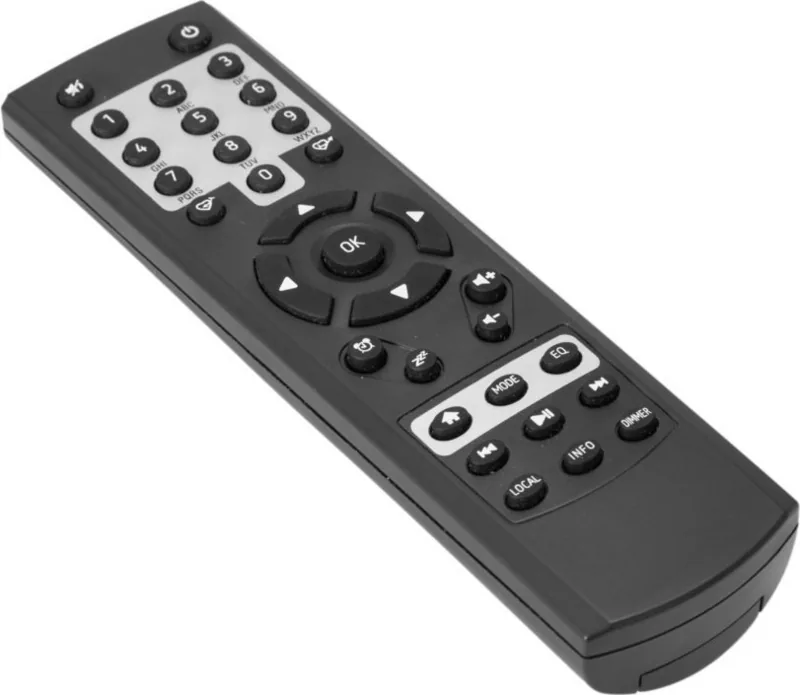
Sound quality is enhanced through various equalizer presets available in the main menu. Users can adjust frequencies to match their specific listening environment or external speaker system. A large 2.4-inch TFT color display provides clear information about current tracks, stations, and system settings. Control is simplified via a dedicated jog dial on the front panel or the included infrared remote control. You can navigate through favorites, radio bands, and stored media files effortlessly. The remote control features number buttons for text entry and dedicated keys for favorites. The device also features a dual alarm function for waking up to music or radio broadcasts. A sleep timer allows for automatic shutdown after a set duration of usage ranging from 15 to 180 minutes.
Connectivity and Installation
The documentation for the Omnitronic TUNA-NET-CD 19 Manual provides guidance on setup procedures. Connection options include digital optical Toslink and analog Cinch outputs for connecting to external amplifiers. There is also a dedicated headphone jack positioned on the front panel for private listening sessions. Users can insert microSD cards into the slot or play physical audio CDs directly. Antenna ports allow for FM and DAB+ reception without requiring any internet dependency. This ensures reliable access to local broadcasts even when offline. Digital outputs include coaxial SPDIF for cleaner signal transmission.
For professional setups, the unit fits into a standard 19-inch rack system. It requires only one unit of height and includes removable mounting brackets. This makes it ideal for home studios or dedicated listening rooms where space is limited. Power consumption remains low during standby mode while retaining network settings. The device handles various audio formats including MP3, FLAC, AAC, and WAV efficiently. It scans for local radio networks automatically upon activation. Network settings allow for WPS connection or manual entry of Wi-Fi keys with a keypad.
Maintenance and Safety
Regular cleaning is recommended to maintain performance. Use a dry cloth to wipe the surface without moisture entering ports. The aluminum front panel resists dust accumulation effectively. Keep the device away from water and extreme heat sources. Ensure ventilation is clear when installed in an enclosed rack. This prevents overheating and ensures long-term reliability for your audio rig. Enjoy high fidelity sound with robust connectivity options today. It supports summer and winter time switching automatically. Keep your collection organized with digital storage solutions.
Search for 67,706 Manuals online


Type-in Brand or Model