
Noctua NM-AMB13 Manual
PDF manual · 1 Pages
English


Quick check
Incorrect answer, please try again.
Chat with your Noctua NM-AMB13 manual using AI
Get instant AI answers from your Noctua NM-AMB13 manual
Ask anything about the Noctua NM-AMB13. Answers come from this manual, with the pages they are based on.
Ask a Question
Do you recommend NM-AMB13?
Yes NoFrequently Asked Questions
It supports Socket AM5 and Socket AM4, specifically for Ryzen 5000, 3000 series CPUs.
Is this answer helpful?
No, long screws NM-ALS1 are not included and must be found with your cooler or bought separately.
Is this answer helpful?
You should gently tighten the screws until they stop without excessive force, maxing at 0.6 Nm.
Is this answer helpful?
Yes, if your CPU cooler is already installed, you must unscrew it from the original mounting bars first.
Is this answer helpful?
They go over the threads of the motherboard backplate when installing new hardware to ensure proper fit.
Is this answer helpful?
Yes, on other AM4 CPUs or if clearance issues exist, choose the standard position zero offset.
Is this answer helpful?
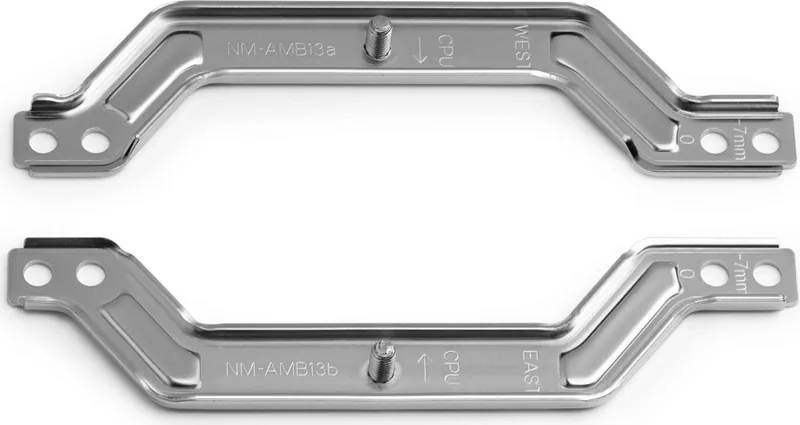
The NM-AMB13a bar with WEST marking goes to the left, and NM-AMB13b with EAST goes to the right.
Is this answer helpful?
Advantages and Disadvantages
Advantages

- Improves thermal contact on AM5 and AM4 sockets significantly for better cooling.
- Features clear WEST and EAST labeling for correct bar placement orientation.
- Prevents uneven pressure distribution that can damage chips or boards.
- Compatible with standard AMD stock backplates found on most motherboards.
- Allows selection between offset or standard positions based on clearance needs.
Disadvantages

- Separate purchase required for plastic spacers needed for installation process.
- Long screws are also not included and must be sourced from your cooler.
- Specific torque limits apply and user must avoid overtightening hardware.
- Not suitable for all AM4 variants that require standard mounting position.
- Installation requires removal of existing cooler which takes extra time.
Product Specification
Type
Mounting kit
Product Description
Enhancing Thermal Performance with Offset Mounting
Understanding the Need for Adjustment
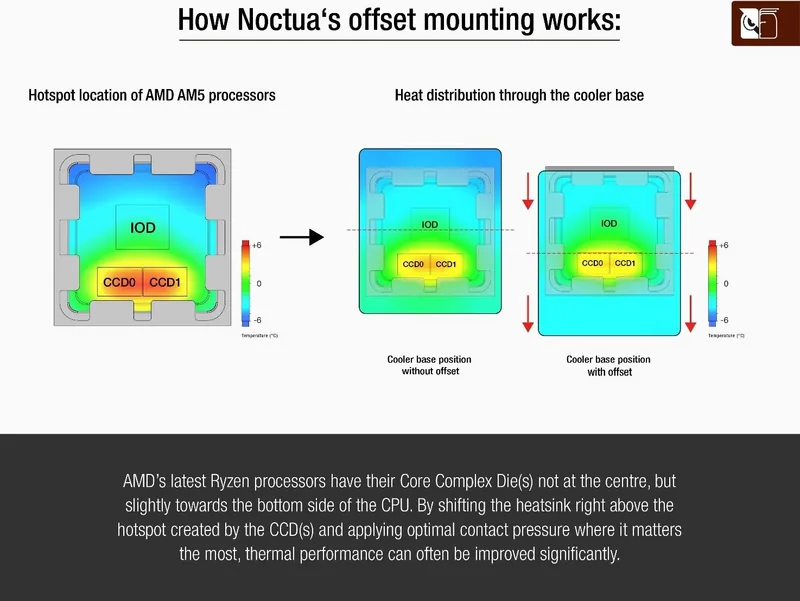
PC builders often struggle with achieving perfect contact between a CPU cooler and the processor die physically. Standard mounting solutions sometimes result in slight tilts that reduce cooling efficiency significantly. The Noctua NM-AMB13 offset mounting bars solve this problem for users of Socket AM5 and AM4 platforms effectively. These components allow for precise height adjustments, ensuring the heatsink presses down uniformly across the top surface. This is particularly important for high-performance CPUs that generate significant heat during operation. By addressing contact unevenness, system temperatures remain lower under heavy loads consistently. Users looking to optimize their cooling solution should consider this specific upgrade for their build. It ensures the best possible performance from your silicon investment without voiding warranties.
Preparation and Removal Steps
Proper preparation prevents damage to your motherboard or cooler components during the swap. If you are replacing existing hardware, unscrew the CPU cooler first carefully. Then, detach the original mounting bars from the backplate and remove them completely. For brand new installations, remove the motherboard heatsink retention module first. You should place plastic spacers over the threads of the motherboard backplate specifically. Refer to the manual for spacer placement to avoid interference with other components nearby. This ensures a clean setup before attaching new hardware securely to the board.
Installation Best Practices
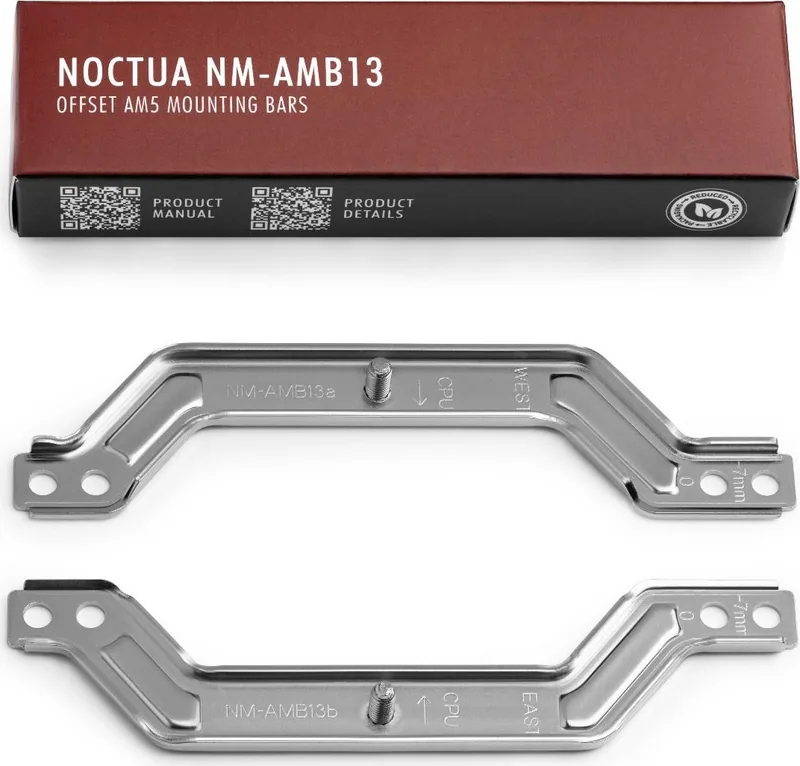
Align the bars correctly to avoid compatibility issues with your specific motherboard model. The NM-AMB13a bar marked with WEST must be installed on the west side of the socket. The NM-AMB13b bar marked with EAST goes to the east side specifically. Markings on the CPU must point correctly towards the processor during assembly. Gently tighten the screws until they stop properly. Do not use excessive force as the torque limit is 0.6 Nm. This protects the board from stress cracks and damage over time. Choose the offset hole position for Ryzen 5000 and AM5 for best results typically. Use the standard position if clearance is restricted by other PCB components. This flexibility helps prevent overheating and ensures stable operation.
Included Parts and Tools
This kit provides the necessary offset bars to upgrade your mounting system effectively. You will need NM-APS4 grey plastic spacers separately for the process. Long screws are also not included with this specific set of mounting hardware. You must use the AMD stock backplate which is pre-installed on the motherboard usually. Ensure you apply thermal paste according to the cooling manual after securing these bars. This setup maximizes heat transfer capability from the processor to the radiator. It is a vital step for enthusiasts demanding the best from their silicon components. Always verify compatibility for specific motherboard models before proceeding with the installation process.
Scanning for Manuals
You can scan the provided code to display multilingual manuals on your phone easily. This feature helps international users understand the process quickly and accurately. Follow the steps precisely to ensure your cooler sits flat against the die. This ensures optimal contact quality and performance across different system configurations reliably. It is always best to read the entire guide before beginning any task. Having the manual available makes troubleshooting easier if any issues arise.
Notes on Compatibility
Verify if your CPU requires the seven millimeter offset for proper contact. Some older AM4 boards might need the zero position instead for clearance. Check clearances with motherboard heatsinks carefully before final mounting. Ensure the plastic spacers fit the threads properly on the backplate. This attention to detail ensures long term reliability for your cooling system.
Search for 67,706 Manuals online


Type-in Brand or Model