
Noctua NM-AMB12 Manual
PDF manual · 1 Pages
English


Quick check
Incorrect answer, please try again.
Chat with your Noctua NM-AMB12 manual using AI
Get instant AI answers from your Noctua NM-AMB12 manual
Ask anything about the Noctua NM-AMB12. Answers come from this manual, with the pages they are based on.
Ask a Question
Do you recommend NM-AMB12?
Yes NoFrequently Asked Questions
-7 millimeters for Ryzen 5000/3000 for optimal contact.
Is this answer helpful?
AM5 and Ryzen 3000/5000 series processors are supported.
Is this answer helpful?
Yes, zero millimeter setting is available for AM4 CPUs.
Is this answer helpful?
Maximum 0.6 Nm recommended to prevent frame damage.
Is this answer helpful?
Grey sleeves and long screws might be needed but not supplied.
Is this answer helpful?
Check the NORTH and SOUTH markings on the bridge.
Is this answer helpful?
Switch to standard position if space is too tight.
Is this answer helpful?
Advantages and Disadvantages
Advantages

- Ensures even contact pressure for improved thermal transfer
- Compatible with AM5 and Ryzen 3000/5000 series sockets
- Includes clearly labeled NORTH and SOUTH mounting bridges
- Allows switch to standard position if offset conflicts occur
- Supports precise thermal solutions for high-end systems
Disadvantages

- May require purchasing additional spacers or screws separately
- Requires careful torque management to avoid hardware damage
- Offset position might conflict with nearby memory cooling components
Product Specification
Type
Mounting Kit
Product Description
Noctua NM-AMB12 Offset Mounting Bars Overview
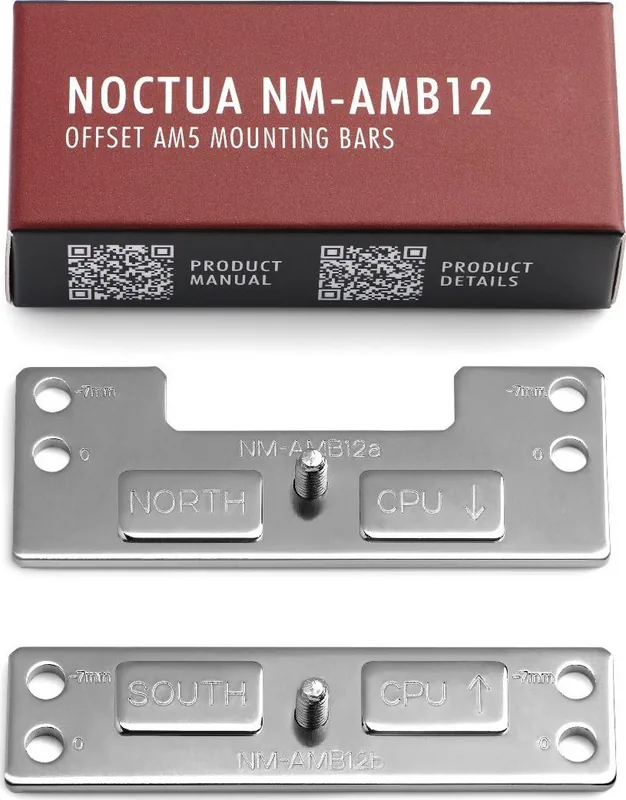
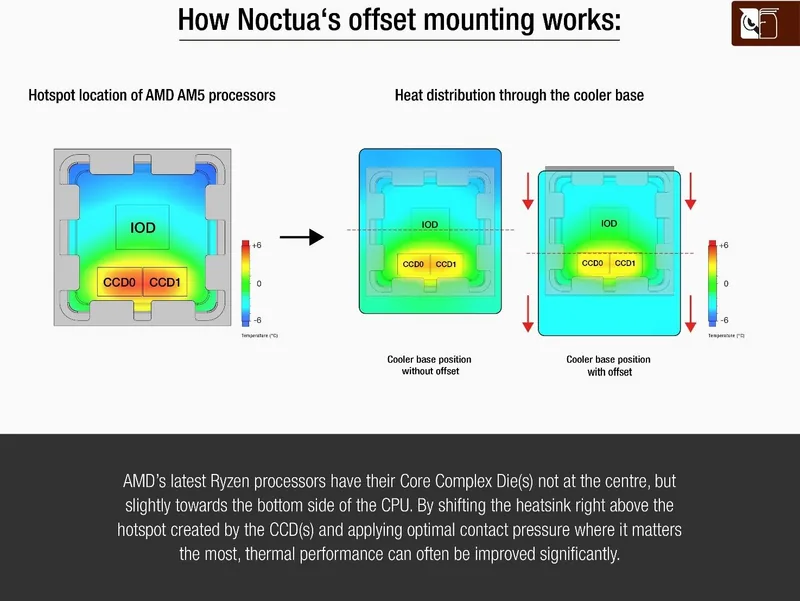
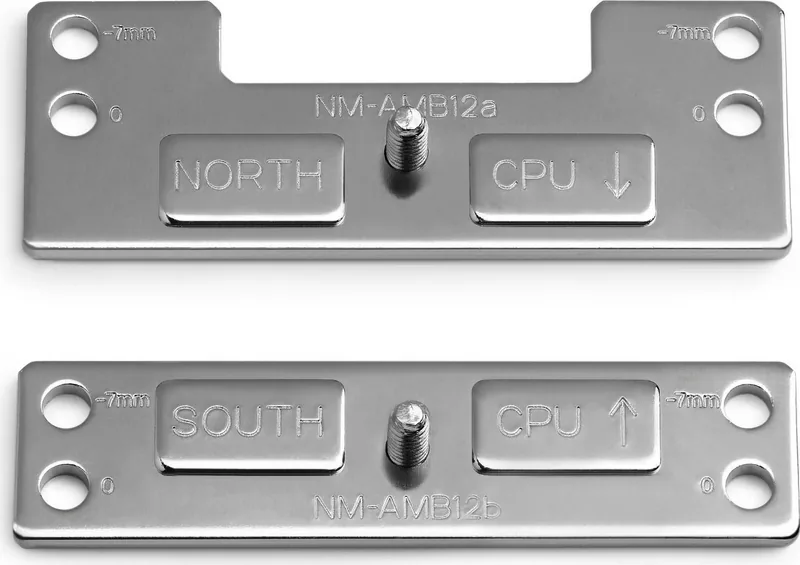
The Noctua NM-AMB12 Offset Mounting Bars represent a crucial upgrade for enthusiasts seeking optimal thermal performance on AMD platforms. Specifically designed for Socket AM5 and AM4, these bars address clearance and contact pressure issues common with high-performance cooling solutions. In modern computing, heat dissipation is paramount for maintaining stability under load. The NM-AMB12 facilitates this by adjusting the mechanical distance between the motherboard and the cooling unit. By utilizing a -7 millimeter offset, the kit ensures that the CPU cooler presses evenly against the processor die. This is particularly vital for Ryzen 5000 and 3000 series processors where standard mounting might cause uneven contact. The kit includes two distinct mounting bridges labeled NORTH and SOUTH to maintain precision during installation. Proper orientation is key to avoiding hardware interference with the motherboard surface. You must align the arrows correctly towards the CPU. If you encounter conflicts with existing hardware, the zero millimeter setting offers a safe alternative for various configurations.
Installation and Specifications
Users must adhere to strict torque specifications when affixing these components. The maximum recommended torque is 0.6 Nm to prevent damage to the delicate mounting frame. Installation involves swapping standard brackets for these offset variants. This process might require purchasing additional spacers or screws not included in the initial shipment. You should remove the backplate carefully. Ensure the original mounting brackets are detached from the backplate completely before starting. When installing the cooler, apply thermal paste as required by the specific cooler manufacturer guidelines. Regardless of the complexity, the result is significantly improved thermal transfer.
Final Thoughts
Enthusiasts will find the flexibility to choose between standard and offset modes beneficial. This adaptability makes the NM-AMB12 a versatile addition to any high-end PC build toolkit. If compatibility issues arise with the offset position due to nearby RAM cooling fins, the standard position remains an option. This feature prevents installation from being forced where space is tight. Always verify compatibility with your specific CPU before proceeding with the installation to ensure the best possible results for your system temperature. You can access multilingual instructions via scanning the provided code for detailed visual guidance. This ensures that even novice builders can achieve professional results without confusion during the assembly process. The manual clarifies the placement of grey plastic sleeves and long screws if needed. Overall, this product ensures your investment in hardware remains protected and runs efficiently. This specific hardware component is essential for maintaining system longevity. High performance computing environments demand precise thermal management protocols. The offset allows for better airflow dynamics around the memory slots. It is recommended to use high quality anti-static precautions during the physical installation. Always handle the plastic sleeves with care to avoid cracking. The product works well with aftermarket air cooling solutions. It may also be utilized with some all-in-one liquid cooling radiators. Proper planning ensures a seamless upgrade experience.
Search for 67,706 Manuals online


Type-in Brand or Model