
Noctua NH-U9 Manual
PDF manual · 2 Pages
English



Quick check
Incorrect answer, please try again.
Chat with your Noctua NH-U9 manual using AI
Get instant AI answers from your Noctua NH-U9 manual
Ask anything about the Noctua NH-U9. Answers come from this manual, with the pages they are based on.
Ask a Question
Do you recommend NH-U9?
Yes NoFrequently Asked Questions
This cooler is designed specifically for Intel Xeon processors using the LGA4189-4 socket type.
Is this answer helpful?
Yes, but you must clean off the old thermal compound and apply a fresh thin layer before reinstalling.
Is this answer helpful?
Noctua offers a comprehensive six-year warranty covering defects and providing direct RMA service.
Is this answer helpful?
No, a NA-YC1 Y-cable is supplied to connect both fans to a single motherboard header if needed.
Is this answer helpful?
Transport forces can damage the cooler if the fans are attached; removal ensures safety during transit.
Is this answer helpful?
You must check the Noctua compatibility center first to ensure your specific motherboard supports the SecuFirm2 system.
Is this answer helpful?
Advantages and Disadvantages
Advantages

- Exceptional quiet operation ideal for server environments
- SecuFirm2 mounting system ensures secure and easy installation
- Six-year warranty demonstrates high build quality and reliability
- Pre-applied thermal compound saves time during initial setup
Disadvantages

- Requires careful clearance checks against RAM and graphics cards
- Specific plastic carrier frame limits use to LGA4189-4 sockets only
- Must manually apply thermal paste if the heatsink has been reused
- Fans must be removed for transport to prevent structural damage
Product Description
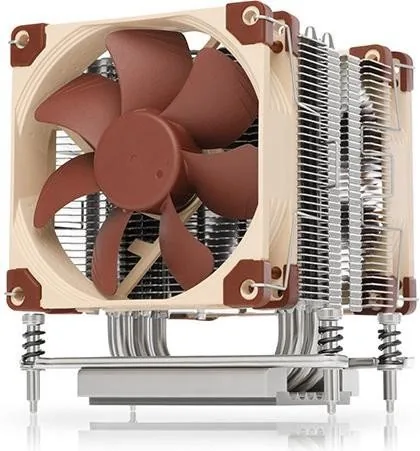
The Noctua NH-U9 DX-4189: A Quiet Powerhouse for Intel Xeon
The Noctua NH-U9 DX-4189 stands as a testament to engineering excellence, specifically designed for high-performance quiet cooling solutions targeting Intel Xeon processors. This cooler is the result of extensive research and careful attention to detail, ensuring that users experience optimal thermal performance without the noise associated with aggressive cooling fans. Whether you are running a demanding server or a workstation requiring stability, this unit delivers consistent results.
Installation begins with understanding the SecuFirm2 mounting system, which simplifies the process while ensuring a secure fit. Before starting, it is crucial to verify compatibility with your specific motherboard using the Noctua compatibility center. Users must also ensure their PC case provides adequate clearance for the heatsink and that no components like tall RAM modules or VGA cards interfere with the assembly. The pre-applied thermal compound on the base requires careful handling; if reusing an old heatsink, fresh compound must be applied manually after cleaning off any residue.
The assembly process involves attaching the CPU carrier frame to the heatsink base while the unit is upside down to prevent damage to the fins. Once secured, the CPU is placed into the frame, and the entire assembly is installed onto the socket following official Intel guidelines. Reattaching the fans using steel clips completes the physical setup. For power management, connecting both fans to a single motherboard header via a Y-cable is recommended if only one header is available. Noctua backs this product with a six-year warranty, reflecting their confidence in its reliability and offering straightforward RMA service should any issues arise.
Note: Always remove the fans before transporting the system to avoid stress damage during shipping. If you encounter installation difficulties, consult the FAQ section on the Noctua website or contact their support team directly.
Search for 67,706 Manuals online


Type-in Brand or Model