
Moser ChroMini 1591-0052 Manual
PDF manual · 148 Pages
English



Quick check
Incorrect answer, please try again.
Chat with your Moser ChroMini 1591-0052 manual using AI
Get instant AI answers from your Moser ChroMini 1591-0052 manual
Ask anything about the Moser ChroMini 1591-0052. Answers come from this manual, with the pages they are based on.
ChroMini 1591-0052 Maintenance Schedule
Remove attachment comb and lift blade set from housing. Use cleaning brush to remove hair from housing and blade set, pressing the cleaning lever.
Apply blade set oil frequently to ensure good and long-lasting cutting performance.
If cutting performance deteriorates despite regular cleaning and oiling after long use, replace the blade set.
Ask a Question
Do you recommend ChroMini 1591-0052?
Yes NoFrequently Asked Questions
The device provides up to 100 minutes of continuous operating time when the battery is fully charged. This capacity is typically reached after approximately 5 to 10 charging cycles.
Is this answer helpful?
No, you must not use the device near water or in wet areas to avoid electric shock. Always keep the appliance in dry rooms and never submerge it in water.
Is this answer helpful?
Remove the attachment comb and open the blade set from the housing. Use the included cleaning brush to remove hair debris. Press the cleaning lever to clear residue between the blades for best results.
Is this answer helpful?
Children under 14 years old must be supervised by an adult. Children must not play with the device, and cleaning or maintenance tasks must never be carried out by children without supervision.
Is this answer helpful?
Do not touch the device or the water immediately. Disconnect from the mains immediately. Have the appliance inspected at an authorized service center before attempting to use it again to prevent electric shock.
Is this answer helpful?
For good and long-lasting cutting performance, it is important to oil the blade set after every use or frequently during extended use to prevent overheating and pulling.
Is this answer helpful?
Yes, the operating voltage ranges from 100 to 240 V at 50 or 60 Hz. This makes it compatible with power supplies in many regions without needing a voltage converter.
Is this answer helpful?
Advantages and Disadvantages
Advantages

- Up to 100 minutes of battery runtime for long sessions
- Lightweight design at 132 grams reduces hand fatigue
- Universal voltage input of 100 to 240 V allows travel
- Intelligent charging system prevents battery damage
- Easy cleaning mechanism with removable blade set
Disadvantages

- Blade set requires frequent oiling to maintain performance
- Device is not waterproof and cannot be submerged
- Battery cannot be replaced by the user at home
- Charging stand required for optimal charging convenience
- Performance may decline if blade maintenance is neglected
Product Specification
Type
Hair Clipper
Power Source
Battery (NiMH)
Cutting Lengths
0.02-0.24 inches
Cutting Width
1.26 inches
Features
Charging Indicator Light
Runtime
100 minutes
Charging Time
16 hours
Package Contents
Charging Station, Cleaning Brush, Cleaning Oil
Product Description
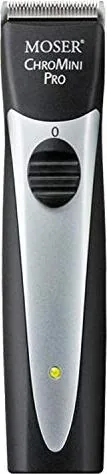
Achieve Professional Grooming Results With The Moser 1591-0052 ChroMini Black
Achieve salon-quality results at home or in the professional shop with the Moser 1591-0052 ChroMini Black manual clipper. Designed for durability and precision, this cord-operated hair clipper handle handles human hair, beards, and eyebrows effortlessly. Whether you are a professional stylist or a dedicated home groomer, reliability is key for consistent outcomes. This device offers a seamless cutting experience backed by robust engineering suitable for commercial environments.
Power And Battery Efficiency
One of the standout features is the robust NiMH battery system. It provides up to 100 minutes of continuous operating time on a full charge. This ensures you can complete multiple styling sessions without interruption or delay. Charging is efficient, taking approximately two hours to reach full capacity. An intelligent charge management system prevents overcharging, which significantly extends the lifecycle of the power source. The device works with a universal voltage input ranging from 100 to 240 V, making it suitable for international travel without adapters.
Ergonomic Design And Performance
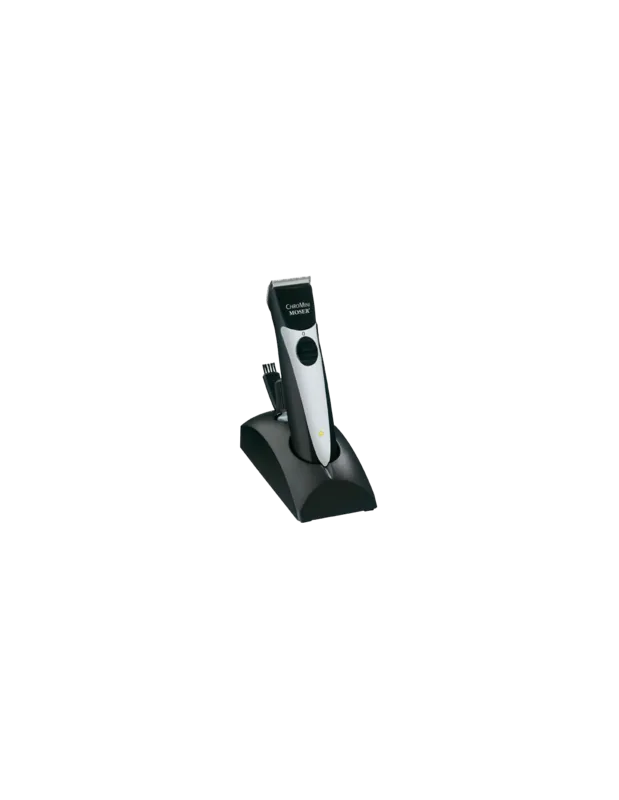
Weighing only about 132 grams, the hand-held appliance is remarkably lightweight. It fits comfortably in the palm, reducing hand fatigue during long styling sessions. The internal DC motor delivers consistent power throughout the usage cycle. Vibration levels remain low at under 2.5 m/s2, ensuring a smooth hold. A charging stand is included to keep the workspace organized. You can keep the blades ready for the next cut while recharging.
Comb Attachments And Precision
The device supports cutting length adjustments from 3 mm to 6 mm. The attachment comb slips on easily and adjusts in five detent positions. Pushing the comb further retracted yields shorter lengths. This versatility allows for precise fading or general trimming. Always remove the comb after use to prevent hair buildup between the teeth.
Ease Of Cleaning And Maintenance
Hygiene is critical for hair tools used on skin. This model features an EASY CLEANING mechanism. After use, simply remove the comb attachment and open the blade set to access the interior. Use the included brush to clear hair debris. Regular oiling is essential for preserving the blade set performance. Apply oil frequently to prevent overheating and pulling. Replace the blade set if performance declines despite maintenance.
Safety And Durability Standards
Safety is paramount in any grooming setup. Do not submerge the unit in water to avoid electric shock risks. Keep the appliance in dry rooms only. Always switch the device off before storage due to vibration risks. The build quality ensures it meets EU electromagnetic compatibility standards. It is constructed for commercial use, promising longevity. Dispose of properly according to electrical waste regulations. Protect the device from animals and weather effects when not in use to maintain condition. Keep out of reach of children under 14 unless supervised.
Maintaining your grooming tools ensures professional results every time. Protect your investment by following detailed care instructions for optimal lifespan. Ensure all users understand safety protocols before operation begins. When the charging indicator is flashing evenly, the device is receiving power. A different flashing cycle indicates full capacity. This visual feedback helps manage time effectively during professional use.
Search for 67,706 Manuals online


Type-in Brand or Model