User’s Manual
No.99MAD029M
Säkerhetsåtgärder
För att säkerställa användarens säkerhet, använd skjutmåttet i enlighet med riktlinjer och
specikationer i denna manual.
Ang. exportrestriktioner
Ni skall samtycka till att inte begå någon handling som på något sätt, direkt eller indirekt,
ellerlokala,lagar-
reexportavMitutoyosprodukter
• F
batteriernasinnehållläckerutochkommerikontaktmedögonen,ellerorsakaexplosion.
• Omettbatterisväljs,
Omhändertagning av uttjänt elektrisk
Europeiska unionen och övriga europeiska länder med källsortering av avfall)
Denna på produkten
behandlas inverkan på miljön genom
frånelektrisk
iomgivningen,varvänligåteranvändochåtervinn.
Förnärmareinformation,
VIKTIGT
• Innan
Monteradärefterbatteriet.
• Om
batteriernaläckaochskadaskjutmåttet.
• Användinteelektriskmärkpennaetc.,
• Repaytanpåhuvudskalan.
• Efteranvändandebörkorrosionsförebyggandeåtgärdervidtagas.K
●
Förklaring på symboler
:Tryck på knappen :T
[1] Delarnas beteckning och funktion
1. Mätytor för mätning 2. Referensyta 3.Huvudskala
4. Skydd för skalan 5. Slid 6. Låsskruv
7. Displayenhet 8. LCD-display 9. Kontaktlocket
10. Batterifack 11. Styrtunga 12.
13. ZERO/ABS knapp(kopplar om mellan inkremental och absolut mätning) se punkt [3]
14. På/A 15. ORIGIN-knapp (används för inställning av ORIGIN)
16. Omställning tum/mm (endast vissa modeller)
[2] Montering av batterier samt inställning av ORIGIN (nollpunkt)
VIKTIGT
• AnvändalltidbatterieravtypSR44.
• Medlevereradebatterierärendastavsedda
kanutlovadbatterilivslängdejgaranteras.
• StällinORIGINpåskjutmåtteteftermonteringavbatterierna.
• Följgällandelagarföråtervinningnärbatteriernaslängs.
• Vid
genom“-----”
• Varnogamedattinteskadabatterietskontakternärduinstallerarbatteriet.
1) Montering av batterier
T
2) Nollpunktsinställning
När batteriet är installerat visas “-----“ .
efter att ha justerat mätytan mot referensplanet på planskivan.
Anm.
När i, inte huvudskalan och
OR
UndvikattanvändavassastickoreftersomsådanakanskadabrytarenORIGO.
[3] Inkremental mätning (INC) och Absolut mätning (ABS)
●
Inkrementalmätningutföresenligtnedan.
Ställ in reglaget på nominellt värde och håll knappen ZERO/ABS intryckt i mindre än 1 sekund. Displayvärdet
raderas och “INC”
Relativ mätning med nominellt värde aktiveras.
●
Absolutmätningutföresenligtnedan.
• Efter det att skjutmåttet slagits på är det alltid i ABS mode, och visar dimensionen från ORIGIN.
• Om “INC” inte visas på diplayen kan man fortsätta med absolut mätning.
• Om“INC”visas försvinner och
skjutmåttet är klart för absolut mätning.
[4] Omkoppling mellan in/mm (endast för tummodell)
Varjegångsom
[5] Felsymptomer och åtgärder
1) “E” visas efter sista siffran:
Uppkommer om skalan är för smutsig. Gör ren skalans skyddsyta.
OBS
Om det att skalans skyddsyta rengjorts, batterierna och sätt tillbaka dom efter
sekunder
2) “B”:
Uppkommer vid för låg batterispänning. Byt batterierna.
3) Samma siffr
T
4) Övriga fel:
Om fel (Err-S) enligt bilden till vänster uppträder
[6] Specifikationer
•Upplösning : 0.01mm/.0005”
•Repetering : 0.01mm/.0005”
•Instrumentfel : ±0.02mm/±.001”
•Maxavläsningshastighet : Obegränsad(ingetavläsningsfelorsakatavförhögslidföryttning)
•Strömförsörjning : SR44(kna
•Batterilivslängd : ca.
3.5 år vid normal användning
Batteritiden beror på användningen av indikatorn.
Normal användning antas vara 5 timmar per dag.
•Indikatorfel : ±1siffra
•Arbetstemperatur : 0till40°C
•Lagringstemperatur : –10till60°C
[7] Specialtillbehör (Endast för model med utgång)
•Anslutningskabel(meddataknapp) :
•DA :Fryservisatvärde.
[8] Stiftkonfiguration (Endast för model med utgång)
[9] Data format (Endast för model med utgång)
(1) Utgångs (2) Alla “F” (3) T
(4) Mätdata (5) Decimalpunkt (6) Enhet
[10] Tids schema (Endast för model med utgång)
*1: DA
*2: Tidsintervallet T
5
processorns prestanda.
Precauzioni per la sicur
Per garantire la sicurezza all'operatore, utilizzare questo strumento in conformità con le
direttive e le speciche fornite in questo manuale d’uso.
Note sulle Norme di Esportazione
Rimane
o indiretta,
relative all’esportazione o riesportazione di qualsiasi prodotto.
• Non
versa contenuto potrebbe entrare scaldarsi
provocandocosìun’esplosione.
• Se consultare
medico.
Smaltimento di vecchie apparecchiature elettriche ed elettroniche (Applicabile
nell’Unione Europea e negli altri paesi europei con sistemi di raccolta differenziata).
L o che
prodotto Per l’impatto
ambientale elettriche di riuto (WEEE (Waste
Electricaland
nellediscariche,sipregadiprocederealriutilizzoealricic
Per
distributori.
IMPORT
• Prima di di utilizzando
pannodicotonecondell'olionuovo.Installarequindilabatteria.
• Se
Viceversailliquidocontenutopotrebbeusciredanneggiandoilcalibrostesso.
• Nonutilizzarelapennaelettricaperinciderenumerioaltrosulcalibro.
• Nongrafareoinciderelasuperciedellascaladiletturaprincipale.
• Dopol’utilizzopulireilcalibroperprevenirelacorrosione.Questapuòcausareproblemisuccessivi.
●
Descrizione dei simboli
: Premere il pulsante :
[1] Nome e funzione di ogni parte
1. Facce di misura 2. Superficie di riferimento 3. Scala principale
4. Copertura della scala 5. Corsoio 6.
7. Modulo completo 8. Display LCD
9. Coperchio del connettore di emissione 10. 11.
12. Linguetta di bloccaggio
13.
14. 15.
16.
[2] Installazione della batteria e impostazione dell'origine
IMPORT
• Utilizzaresempreunaba
• Le
potrebberononsoddisfarelaspecicatadurata.
• Impostarel'originedelcalibrodopoa
• Perdisporredellabatteria,riporlainunluogoordinatodovesiafaciletrovarla.
• Dopol’installazionedelleba
l’impostazionedell’origine.Reinstallarelebatterieseisimboli
• Assicurarsidinondanneggiareicontattidellabatteriadurantelasuainstallazione.
1) Installazione delle batterie
Rimuovere il coperchio dello scomparto batteria e montare la batteria SR44 con il lato positivo rivolto verso l’alto.
2) Impostazione dell'origine
Quandolabatteriaèinserita,apparirà
secondo, dopo aver allineato la superficie di misurazione con la superficie di riferimento sulla piastra della superficie.
Appare il valore “0.00”
Nota
Quando
(Nellostato
utilizzarestrumentiappuntiti,potrebberodanneggiarel’interruttoreORIGIN.
[3] Misurazione comparativa e misurazione assoluta
●
Eseguirelamisurazionecomparativa(modoINC)comeillustratodiseguito:
Porre il calibro nel valore nominale e premere l’interruttore ZERO/ABS per meno di un secondo.
Il valore di visualizzazione viene cancellato e appare “INC”.
La misurazione comparativa con il valore nominale viene attivata.
●
Eseguirelamisurazioneassoluta(modalitàABS)comeillustratodiseguito:
• All ’accensione il calibro si predispone sempre nella modalita ’ ABS e visualizza le dimensioni dal
punto Zero.
• Sesuldisplaynoncomparel’indicazione “INC”, non si può continuare la misurazione assoluta.
• Se“INC”compareinaltoasinistrasuldisplay,tenerepremutoil secondi. “INC”
scomparirà e il calibro sarà così pronto per la misurazione rispetto all’origine assoluta.
[4] Commutazione tra pollici/mm (solo per il modello in pollici)
Ognivolta
reciprocamente.
[5] Errori e rimedi
1) L'indicazione della lettera “E”:
Compare sull’ultimo digit del display segnalando la presenza di sporco che provoca errori di conteggio. Pulire lo
sporco sopra la scala.
NOT
Reinstallarelebatteriesedopolapuliziadellascalapersistel’errore“E”
dopotaleoperazione,rimuoverelebatterieecontattareilservizioriparazionidellaMitutoyopiùvicino.
2) Indicazione “B”:
Appare quando il voltaggio delle batterie è basso. Sostituire immediatamente le batterie.
riferimento al punto [2]).
3) Stessi numeri per tutte 5 le cifre o segno "H" illuminato:
T
4) Altri errori:
Se appaiono gli errori (Err-S) nella figura a sinistra,
[6] Dati tecnici
•Risoluzione :0,01mm/,0005”
•Ripetibilità :0,01mm/,0005”
•Erroristrumentali :
• :
•Alimentazione :SR44(acelladiossidod'argento),1pezzo
•Duratabatteria : ca.
3 anni e 5 mesi per un normale utilizzo
La durata della batteria dipende dall’uso del calibro. Utilizzare il valore sopramenzionato come riferimento.
Per normale utilizzo si intende 5 ore al giorno.
•Errorediconteggio :
•T :da0°Ca40°C
•T :
[7] Accessori opzionali (Applicabile solo al modello con uscita dati)
•AccessoriOpzionali(contastoinviodato) :Cod.No.959149(1m),
•Unitàdibloccoquota(PartNo.959143) :
[8] Assegnazione dei Pin Connettore di Uscita Dati
(Applicabile solo al modello con uscita dati)
[9] Formato uscita dati (Applicabile solo al modello con uscita dati)
(1) Ordine d'uscita (2) T (3) Segno
(4) Dati misurati (5) Punto decimale (6) Unità
[10] Prospetto di temporizzazione (Applicabile solo al modello con uscita dati)
*1: DAT
*2: L'intervallo di tempo T
5
intercorrente
prestazioni del processore dati da collegare.
Safety Precautions
T
specications
given in this User's Manual.
Notes on Export Regulations
Y
your country
• Do disassemble, ba
content the eye, cause ba or
explosion.
• Ifabatteryisswallowed,immediatelyconsultadoctor
Disposal of Old Electrical & Electronic Equipment (Applicable in the European Union
and other European countries with separate collection systems)
This
WasteElectricalandElectronicEquipment),
andthissymbolindicatesthatthisproductshallnotbetreatedashouseholdwaste.
T
inreuseandrecyc
For dispose of the contact dealer or the Mitutoyo
salesofce.
IMPORT
• Before time, rust a
soakedwithcleaningoil.And,installthesuppliedbattery.
• Ifthiscaliperwill
properly.Otherwise,liquidmayleakfromthebatteryanddamagethecaliper.
• Donotuseanelectricengraverformarkinganumberetc.,onthecaliper.
• Donotscratchthemainscalesurface.
• Afteruse,takecorrosionpreventionmeasures.Corrosionwillcausethetrouble.
●
Description of Symbols
: Press the button. : Press and hold down the button.
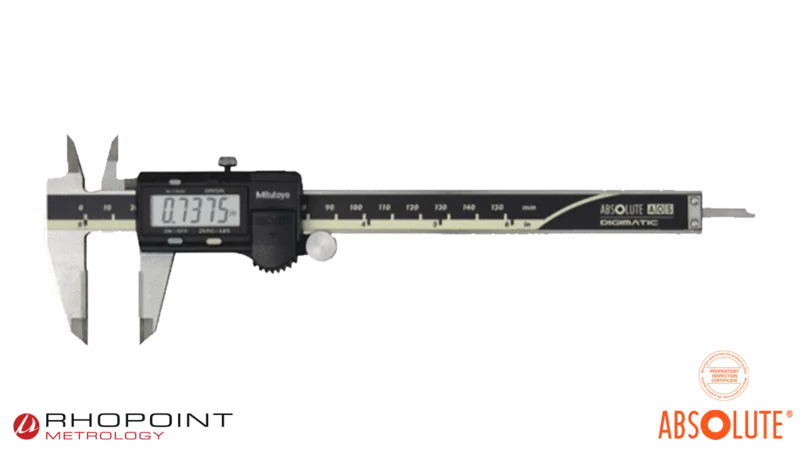
[1] Name and Function of Each Part
1. Measuring face 2. Reference face 3. Main scale 4. Scale
5. Base 6. Clamp screw 7. Detection/Display module 8. LCD display
9. Connector cap 10. 11. 12. Locking tang
13. ZERO/ABS switch (toggles between incremental and absolute measurement.
14. Power ON/OFF switch 15. ORIGIN switch (used for setting the origin)
16. in/mm switch (for only inch specification)
[2] Battery Installation and Origin (Zero Point) Setting
IMPORT
• AlwaysuseanSR44battery(silveroxidecell).
• The
caliper
• Setuptheoriginofthecaliperafterinstallingthebatteries.
• F
• Uponinstallation
Reinstallthebatteriesifthe“-----”
• Besurenottodamagethebatteryterminalwheninstallingthebatter
1) Installing the batteries
Remove the compartment lid and install the SR44 battery with its positive side facing up.
2) Setting the origin
When the battery is installed,
1 second, after aligning the measuring surface with the reference plane on the surface plate.
displayed, and the origin will be set.
IMPORT
Whenthe
ORIGINswitch.(Whileinthestatedescribed
Avoidusingsharpsticks,sinceitmaydamagetheORIGINswitch.
[3] Comparison Measurement and Absolute Measur
●
Performcomparisonmeasurement(INCmode)asfollows.
Set the gage in the nominal, and
cleared, and
●
Performabsolutemeasurement(ABSmode)asfollows.
• The caliper always enters the ABS mode when the power is turned on, displaying dimensions from
the zero point.
• Unless“INC”isdisplayedontheLCD,absolutemeasurementcanbecontinued.
• If“INC”appears
“INC” will disappear and the caliper will be ready for measurement with respect to the absolute origin.
[4] Switching in/mm (for only inch specification)
Each time pressing “in/mm”
[5] Error Symptoms and Remedies
1) “E” at the least significant digit:
Appears if the scale surface is too contaminated to count.
NOTE
Reinstall stays on If
persistsafterreinstallingthebatteries,rstremovethebatteriesandcontactthenearestMitutoyoofce.
2) “B” indicator:
Appears when the battery voltage is low.[2] .)
3) Same numbers for all 5 digits or flashing “H”:
Remove the battery once and set it again.
4) Other errors:
If the errors (Err-S) in the figure left appear
[6] Specifications
•Resolution : 0.01mm/.0005”
•Repeatability : 0.01mm/.0005”
•Instrumentalerrors : ±0.02mm/±.001”
•Maximumresponsespeed : Unlimited(Miscountwillnotresultduetosliderspeed.)
•Power : SR44(silveroxidecell),1pc.
•Batterylife : Approx.18,000hoursincontinuoususe
3.5 years under normal use
Battery life depends on use of the indicator
Normal use is assumed as 5 hours per day.
•Quantizingerror : ±1count
•Operatingtemperature : 0to40°C
•Storagetemperature : –10to60°C
[7] Optional Accessories (Applicable to the external output type only)
• Connectingcable
(with data output switch) : Part No.959149 (1m), 959150 (2m)
• DataHoldUnit
(PartNo.959143) : Holdsthedisplayvalue.
[
[9] Data Output Format (Applicable to the external output type only)
(1) Output order (2) All (3) Sign
(4) Measured data (5) Decimal point (6) Unit
[10] Timing Chart (Applicable to the external output type only)
*1: DA
*2 Time falling LOW
performance of the data processor to be connected.
V
CAUTION
Printed in Japan
A
안전에 관한 주의
상품 사용에 있어서는 기재된 사양 • 기능 • 사용상의 주의에 따라 사용해 주십시오 .
그 외의 사용은 안전을 해칠 우려가 있습니다 .
해외 이전에 관한 주의
본 제품은 「대외무역법 등」의 규제 대상품입니다 . 해외 이전할 경우에는 사전에 폐사에 상
담해 주십시오 .
•
전지를 분해 , 단락 ( 短絡 ), , .
이 새어 눈에 들어가거나 발열 , 파열의 원인이 됩니다 .
•
만일 전지를 삼킨 경우에는 즉시 의사와 상담해 주십시오 .
분별 처리 하고 있는 유 ) 국가에 전 • 전 기 폐기 시 주의
제품이나 포장에 인쇄되어 있는 이 심볼 마크는 , 본 제품을 폐기할 때 일반 가
정쓰레기와 함께 버리지 않도록 하기 위해 국가에서 정한 폐전기전자제품
처리지침 (WEE 지침 ) 에 의거한 규제입니다 .
토양에 매립하는 양을 줄여 환경에 미치는 영향을 감소시키기 위해 상품의 재
활용과 리사이클에 협조하여 주시기 바랍니다 .
본 제품의 폐기 방법에 대해서는 제품을 구입하신 가까운 소매점이나 대리점
에 문의하여 주십시오 .
중요
• 본 기기를 구입 후 처음 사용하실 때는 오일을 묻힌 부드러운 천으로 본 기기에 도포되어
있는 방청유를 닦아내고 , 동봉된 전지를 본 기기에 세팅하여 사용해 주십시오 .
• 3 개월 이상 사용하지 않을 경우에는 전지를 본 기기로부터 제거하여 보관해 주십시오 .
전지의 액 누설로 기기가 파손될 우려가 있습니다 .
• 전기 펜으로 번호 등을 기입하는 행위는 삼가해 주십시오 .
• 스케일 ( 메인 스케일 ) 이 상처나지 않도록 해 주십시오 .
• 사용 후에는 방청처리를 해 주십시오 . 녹은 고장의 원인이 됩니다 .
●그림중의 기호설명
:
스위치를 길게 누른다 .
:
스위치를 짧게 누른다 .
[1] 각부의 명칭과 기능
1. 측정면 2. 기준단면 3 . 메인 스케일
4. 내측용 측정면 5. 슬라이더 6. 고정 나사
7. 모듈부 8. LCD 표시부 9. 커넥터 캡
10. 전지 뚜껑 11. 가이드 날 12. 잠금 날
13. ZERO/ABS 스위치 ( 비교 측정 (INC) 과 절대 측정 (ABS) 을 전환합니다 . [3] 참조 )
14. 전원 ON/OFF 스위치 15. ORIGIN 스위치 ( 원점 설정을 합니다 )
16. in/mm 스위치 (inch 사양만 )
[2] 전지 세팅과 ORIGIN( 원점 ) 설정
중요
• 전지는 반드시 SR44( 산화은 전지 ) 를 사용해 주십시오 .
• 구입 시 동봉되어 있는 전지는 기능이나 성능을 확인하기 위한 것입니다 . 소정의 수명을
다하지 못하는 경우가 있습니다 .
• 전지를 세팅한 후에는 반드시 ORIGIN( 원점 ) 설정을 해 주십시오 .
• 전지의 폐기 시에는 조례 , 규제 등에 따라 주십시오 .
• 전지 세팅직 후 ,“ ---”가 표시됩니다 . 표시에 관계없이 원점을 설정하여 주십시오 .
• 배터리 장착 시 배터리 단자가 손상되지 않도록 주의하십시오 .
1) 전지 세팅
오른쪽 그림과 같은 (SR44) 의 플러스 쪽을 위로하여 세트하여 주십시오 .
2) ORIGIN( 원점 ) 설정
전지를 세팅하면 , “ ” 표시가 나타납니 . 정반의 기준면에 측정면을 정렬한 상태로 끝이
가는 스 이 O스위 1 초 이상 누르십 . 「0.00 」(mm 모델 ),「0.000」(inch
모델 ) 의 수치 표시되고 , ORIGI 원점 ) 이 설 .
주
전지를 세팅한 후에는 ORIGIN 스위치를 눌러 원점 값이 설정 되기 전 까지는 ( 전 페이지 삽
화 에 메인 스케일 및 베이스를 이동시키지 마십시오 . 정상적으로 카운트가 작동하지
않는 경우가 있습니다 .
ORIGIN 스위치가 파손될 우려가 있으니 끝이 뾰족한 스틱으로 세게 누르지 마십시오 .
[3]
비교 측정 (INC) 과 절대 측정 (ABC)
• 비교 측정 (INC) 은 다음과 같이 시행합니다 .
기준 치수에 게이지를 세팅하고 ZERO/ABS 스위치를 짧게 (1 초 미만 ) 눌러 주십시오 .
표시 값이 제로 세팅이 되고 INC 가 표시됩니다 . 이 조작으로 기준 치수와 비교 측정을 할
수 있습니다 .
• 절대 측정 (ABS) 을 하려면 다음과 같이 합니다 .
•
전원을 ON 하면 항상 절대치를 표시합니다 .
•
INC 가 표시되어 있지 않으면 절대 측정을 합니다 .
•
INC 가 표시부 왼쪽에 표시되지 않으면 , ZERO/ABC 스위치를 2 초이상 눌러 주십시오 .
INC 표시가 꺼지고 절대 원점에서의 측정이 가능합니다 .
[4] in/mm 변경 (inch 사양만 )
in스위 누 때마 표 m표시 바뀝 .
[5]
에러와 대책
1) 최소 자리수 “E ” 표시
카운트할 수 없을 정도로 스케일 표면이 더러워진 경우에 발생합니다 . 스케일 표면을 청소
해 주십시오 .
주
스케일 표면을 닦아내도 E ” 표시가 사라지지 않는 경우에는 전지를 다시 세팅해 주십시오 .
그래도 표시가 사라지지 않는 경우에는 전지를 빼내고 , 구입한 판매점 또는 영업소에 연락해
주십시오 .
2) "B" 표시
전지의 전압이 저하되고 있습니다 . 즉시 전지를 교환해 주십시오 . ( 전지 교환 방법은[2 ]
참조 ).
3) 5 자리수 모두 같은 숫자 , H 가 표시될 경우
전지 일단 꺼 다시 넣 주십 .
4) 그 외의 에러
그림 같은 에 가 발생 경우 다 설 해 주 .
[6] 사양
• 분해능 : 0.01mm
• 반복 정도 : 0.01mm
• 기기 오차 : ± 0.02 mm
• 최대 응답 속도 : 제한 없음 ( 속도에 의한 미스 카운트는 없습니다 )
• 전원 : SR44( 산화은 전지 ) 1 개
• 전지 수명 : 연속 사용 시 약 18,000 시간
일반적인 사용 시 약 3.5 년
전지의 수명은 사용횟수 또는 사용방법에 따라 차이가 날 수 있습니다 . 상기 수치는 기준
으로써 참고해 주십시오 .
• 양자화오차 : ±1 카운트
보통사용은 1 일 5 시간 사용을 기준으로 산출한 값입니다 .
• 사용 온도 : 0 ℃ ~ 40 ℃
• 보관 온도 :
–
10℃~ 60℃
[7] 특별 부속품 ( 외부 출력 타입만 적용 )
•
접속 케이블 : 파트 No.959149(1m), No.959150(2m)
( 출력 스위치 부착 )
•
흘드 유닛 : 파트 No.95914
( 본 파트에는 표시치의 흘드가 가능합니다 .)
[8]
커넥터 핀 배열 ( 외부 출력 타입만 적용 )
[9] 데이터 포맷 ( 외부 출력 타입만 적용 )
(1) 출 력 순 서ㅤㅤ (2) 모 두 “F ” (3) 부 호 ㅤㅤ (4) 측 정 값ㅤㅤ (5) 소 수 점ㅤㅤ (6) 단 위
[10] 타이밍 차트 ( 외부 출력 타입만 적용 )
*1: DATAsw 는 데이터 출력 스위치가 눌러져 있는 동안은 LOW 가 됩니다 .
*2: DATAsw 가 LOW 레벨이 되어 REQUEST 가 입력될 때까지의 시간 T5 는 데이터 처리 장
치의 성능으로 정해집니다 .
주의
安全注意事項:
使用本器時,請遵守說明書上記載的規格、功能和使用注意事項,
超出使用範圍會影響本器的安全性能。
有關出口管制的注意事項
本商品
關此商品
• 請勿拆解電
可能引起電池發熱、破裂及電池漏液進入人的眼中。
• 萬一誤吞了電池,要馬上請醫生檢查。
在有 E 歐 ) 諸
事項
在產品或 E 歐州 ) 諸國
廢電 ( 指令 ) 的標
垃圾一同丟棄。
為了減
利用和回收。
關於本產品的廢棄方法的詳細內容,請向附近的銷售商或代理商咨詢。
重要
• 購買本器後
池裝入本器內,然後再開始使用。
• 如果連續 3 個月以上不使用本器,請取出電池後進行保管,因為電池漏液可能損壞本器。
• 請避免用電筆在本品上刻寫號碼。
• 請不要損傷本尺的刻度。
• 使用後請作防銹處理,生銹往往是造成故障的原因。
●圖中符號的說明。
:短時間按開關 :長時間按開關
[1]
各部位的名稱及功能
1. 量測面 2. 基準面 3. 主尺 4. 尺
5. 滑塊 6. 緊固螺絲 7. 模組部 8. LCD 顯示窗
9. 連接端子蓋 10. 電池盒蓋 11. 引導部 12. 卡榫
13. ZERO/ABS 開關 ( 切換比較測定與絕對值測定。參照 [3])
14. 電源 ON/OFF 開關 15. ORIGIN 原點開關 ( 原點設定用 )
16. in/mm 開關(僅於英寸 / 亳米型號)
[2]
裝入電池, 調整原點
(ORIGIN)
重要
• 請務必使用 SR44 電池(氧化銀電池)
• 購入時所附
求。
• 裝好電池後,請務必原點設定( ORIGIN)
• 廢電池請按照有關條例和規定處理。
• 剛裝好電
閃現“……"字樣,則請重裝電池。
• 在安裝電池的時候,請注意以免損壞電池端子。
1) 裝入電池
按圖所示的要領, 將電池( SR44)的正極向上進行安裝。
2) 調整原點( ORIGIN)
電池安裝 會顯 用
持續按 ORIGIN 鍵 1 秒鐘以上。數值顯示「0.00 」mm 機型) 0.0000 」inch 機型)後,
即完成 ORIGIN (原點)設定。
重要
裝入電池時, 在從按下 ORIGIN 開關到確定原點值這段時間內 (參閱背面插圖 2) ) 請不要
移動主尺與基座。否則,有可能造成無法正常計數。
請勿用尖端比較銳利的棒用力按下,以免損壞 ORIGIN 開關。
[3] 比較測定( INC)與絕對值測定( ABS)
● 進行I)的
按照基準尺寸設定好尺後,請短促地按動 Z 開關(小於 1 秒)
“0 ”並顯示“INC ”
● 進行AB)
• 在電源 ON 時,機器即顯示絕對值狀態。
• 如果不出現“ INC”顯示的話, 就可以進行絕對值的量測。
• 如果 I” Z 開關約 2 秒鐘,
INC”即消失, 這樣就可以進行從絕對原點起的量測。
[4] in/mm 切換(僅限 inch 規格)
每按 in/mm 開關 1 次,英制顯示 (inch) 與公制顯示 (mm) 可交互切換。
[5]
錯誤訊號及對應措施
1) 最小一位數出現“ E”
尺面太髒, 本器無法計數等情況下出現此訊號。請將尺表面擦乾淨。
備註
如果尺表面擦乾淨後, 顯示窗上的“ E "仍不消失, 請重新裝電池。 如果重裝電池後,E "
還是不消失, 則請取出電池, 並與經銷店或者營業所聯繫。
2) 顯示窗顯示“ B”
表示電池電壓過低, 請馬上換用新電池。
[2]
)
3) 5 位數出現相同的數字, H 閃爍時
請將電池一時取出,重新裝入。
4) 其它錯誤
出現如圖那樣的錯誤 (Err-S) 時,請重新設置原點 ORIGIN 。
[6]
規格
● 最小顯示量 :0.01mm/.0005"
● 重覆精度 :0.01mm/.0005"
● 儀器器差 :±0.02mm/ ±.001"
● 最大反應速度 :無限制(不會因速度引起誤計數。
● 電源 :SR44 (氧化銀電池)1 個
● 電池壽命 :可連續使用大約 18,000 小時
可普通使用大約 3.5 年
電池壽命長短會依個別的使用次數和使用方法而有差異。上述數值為參考值。
普通使用是按照 1 天使用 5 小時左右的計算值。
● 量子化誤差 :±1 計數
● 使用溫度 :0 ℃∼ 40 ℃
● 保存溫度 :
–
10℃∼ 60℃
[7]
特殊附屬品(僅適用於具有外部輸出功能的機型。
• 連接纜:零件 No.959149( 1m) No.959150( 2m) 附輸出開關)
• 保留裝置:零件 No.959143 (用此零件可保留顯示值。
[8] 連接夾的排列(僅適用於具有外部輸出功能的機型。
[9]
數據格式(僅適用於具有外部輸出功能的機型。
(1) 輸 出 順 序 (2) 全 部“ F” (3) 符 號 (4) 量 測 值 (5) 小 數 點 (6) 單 位
[10]
時間圖(僅適用於具有外部輸出功能的機型。
*1: DATAsw 是在 DATA 輸出鍵被按著時成為 LOW。
*2: DATAs 變為 LOW 程度時, 一直到 R 被輸入為止的這段時間 T5, 則視 DA
處理裝置的性能而定。
注意
安全注意事项
使用本仪器时,请遵守说明书上记载的规格、功能和使用注意事项,
超出使用范围会影响本仪器的安全性能。
出口管制条例
本产品为
• 请勿拆解电
引起电池发热、破裂及电池漏液进入人的眼中。
• 万一误吞了电池,要马上请医生检查。
产业垃圾分别处理的 EU( 欧州 ) 诸国的电气 · 电子设备的废弃时的注意事项
在产 E 欧州 ) 诸国的 :
废电 ( 指令 ) 的标
垃圾同样丢弃。
为了减
利用和再生。
关于本产品的废弃方法的详细内容,请向附近的经销商或代理商咨询。
重要
• 购买本仪器
的电池装入本仪器内,然后开始使用。
• 如果连续 3 个月以上不使用本仪器,
损坏仪器。
• 请勿使用电笔在本产品上标写号码。
• 请勿划伤主标尺(尺身)的表面。
• 使用后请作防锈处理。生锈后本仪器会发生故障。
●图中记号的说明。
: :
[1] 各部位的名称与功能
1. 尺身测量面 2. 尺框测量面 3. 尺身 4. 刻度
5. 基座 6. 紧固螺钉 7. 检测 / 显示模块 8. LCD 显示屏
9. 接口保护盖 10. 电池盒盖 11. 引导部 12. 卡榫
13. ZERO/ABS 开关(切换相对测量与绝对值测量。参照 [3])
14. 电源 ON/OFF 按钮 15. ORIGIN 开关(进行原点的设定。
16. in/mm 切换开关 ( 仅适用于 inch 规格 )
[2] 安装电池和 ORIGIN(原点)设定
重要
• 请务必使用 SR44 电池(氧化银电池)
• 购入时所附
求。
• 装好电池后,请务必进行 ORIGIN(原点)设定。
• 废电池请按照有关条例和规定处理。
• 装好电池后,在屏幕上会有“ -----”标志闪烁。如果这些标志不闪烁,请重新安装电池。
• 安装电池时,请注意以免损坏电池端子。
1) 安装电池
按图所示,安装时电池 (SR44) 的正极朝上。
2) ORIGIN(原点)设定
装好- ”
持续 O G 开 1 秒0 」0 ”i h 模
ORIGIN(原点)的设定已完成。
重要
装好电池时,在按下 O 开关到确定原点值的期间内(参阅背面插图 [2] 2) )
动尺身和基座。否则,有可能造成错误计算。
请不要用尖端比较锐利的棒用力按下,以免损坏 ORIGIN 开关。
[3] 相对测量( INC)与绝对值测量( ABS)
● 进行I)时
将块 ZER开关 1 秒)INC”
后可
● 进行AB)
• 打
• 如I”
• 如果显INC” ZER开关 2 秒以IN”显示
后可
[4] 切换 in/mm ( 仅限 inch 规格 )
每按 in/ 开 (inch) 与 (mm) 可
[5] 错误显示及对策
1) 最小位数出现“ E”
尺面太脏,本仪器无法计数等情况下会发生此错误。请将刻度面擦拭干净。
重要
如果刻度面擦拭干净后,E ”仍不消失,E ”
还是不消失,则请取出电池,并与经销商或者办事处联系。
2)“ B” 显示
表示电池电压不足。请立即更换新电池。 [2] )
3) 显示的 5 位数字全部相同,且 H 闪烁时
请取出电池,然后重新装入。
4) 其它错误
出现如图所示的错误 (Err-S) 时,请重新设置原点 ORIGIN 。
[6] 规格
· 最小显示量 : 0.01mm/.0005”
· 重复精度 : 0.01mm/.0005”
· 仪器误差 : ± 0.02mm/± .001”
· 最大反应速度 : 无限制(不会因速度引起计数错误)
· 电源 : 氧化银电池( SR44) 1 个
· 电池寿命 : 可连续使用大约 18000 小时
可通常使用大约 3.5 年
电池寿命因使用次数和使用方法而不同。请将上述数值作为参考值来考虑。
通常使用是以 1 天使用 5 小时左右情 下的计算值。
· 量化误差 : ± 1 个计数单位
· 操作温度 : 0℃~ 40℃
· 保存温度 :
–
10℃~ 60℃
[7] 特殊附属品(仅适用于带外部输出功能的机型)
• 连接线 : 货号 No.959149 (1m), No.959150 (2m)(带输出开关)
• 保留( HOLD)装置 : 货号 No.959143(保留显示值。
[8] 连接器管脚信号 ( 仅适用于带外部输出功能的机型)
[9] 数据格式(仅适用于带外部输出功能的机型)
(1) 输出顺序 (2) 全部“ F” (3) 符号 (4) 量测值 (5) 小数点 (6) 单位
[10] 时间图(仅适用于带外部输出功能的机型)
*1: 在按住数据输出开关时, DATAsw 变成 LOW。
*2: DATAsw 变为 LOW, REQUEST 为止之前的 T5 时间,
注意
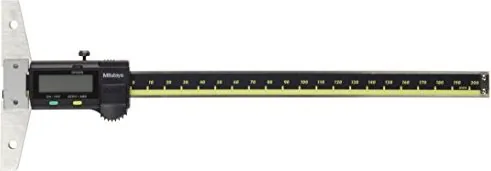
ABS Digimatic Depth Gage
ABS
數位式深度尺
ABS
Digimatic 深度卡尺
ABS 디지매틱 뎁스 게이지
ABS Digimatic Djupmätar
Calibr