
Lupine SL MiniMax Manual
PDF manual · 13 Pages
English



Quick check
Incorrect answer, please try again.
Chat with your Lupine SL MiniMax manual using AI
Get instant AI answers from your Lupine SL MiniMax manual
Ask anything about the Lupine SL MiniMax. Answers come from this manual, with the pages they are based on.
Ask a Question
Do you recommend SL MiniMax?
Yes NoFrequently Asked Questions
The headlight complies with IP67 standards making it waterproof against heavy rain and dust. It can operate under severe conditions. However, it is NOT suitable for use underwater or as a diving lamp. Strong water jets should also be avoided during cleaning to protect seals.
Is this answer helpful?
If even one LED fails, the light source goes out and the unit cannot be repaired by replacing individual parts. The entire headlight assembly must be replaced. Service and replacement are handled exclusively by Lupine facilities.
Is this answer helpful?
No, calibration must be done outdoors. Artificial light sources or proximity to reflective objects will cause improper calibration. This can restrict the lamps functionality by messing up the switching point between daytime and low beam modes.
Is this answer helpful?
It supports voltage ranges from 6 to 15 volts. Some drive units may provide insufficient power or compatibility issues. The 22W mode is specifically noted as not recommended for Bosch systems. Users should check compatibility lists online before purchase.
Is this answer helpful?
You can switch modes using the wired remote control button mounted next to the handlebar. Pressing the button cycles through modes. Blue light on remote indicates high beam is active. Green light means low beam is active. Dark means off or day mode.
Is this answer helpful?
The housing can get hot during operation. You must maintain a safe distance from any combustible or flammable materials to prevent fire risks. Quiescent operation without airflow cooling is fine for the product but does not eliminate heat risk externally.
Is this answer helpful?
Users can select either five seconds or sixteen seconds for the transition delay between day running light and low beam. The factory setting is usually set to sixteen seconds. This adjustment is made via the remote control button settings.
Is this answer helpful?
Advantages and Disadvantages
Advantages

- IP67 waterproof rating for all weather conditions
- High output of 2100 lumens with Osram LEDs
- Automatic brightness sensor for day and night modes
- Durable CNC machined aluminum housing
- Convenient wired remote control for switching beams
Disadvantages

- Entire unit must be replaced if one LED fails
- Housing gets hot during operation requiring clearance
- Not recommended for 22W mode on Bosch systems
- Sensors require outdoor calibration avoiding artificial light
- Limited to 6-15V voltage range for power supply
Product Specification
Type
Front Light, Safety Light
Colors
Black
Max. Light Output
2100 lm, 250 lux
Light Mode
Continuous Light (3 Levels)
Power Supply
6-15V (E-Bike)
Mounting
Bracket
Dimensions
1.46x2.72x1.34 in
Weight
3.53 oz (Front Light)
Product Description
Experience Superior Night Visibility
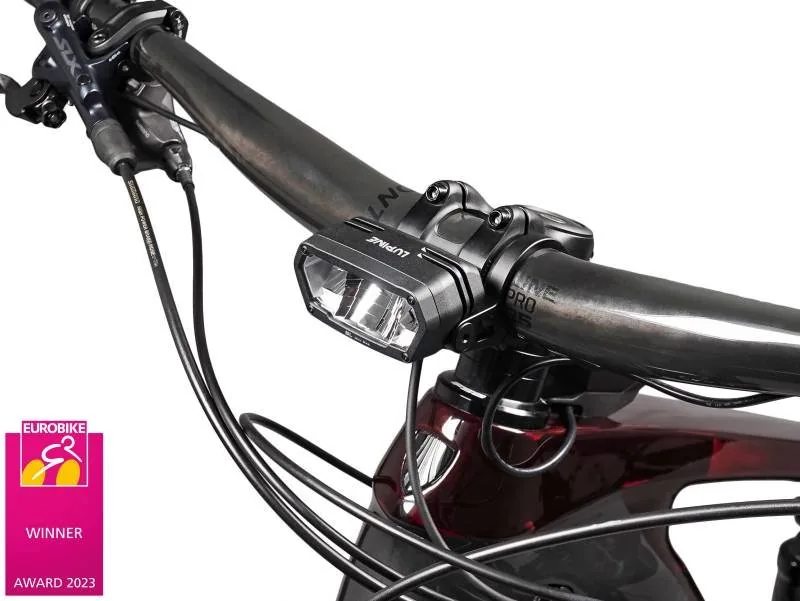
Riding your electric bike after dark demands equipment you can trust completely. The Lupine SL MiniMax E-Bike Headlight stands out as a premium solution designed for maximum safety and performance on varied terrains. Integrating advanced Osram Automotive LEDs, this device delivers up to 2100 lumens of powerful light output. Whether navigating busy city streets or winding mountain trails, users benefit from a robust beam pattern engineered for optimal road coverage. The system operates efficiently using aluminum CNC machining that ensures durability while resisting water ingress effectively.
When installing this unit, precision matters immensely for safety and function. Users often refer to the Lupine SL MiniMax E-Bike Headlight Manual during setup to align the lamp correctly. Proper alignment involves placing the light cone height appropriately relative to the ground at a distance of five meters. Mounting occurs near the stem with specific torque settings to prevent damage to threads. A wired remote control allows convenient switching between low beam and high beam functions without reaching for the display unit. This feature enhances rider focus while maintaining traffic compliance.
Smart technology integrates seamlessly into daily use through an automatic brightness sensor. This sensor switches between daytime running mode and low beam automatically based on ambient conditions. For custom needs, manual mode lets riders adjust settings individually via the remote button interface. However, owners should note that if a single LED fails, the entire assembly usually requires replacement due to construction limitations. Heat management is also critical, as the housing can become hot during operation. Always maintain clearance from flammable materials to prevent potential fire hazards. Waterproofing reaches IP67 standards making rain resistance excellent but submersion discouraged.
Additionally, connecting the power supply requires attention to voltage specifications ranging between six to fifteen volts. Incompatible drive units might trigger error codes preventing activation. Checking software settings for light input enablement resolves some startup failures. Riders should carry a spare small lamp because unexpected failures are possible despite the high quality build. The warranty process dictates sending defective units to Lupine centers for service rather than attempting DIY repairs. Understanding these operational constraints helps maximize the lifespan of your investment. By adhering to the guidelines outlined in documentation, riders ensure consistent legal compliance and personal safety throughout every journey undertaken in low-light environments where visibility equals security against accidents involving other road users sharing space.
Search for 67,706 Manuals online


Type-in Brand or Model