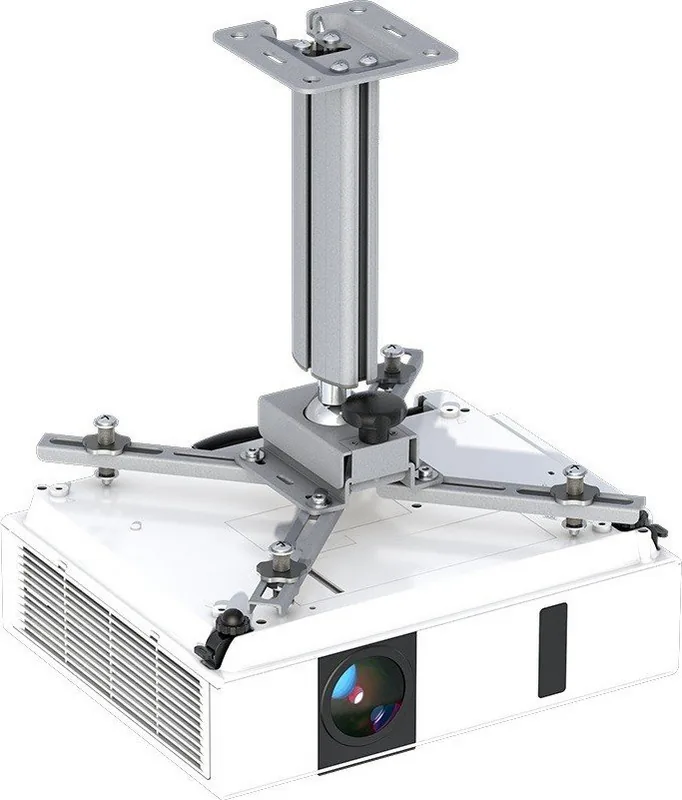
Legen Sie den Projektor mit der Unterseite nach oben auf eine weiche
Unterlage. Lockern Sie mit dem Sechskant-Schraubendreher
die
Profilarme des Projektorhalters. Richten Sie die Profilarme auf die Befe-
stigungsbuchsen des Projektors aus, siehe auch Anleitung des Projektors.
Entnehmen Sie aus dem Schraubensatz die für Ihren Projektor passenden
Schraubengrößen und Scheiben. Montieren Sie zuerst nach Abbildung
a
die 4 Gewindehülsen und 4 Muttern M10x1, und stellen Sie die Höhe eines
jeden Armes passend zum Projektorboden ein. Ziehen Sie anschließend
die Rändelmutter M10x1 zum Kontern handfest an,
b
. Montieren Sie nun
die passenden Schrauben und Unterlegscheiben nach Abbildung
c
in alle
Befestigungsbuchsen des Projektors.
Achtung: Es müssen mindestens 3 Gewindegänge eingeschraubt
werden. Keine Kleber oder Schmiermittel verwenden. Wenn die Montage
nicht richtig ausgeführt wird, kann der Projektor herunterfallen. Dabei
besteht die Gefahr von Verletzungen oder Unfällen.
Ziehen Sie nun alle Schrauben der vorhergehenden Schritte am
Projektorhalter fest.
a
b
a
bb
b
weight of the projector.
• Screw the bolts at least three turns into the drill-holes of the projector.
• If the screws are too long for the drill-holes of your projector,
use additional discs in order to prevent damages.
• The airflow of the projector is hot! Make sure that the unit keeps its
distance to other materials and that the flow of fresh air is not
hampered. The projector can be ruined by overheating.
• We are not responsible for subsequent damages in case of incompetent
mounting.
• Please keep this user manual.
Consignes de sécurité
• L’installation doit être uniquement eectuée par du personnel qualifié.
• Vérifier en tout cas la force de tenue du plafond soit susante pour
projecteur et support.
• Utiliser uniquement des vis de grosseur susante, qui sont spéciale-
ment conçues pour le matériel de plafond rencontré.
Ces vis ne sont pas livrées avec le support.
• Vérifier que la solidité de la matière du plafond est convenable pour
un montage définitif et qu’il y a aucun risque de chute.
Les matières de plafonds convenables sont: Bois dur, poutre d’acier,
béton.
• Faites un test de charge du double du poids.
• Les boulons d’attache doivent être tournés au moins trois fois dans le
pied du projecteur.
• Si les vis de montages sont trop longues, il faut utiliser des rondelles
supplémentaires pour ne pas endommager le projecteur.
• Un montage incorrect, un plafond défectueux ou non-convenable sont
des risques potentiels pour personnes, appareil et équipement!
• Le ventilateur du projecteur est chaud! Faites attention aux distances
nécessaires pour la circulation d’air et la distance aux autres matériaux.
L’appareil peut être endommagé à cause de surchaue, ou il peut
prendre feu!
• Nous ne sommes pas responsables en cas de montage non-approprié et
pour des préjudices ultérieurs.
• Les installations électriques ne doivent être faites que par du personnel
compétant.
• Conservez le mode d’emploi.
b) Un montage avec seulement 3 bras est possible
c) Longueurs spéciales de bras sur demande
Le porte-projecteur est attaché à une articulation ronde, et peut être tourné
de tous les côtés et incliné de 20°.
Fixer le porte-projecteur au projecteur
Posez le projecteur partie inférieure sur le dessus sur une surface douce.
Desserrez à l’aide du tourne-vis cruciforme
les bras profilés du
porte-projecteur. Orientez les bras sur les points de fixation du projecteur,
voir mode d’emploi du projecteur. Prennez du set de vis “pour fixation du
projecteur” les vis et rondelles correspondantes à votre projecteur.
Fixez selon l’illustration
a
les 4 vis profilées et 4 écrous M10x1, et réglez la
hauteur de chaque bras selon le socle du projecteur. Contre-serrez ensuite les
écrous moletés M10x1 à la main,
b
. Fixez ensuite les vis et rondelles
nécessaries selon l’illustration
c
dans les points de fixation du projecteur.
Attention: 3 pas de vis au minimum doivent être vissés. Ne pas utiliser de
colle ou de lubrifiant. Le projecteur peut tomber si le montage n’a pas été fait
correctement et peut ainsi causer blessures ou accident.
Serrez ensuite toutes les vis du porte-projecteur.
b
a
a
b
Fixing the projector holder
Put your projector on a soft surface (upside down). Loosen the movable
arms with a hexagon screw driver
. Adjust the arms to the location of
the drill-holes of the projector (see also manual of the projector).
Choose the suitable screws and discs from of the set supplied.
First fix the 4 threaded sleeves and 4 nuts M10x1
a
and adjust the height
c
d
a
a
Adjustment – Premium 60/100/150/200/250/300
The telescope column has a range for height adjustment.
In order to adjust, loosen the screw
c
with the delivered allen key
.
Attention: Do not loosen the safety screw
d
!
By loosening the rotating knob
a
on the ball-and-socket joint the
projector can be rotated ±180 degrees and tilted about ±20 degrees.
Achtung: Die Sicherungsschraube
d
nicht lockern!
Durch Lockern der Halte-/Justageschraube
a
am Kugelgelenk kann der
eingesetzte Projektor um ±180° gedreht, sowie um ca. ±20° geneigt
werden.
durch Hochdrücken die Rastfeder
b
einrasten und eine der beiden Halte-/
Justageschrauben
a
eindrehen.
Achten Sie darauf, dass die Lüfterönungen des Projektors frei bleiben!
of each arm so that they fit to the projector bottom. Then tighten the knurled
nut M10x1
b
. Insert the suitable screws and discs (ill.
c
) into all drill-holes
of the projector.
Note: At least 3 threaded passages must be fixed. Do not use glue or
lubricants. Danger: The projector could fall down and cause injuries.
Now tighten all other screws on the projector holder.
a
b
c
Befestigung in diesem Bereich
nicht möglich!
Projector cannot be mounted
in this area!
Attaches dans ce rayon impossible!
Ø 138mm
Ø 378mm
/2
%
Quick check
I'm not a robot
Incorrect answer, please try again.
Chat with your Kindermann Premium 30 manual using AI
Get instant AI answers from your Kindermann Premium 30 manual
Ask anything about the Kindermann Premium 30. Answers come from this manual, with the pages they are based on.
Ask a Question
0/1000
Do you recommend Premium 30?
YesNo
Frequently Asked
Questions
A
It is a ceiling mount for projectors. The goal is to hold the unit securely, keep the setup neat, and provide a stable fixed drop from the ceiling for a professional installation.
Is this answer helpful?
A
The system is designed for projectors up to 25 kg, provided the mount is installed correctly and the ceiling structure is suitable for that load.
Is this answer helpful?
A
No. The Premium 30 uses a fixed 30 cm length, which makes it a simple choice when the required ceiling distance is already known.
Is this answer helpful?
A
No. Suitable screws and plugs depend on the ceiling material, so they must be selected separately for the specific installation surface.
Is this answer helpful?
A
Projectors release hot air during use. If vents are blocked or clearance is too small, the device may overheat and suffer damage.
Is this answer helpful?
A
A separate tilting accessory is available for sloped ceilings in the broader Premium range, but the base mounting setup should always match the ceiling conditions and installation plan.
Is this answer helpful?
M: OA-GPT-54-NAN
Advantagesand
Disadvantages
Advantages
Fixed 30 cm drop offers a predictable, low-profile ceiling installation.
Silver finish looks clean and blends well with modern interior designs.
Supports secure mounting for projectors up to 25 kg when installed correctly.
Cable routing and tidy assembly help create a professional AV setup.
VS
Disadvantages
Installation needs care and is best handled by qualified personnel.
Ceiling screws and plugs are not included because they depend on the ceiling type.
Limited to a fixed length, so it offers less flexibility than telescopic models.
Incorrect screw choice or blocked airflow can lead to damage or safety risks.
M: OA-GPT-54-NAN
Product
Specification
Type
Ceiling mount
Ceiling distance
11.81 in
Tilt angle
20°
Max. load capacity
55.12 lb
Color
silver
M: OA-GPT-54-NAN
Product
Description
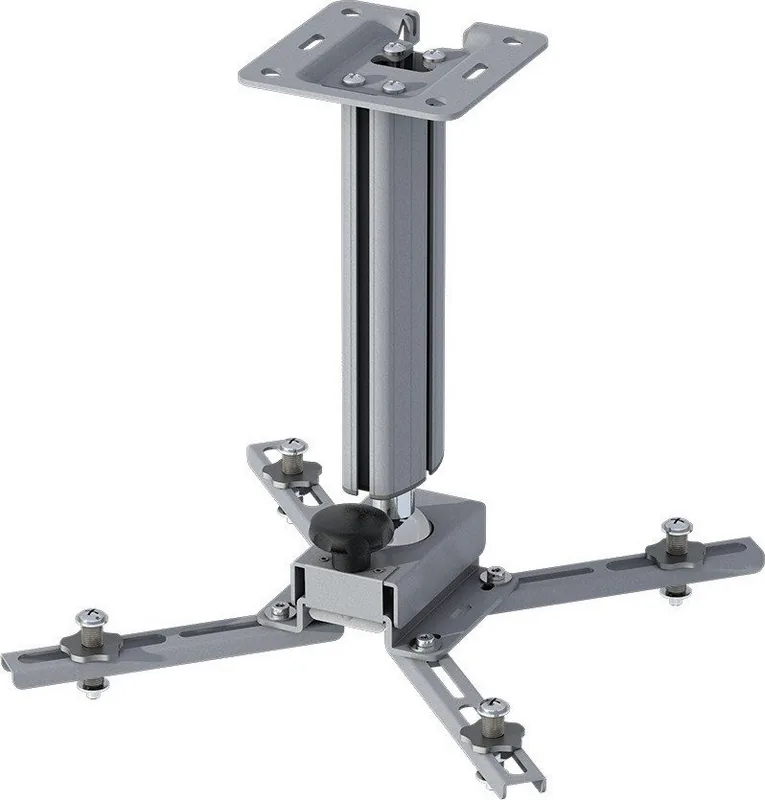
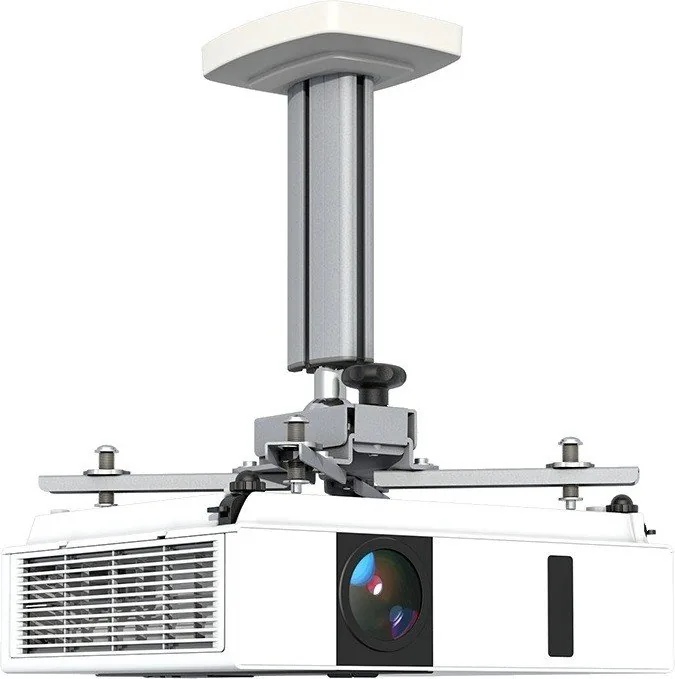
Kindermann Premium 30 Silver: Compact Ceiling Support with a Clean Finish
The Kindermann Premium 30 silver is a practical ceiling-mount solution for projector installations that need stability, a tidy appearance, and a professional result. Its silver anodized look gives it a clean, understated style that blends well into meeting rooms, classrooms, and home cinema spaces. Rather than drawing attention away from the image, it helps the projector sit neatly and securely in place.
What makes this model especially attractive is its fixed 30 cm length. That gives installers a clear, predictable drop from the ceiling, which is ideal when the room layout is already defined. The design favors simplicity and reliability over complex adjustments, making the Premium 30 a smart choice for users who want a straightforward mounting approach. The Kindermann Premium 30 silver Manual is useful here because it highlights careful alignment, correct screw selection, and the need to keep ventilation paths open.
The mount is built for secure projector attachment and supports projectors up to 25 kg when installed correctly. The manual also emphasizes that the projector must be matched to the right screw sizes and washers, and that at least three thread turns are required for safe fastening. These details matter, because a projector mount is only as dependable as its installation. In other words, the Premium 30 is designed to hold equipment firmly, but it expects careful assembly.
Another strength is the attention to cable management and room aesthetics. A ceiling installation looks far more professional when power and signal cables are routed neatly, and this model is intended to support that clean setup. The result is a mount that feels purposeful rather than bulky, with a form factor that suits modern AV environments where both function and appearance matter.
Overall, the Kindermann Premium 30 silver is best described as a solid, low-profile mounting choice for users who value safety, clean design, and consistent positioning. It is not a flashy product, but it is a dependable one. If your goal is to mount a projector with minimal visual clutter and a strong focus on secure installation, this model delivers exactly that.
Notes
Professional installation is strongly recommended.
Use ceiling hardware suited to the building material.
Keep projector vents unobstructed to avoid overheating.
Tighten and recheck all fasteners after the first setup.