Manual.ly Logo

Keter Manor Manual

0.0 · 0 Ratings

PDF manual · 44 Pages

English

M: QW-35-FL
page

/ 44

Loading...
728310ddfe96fb69628ef61e1a8352defb98 page 4
SPATULA | SPATULE | ESPÁTULA | SPACHTEL | SPATEL | SPATOLA | ESPÃTULA
• Use spatula (part “SPA”) for easier insertion of panel into profile.
• Utilisez la spatule (partie “SPA”) pour une meilleure insertion du panneau dans le profil.
• Utilice una espátula (pieza “SPA”) para una mejor inserción del panel en el perfil.
• Benutzen Sie den Spachtel (Bezeichnung „SPA“), um die Platten leichter in die Nut einführen zu können.
• Gebruik spatel (onderdeel SPA) voor het gemakkelijk invoeren van het paneel in het profiel.
• Utilizzare la spatola (parte SPA) per inserire il pannello più facilmente nel profilo.
• Utilize uma espátula (peça “SPA”) para facilitar a inserção do painel no perfil.
REQUIRED TOOLS | OUTILS EXIGÉS | HERRAMIENTAS NECESARIAS | BENÖTIGTE WERKZEUGE | BENODIGD GEREEDSCHAP |
ATTREZZATURA OCCORRENTE | FERRAMENTAS NECESSÁRIAS
BEFORE STARTING ASSEMBLY |
AVANT DE COMMENCER LE MONTAGE
| ANTES DE EMPEZAR EL ARMADO |
VOR
MONTAGEBEGINN
| VOORDAT U BEGINT TE MONTEREN |
PRIMA DI INIZIARE L’ASSEMBLAGGIO
| ANTES DE INICIAR A
MONTAGEM
Read the care and safety guidelines at the end of this manual | Check to ensure that there are no missing or damaged
parts BEFORE starting or arranging assembly | Remove all parts from the package(s) and spread them out on a clean work
surface | Review all assembly instructions | Assemble all the parts according to the directions in this manual. Do not skip
any steps.
Lea las intrucciones de precauciones y seguridad que están al final de este manual | Asegúrese de que no faltan piezas ni
están dañadas ANTES de comenzar o disponer el montaje | Saque todas las piezas del paquete o paquetes y póngalas
sobre una superficie de trabajo limpia | Revise todas las instrucciones de montaje | Monte todas las piezas según las
instrucciones de este manual. No se saltee ningún paso.
Lisez les instructions de précaution et de sécurité à la fin de ce manuel | Assurez-vous qu’il n’y a pas de pièces manquantes
ou endommagées AVANT de commencer ou d'organiser l'assemblage | Retirez toutes les pièces du/des paquet(s) et étalez-les
sur une surface de travail propre | Lisez toutes les instructions de montage | Assemblez toutes les pièces selon les instructions
de ce manuel. Ne sautez aucune étape.
Lesen Sie die Sicherheitsrichtlinien am Ende des Benutzerhandbuchs durch | Prüfen Sie bitte VOR dem Zusammenbau, dass
keine Teile beschädigt sind oder fehlen | Nehmen Sie alle Teile aus der Verpackung und breiten Sie sie auf einer sauberen
Arbeitsfläche aus | Gehen Sie noch einmal die komplette Aufbauanleitung durch | Bauen Sie alle Teile entsprechend der
Anleitung in diesem Handbuch zusammen. Lassen Sie dabei keinen Arbeitsschritt aus.
Lees de richtlijnen voor zorg en veiligheid achterin deze handleiding | Controleer dat er geen onderdelen mankeren, of
beschadigd zijn, VOORDAT u met de montage begint | Haal alle onderdelen uit het pakket (of uit de pakketten) en leg ze
opeen schoon werkoppervlak | Bekijk alle montagehandleidingen | Monteer alle onderdelen volgens de aanwijzingen van
deze handleiding. Sla geen stappen over.
Leggere le linee guida di assistenza e sicurezza alla fine di questo manuale | Assicurarsi che non ci siano parti mancanti o
danneggiate PRIMA di iniziare l’assemblaggio | Estrarre tutti i componenti dall’imballo e posizionarli su una superficie di lavoro
pulita | Consultare tutte le istruzioni di montaggio | Assemblare tutti i componenti secondo le istruzioni contenute nel
manuale. Non saltare nessuna fase.
Leia as diretrizes de cuidados e segurança que constam da parte final deste manual | Verifique para se assegurar de que
não há peças em falta ou danificadas ANTES de começar a preparar a montagem | Retire todas as peças da embalagem e
espalhe-as numa superfície de trabalho limpa | Reveja todas as instruções de montagem | Monte todas as peças de acordo
com as instruções do manual. Não salte quaisquer passos.
spa x1
ASSEMBLY REQUIRES TWO PEOPLE | LE MONTAGE DOIT ÊTRE EFFECTUÉ PAR DEUX PERSONNES | SE
NECESITAN DOS PERSONAS PARA ARMARLO |
ZWEI PERSONEN ZUR MONTAGE NOTWENDIG | MONTAGE
VEREIST TWEE PERSONEN | L’ASSEMBLAGGIO RICHIEDE DUE PERSONE
| A MONTAGEM EXIGE DUAS
PESSOAS
WALL PARTS | PIÈCES DES MURS | PARTES DE LAS PAREDES | WANDELEMENTE | MUURONDERDELEN | COMPONENTI
DELLA PARETE | PAINÉIS LATERAIS
d1b (x1)
52.4"
133 cm
c1a (x1)
64.5”
164 cm
c1c (x2)
52.7”
134 cm
t (x2) msl (x1) msr (x1)
f2c (x1)
43.7" x 66.5"
111 x 169 cm
h1b (x1)
65"
165 cm
s1a (x1)
26.4” x 72.8"
67 x 185 cm
w1a (x3)
26.4” x 72.8"
67 x 185 cm
bd1a (x1)
66.5” x 42.9”
169 x 109 cm
fd2b (x2)
6.7” x 51.5”
17 x 131 cm
c1b (x4)
73.2”
186 cm
fu2a (x1)
v (x2)
lm (x1) rm (x1)
mdt (x2)
mdfr (x1)
70.4”
179 cm
bu1a (x1)
h1a (x2)
72.4"
184 cm
mdfl (x1)
70.4”
179 cm
mtm (x1)
53.1”
135 cm
SHED PARTS | PIÈCES DE L’ABRI | PARTES DEL COBERTIZO | TEILE DES SCHUPPENS | ONDERDELEN VAN HET SCHUURTJE
| COMPONENTI DELLA CASETTA
| PEÇAS DO ABRIGO
Remove all parts from the package(s) and spread them out on a clean work surface. Code letters are imprinted on each
part for easy identification | Retirez toutes les pièces du/des paquet(s) et étalez-les sur une surface de travail propre. Des
lettres sont imprimées sur chaque pièce pour une identification facile | Saque todas las piezas del paquete o paquetes y
póngalas sobre una superficie de trabajo limpia. El código de letras está marcado en cada pieza para que sea más fácil
identificarla | Nehmen Sie alle Teile aus der Verpackung und breiten Sie sie auf einer sauberen Arbeitsfläche aus. Auf jedem T
eil sind Kennbuchstaben aufgedruckt, die die Zuordnung der einzelnen Teile erleichtern | Haal alle onderdelen uit het pakket
(of uit de pakketten) en leg ze op een schoon werkoppervlak. Op ieder onderdeel zijn codes aangebracht voor een
gemakkelijke identicatie | Rimuovere tutti i componenti dall’imballo e posizionarli su una superficie di lavoro pulita. I codici
identificativi sono impressi in ogni componente per una semplice identificazione | Retire todas as peças da embalagem e
espalhe-as numa superfície de trabalho limpa. Existem letras de código impressas em cada peça para fácil identificação
FLOOR PARTS | ÉLÉMENTS DU PLANCHER | PARTES DEL SUELO | BODENTEILE | VLOERPANELEN | COMPONENTI DEL
PAVIMENTO | PEÇAS DO CHÃO
4

Chat with your Keter Manor manual using AI

Get instant AI answers from your Keter Manor manual

Ask anything about the Keter Manor. Answers come from this manual, with the pages they are based on.

Manor Maintenance Schedule

Periodically
Check shed stability and site level

Periodically check that the shed is stable and that the site is level.

Show in the manual (page 36)
As needed
Clear snow and leaves from the roof

Keep the roof clear of accumulated snow and leaves. Heavy snow can damage the shed and make entry unsafe.

Show in the manual (page 36)
When not in use
Close and lock the doors

Keep doors closed and locked when the shed is not in use to prevent wind damage.

Show in the manual (page 36)
M: gpt-5.6-terra

Ask a Question

0/1000

Do you recommend Manor?

Yes No

Frequently Asked Questions

A

No, the manual strongly recommends that assembly be performed by two people. Some panels are large and heavy, requiring a second person to hold them in place while securing them to ensure proper alignment and safety.

Is this answer helpful?

A

You should consult your local authorities to check if a permit is required to erect the shed. Regulations vary by location, and some areas have specific rules regarding outbuildings based on size and placement.

Is this answer helpful?

A

Yes, the resin material is waterproof and resistant to weathering. However, you must keep the roof clear of accumulated snow to prevent structural damage, as large amounts of weight can compromise the roof panels.

Is this answer helpful?

A

You will need a powerful electric screwdriver for self-drilling screws and the included spatula (part SPA) to help insert panels into profiles. Ensure you have a clean work surface and follow the step-by-step guide carefully.

Is this answer helpful?

A

It is not recommended to paint the shed as the color is molded into the resin. Avoid using abrasive cleaners or solvents like acetone, as these can stain or damage the surface finish.

Is this answer helpful?

A

You should anchor the shed to an immovable object or the ground by drilling holes in the pre-marked locations on the floor and inserting appropriate screws. Note that these anchoring screws are not included in the package.

Is this answer helpful?

M: QW-35-FL

Advantages and Disadvantages

Advantages

  • Durable resin construction resists rust, rot, and pests
  • Easy assembly with pre-labeled parts and clear instructions
  • Requires no painting or staining for long-term maintenance
  • Spacious interior fits lawnmowers and multiple bikes
  • Includes a window for natural lighting
VS

Disadvantages

  • Assembly requires two people for safety and efficiency
  • Must be anchored to a foundation to withstand high winds
  • Doors may feel slightly stiff if not aligned perfectly
  • Not suitable for use as a permanent living space
  • Screws for anchoring to the ground are not included
M: QW-35-FL

Product Specification

Material

Plastic

Roof Shape

Gable Roof

Features

lockable, ventilated, weatherproof, weather-resistant, UV-resistant

M: QW-35-FL

Product Description

Discover the Keter Manor Manual Shed: Your Ultimate Outdoor Storage Solution

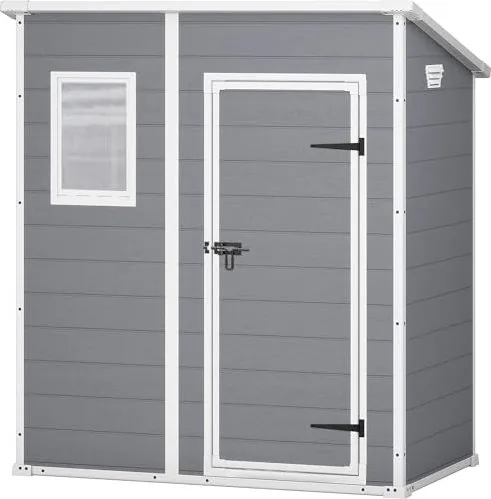
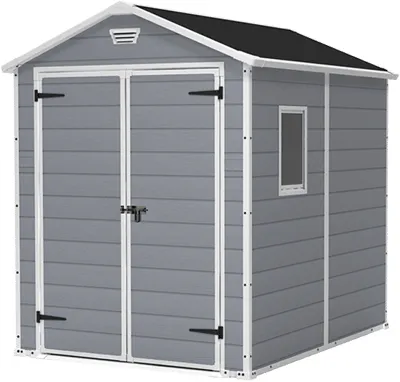
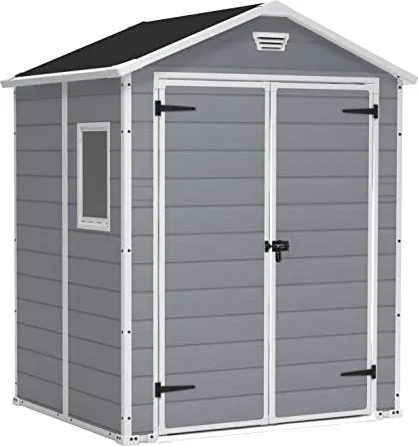
When you invest in a Keter Manor shed, you are choosing durability and style for your garden. The Keter Manor Manual is designed to provide ample space for all your outdoor equipment, from lawnmowers and gardening tools to bicycles and patio furniture. This resin construction ensures that your belongings stay dry and secure without the worry of rust or rot that plagues traditional wooden sheds.

The assembly process is straightforward when following the detailed manual included with your purchase. The system features a modular design where parts are clearly labeled with code letters, making identification easy. You will need two people to handle the assembly safely, as some panels are large and require coordination. Essential tools include a powerful electric screwdriver and the provided spatula, which helps slide panels into profiles smoothly. Before starting, ensure your ground is level and consider building a wooden or concrete base for optimal stability.

Once assembled, the Manor offers a sleek appearance that complements any backyard aesthetic. It includes a window for natural light and a double door for wide access. The roof is designed to shed water efficiently, keeping the interior dry even during heavy rains. Regular maintenance involves simple cleaning with a hose and mild detergent, avoiding abrasive materials that could scratch the surface. Remember never to store volatile chemicals or hot items inside, and always secure the shed to the ground to prevent wind damage.

With its robust build and thoughtful design, the Keter Manor Manual stands out as a reliable choice for homeowners seeking quality storage. Whether you live in a region with harsh winters or humid summers, this shed adapts to various climates while maintaining its structural integrity over time.

M: QW-35-FL

© Copyright 2026 Manual.ly