
Hilleberg Keron 3 Manual
PDF manual · 16 Pages
English



Quick check
Incorrect answer, please try again.
Chat with your Hilleberg Keron 3 manual using AI
Get instant AI answers from your Hilleberg Keron 3 manual
Ask anything about the Hilleberg Keron 3. Answers come from this manual, with the pages they are based on.
Keron 3 Maintenance Schedule
Hang the tent to dry after each use, preferably with poles in place to keep fabrics apart. Do not store without drying first.
Brush out the tent and clean zippers with a small stiff brush, especially after use in sandy or dusty conditions.
Check the entire tent for damage including poles and fabric, and make necessary repairs before packing.
Clean the pegs and replace any that are lost or damaged.
Free maintenance reminders
Timed to your purchase date. Always free, unsubscribe anytime.
Ask a Question
Do you recommend Keron 3?
Yes NoFrequently Asked Questions
The Keron 3 uses Kerlon 1800 for the outer tent fabric combined with an integrated inner tent of mesh and water-repellent materials; poles are 10 mm aluminum (three poles, each 328 cm for Keron 3).
Is this answer helpful?
Yes—the tent can stand with a minimum of four pegs properly placed at the corners, but Hilleberg strongly recommends using all 18 pegging points and the attached guy lines to ensure maximum stability in changing weather.
Is this answer helpful?
Large hooded vestibule vents have two adjustable panels—a snow-proof breathable fabric and no-see-um mesh—both accessible from inside. Inner and outer doors can also be opened for additional airflow; rolling panels increases maximum ventilation.
Is this answer helpful?
Yes, you can use the outer tent alone for gear or group shelter, but note that the outer fabric is waterproof but not breathable, so condensation risk is higher; using a footprint and detaching/reattaching the inner tent when dry helps manage moisture.
Is this answer helpful?
Always dry the tent before long-term storage, brush zippers after sandy use, clean pegs and inspect poles, repair damage promptly, and avoid prolonged UV exposure. Pack the tent rolled around the pole bag and store in a cool, dry place when possible.
Is this answer helpful?
Hilleberg provides spare pole segments and a repair sleeve; for other repairs, contact your dealer or Hilleberg for warranty or paid repair options. Warranty covers manufacturing defects but excludes misuse, wear, and UV damage.
Is this answer helpful?
Yes—Hilleberg offers accessories like pole holders for inner-tent pitching, footprints, snow and sand pegs, extra guy lines, and replacement parts to improve performance in snow, sand, and extreme conditions.
Is this answer helpful?
Advantages and Disadvantages
Advantages

- Robust Kerlon 1800 fabric and strong 10 mm poles provide excellent durability and wind resistance.
- Integrated inner tent with mesh offers insect protection and ventilation; can be detached for versatile outer-only use.
- Multiple peg points (18) and eight guy lines allow secure anchoring in varied and harsh conditions.
- Hooded vestibule vents with dual panels enable adjustable ventilation accessible from inside.
- Comprehensive care and pitching guidance helps prolong tent life and optimize performance.
Disadvantages

- Outer tent is waterproof but not breathable, increasing condensation when used without the inner tent.
- Lightweight poles require careful handling to avoid breakage; improper assembly can cause damage.
- Zippers can be vulnerable to sand and grit; need diligent cleaning after dirty campsites.
- Using all pegs and guy lines increases setup time and requires carrying extra hardware.
- Prolonged direct sun exposure can degrade fabric; extra protection or a tarp may be needed.
Product Specification
Type
Tunnel tent
Persons
3
External dimensions (LxWxH)
169.29x62.99x41.34in
Internal dimensions (LxWxH)
86.61x62.99x41.34in
Water column
216.54in
Weight
9.26lb
Product Description
Hilleberg Keron 3 tunnel tent Manual
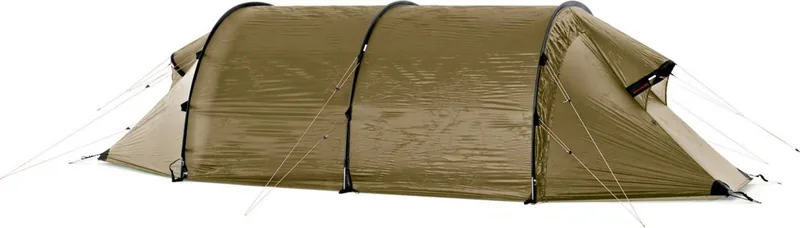
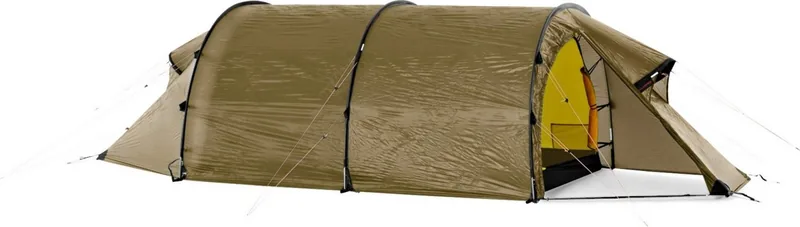
The Hilleberg Keron 3 is a high-end tunnel tent designed for serious outdoor use, combining robust materials with thoughtful features for multi-season comfort. Built with Kerlon 1800 outer fabric and an integrated inner tent, the Keron 3 offers a strong, streamlined shelter suitable for backpacking, alpine trips, and extended expeditions. Its three 10 mm poles create a stable tunnel profile that resists wind and sheds snow, while roomy vestibules provide protected storage and working space.
Durability and practical design are central to the Keron 3. The tent includes 18 pegging points and eight pre-attached guy lines with line runners, allowing secure anchoring in changeable conditions. Although it can stand with as few as four pegs, the manual emphasizes using all pegs and guy lines to maximize stability. Zippered vestibule vents feature dual panels—water-repellent breathable fabric and no-see-um mesh—offering adjustable ventilation that can be managed internally even in poor weather.
The integrated inner tent uses fine mesh for insect protection while allowing ventilation; it can be detached to use the waterproof outer tent alone for group shelter or gear storage. When used without the inner tent, expect increased condensation risk because the outer fabric is waterproof but not breathable. Accessories such as pole holders, footprints, and snow or sand pegs are available to enhance performance in specific conditions.
Practical setup and care guidance are detailed and user-focused. Pitching steps include laying out the tent with adjustable peg loops extended, inserting poles partly into sleeves before seating them fully, and tensioning peg loops so the tent is taut. The manual stresses careful pole handling to avoid breakage, anchoring guy lines correctly (especially in side winds), and using snow-peg deadman techniques when camping on snow. The inner and outer doors roll and secure neatly; users are warned not to let door flaps lie on the ground to avoid grit damage to zippers.
Care and maintenance guidance aims to prolong the tent’s life: always dry the tent before long-term storage, brush zippers clean after sandy trips, inspect and clean pegs and poles, and avoid prolonged direct sun exposure due to UV fabric degradation. The manual also outlines packing and pole removal procedures to prevent damage during takedown. Hilleberg offers warranty coverage for material and manufacturing defects, with regional differences noted and exclusions for misuse or UV damage. Repair services are available for a reasonable fee when not covered by warranty.
Notes:
- The Keron 3 balances low weight with high structural strength—handle poles gently and follow tensioning guidance.
- Use all peg points and guy lines whenever possible to ensure optimal performance in changing weather.
- Detach the inner tent in very wet conditions for separate drying and reassembly to keep the inner dry.
Search for 67,706 Manuals online


Type-in Brand or Model