

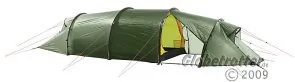

Hilleberg Kaitum 2 GT Manual
PDF manual · 16 Pages
English



Quick check
Incorrect answer, please try again.
Chat with your Hilleberg Kaitum 2 GT manual using AI
Get instant AI answers from your Hilleberg Kaitum 2 GT manual
Ask anything about the Hilleberg Kaitum 2 GT. Answers come from this manual, with the pages they are based on.
Kaitum 2 GT Maintenance Schedule
Hang the tent to dry after each use, preferably with poles in place to keep fabrics apart. Do not store without drying first.
Shake out dirt or debris from the inner tent before drying and packing.
Remove stains using only lukewarm water and a sponge.
Check the entire tent for damage and make repairs if necessary.
Brush zippers with a small stiff brush, especially after use in sandy or dusty environments.
Clean the pegs and replace any that are damaged or lost.
Use a tarp over the tent during extended setups in direct sunlight, especially at high altitude or in deserts.
Ask a Question
Do you recommend Kaitum 2 GT?
Yes NoFrequently Asked Questions
Do not fling poles open. Slide sections together carefully and ensure each part seats fully. Pull gently to check alignment to prevent cracks that could endanger safety during use. Always assemble and disassemble by hand.
Is this answer helpful?
Yes, but the inner fabric is water repellent not waterproof. Use it only in dry conditions during good weather to prevent soaking from rain. It offers less protection than the full tent system.
Is this answer helpful?
Always dry the tent completely before storage. Hang it up with poles in place to keep fabrics separate. Avoid compression to maintain material integrity for years. Cool dark places are best for long term storage.
Is this answer helpful?
You need at least four pegs to make the tent stand. However, using all twenty-two points recommended is better for wind stability and overall structure. Adjust angles based on ground conditions for maximum hold.
Is this answer helpful?
Contact your dealer or Hilleberg directly. They offer accessories like poles and ground sheets. Warranty covers defects but not wear or accidents. They provide repair services for reasonable rates.
Is this answer helpful?
Advantages and Disadvantages
Advantages

- Durable Kerlon 1200 fabric resists tears and weather significantly.
- Modular setup allows inner tent separation for better ventilation and space.
- Tunnel design with four poles ensures high stability during strong winds.
- Large ventilation system protects against rain while maintaining airflow.
Disadvantages

- Using outer tent alone causes condensation due to lack of breathability.
- Pole assembly requires precision to avoid cracks that compromise safety.
- Many peg points can be time-consuming in hard ground conditions.
- Direct sun exposure damages fabric if not protected by a tarp.
Product Specification
Type
Tunnel tent
Capacity
2
Outer Dimensions (LxWxH)
198.82x55.12x39.37in
Inner Dimensions (LxWxH)
86.61x55.12x39.37in
Water Column
196.85in
Weight
8.38lbs
Product Description
Discovering the Hilleberg Kaitum 2 GT Tunnel Tent
When planning an expedition into rugged terrain, reliable shelter is paramount. The Hilleberg Kaitum 2 GT Tunnel Tent stands out as a top choice for adventurers seeking durability without compromising on weight. This tent represents Swedish craftsmanship, designed to withstand harsh weather conditions. Understanding how to utilize this equipment is crucial, which is why following the Hilleberg Kaitum 2 GT Tunnel Tent Manual is highly recommended before your first outing. This guide ensures maximizing your investment.
The construction features Kerlon 1200 material for the outer tent, offering excellent tear strength and resistance against UV damage. A connected inner tent ensures comfort and separation from the elements. The tunnel design utilizes four 9 mm poles, creating a stable arch structure. Adjusting the pole height is key to achieving proper tension. Users should note that while the tent is lightweight, it requires careful handling of the poles to prevent cracking during setup. Never fling the poles open; assemble them section by section to maintain structural integrity.
Ventilation is another standout feature. Large vents in each vestibule are protected from rain and snow. The design allows doors to be rolled aside for views or airflow control. There is also the option to separate the inner and outer tents. However, using the outer tent alone can lead to condensation since the fabric is waterproof but not breathable. For best results, maintain the tent dry and avoid prolonged exposure to direct sunlight. Proper care extends the life of the tent significantly. Hilleberg offers a warranty against manufacturing defects, but users must adhere to maintenance guidelines.
Setting up the tent involves securing twenty-two possible peg points. Basic pitching takes four pegs, but using all recommended points ensures stability. Guy lines should be tensioned correctly to prevent deformation. The peg angle should be around 45 degrees to resist strong winds. Following instructions ensures the roof and vestibules remain taut. Whether for winter camping or summer adventures, this tent provides a safe haven. Remember to pack it correctly with poles rolled inside to protect the fabric during transport. If packing in sand, brush zippers clean to avoid grit damage.
Storing the tent requires attention to moisture. Never pack a wet tent, as this promotes mold and fabric degradation. Clean all components before storage. This regimen ensures your gear remains ready for the next journey into the wild. Choosing between models depends on group size and trip requirements. The 2 GT model is ideal for couples or individuals carrying minimal gear. The extended vestibule provides significant storage for muddy gear. This thoughtful design choice enhances usability during long expeditions.
Search for 67,706 Manuals online


Type-in Brand or Model