Water Cooling Manuals
Manuals
Water Cooling Manuals
Introduction
Water cooling manuals are comprehensive guides that explain how to plan, install, operate, and maintain liquid-cooling solutions for computers, industrial systems, HVAC chillers, laboratory equipment, and high-performance electronics. They provide step-by-step procedures, safety protocols, parts identification, compatibility guidelines, and troubleshooting workflows that ensure efficient heat transfer, long-term reliability, and quiet, stable operation.
What These Manuals Cover
System Overview
- Fundamental principles of heat transfer, convection, and coolant flow.
- The role of blocks, pumps, radiators, reservoirs, tubing, fittings, and fans.
- Closed-loop (AIO) vs. custom loop architecture and when to use each.
Component Identification
- CPU and GPU water blocks: baseplates, microfins, mounting hardware, thermal interfaces.
- Pumps: D5, DDC, integrated pump-reservoir combos, PWM vs. DC control.
- Radiators: sizes (120/140 mm classes), fin density (FPI), materials (copper, brass, aluminum).
- Reservoirs: tube vs. bay reservoirs, fill ports, anti-vortex features.
- Tubing: soft (PVC, EPDM) vs. hard (acrylic, PETG, glass) with sizing conventions (ID/OD).
- Fittings: compression, barb, quick-disconnect, angle and rotary adapters.
- Coolants: distilled water with biocide, premixed coolants, corrosion inhibitors, dyes.
- Sensors and controllers: temperature probes, flow meters, fan/pump controllers.
Planning and Design
- Heat load calculation and radiator capacity sizing (wattage per 120 mm section).
- Loop order best practices prioritizing ease of routing and reservoir-to-pump proximity.
- Material compatibility to avoid galvanic corrosion (e.g., avoid mixing copper and aluminum).
- Case selection, clearance checks, and airflow planning for intake/exhaust balance.
- Noise optimization and thermal targets for different workloads.
Safety and Preparations
Safety Practices
- Power isolation: never power electronics during leak testing.
- Personal safety: cutting tools, deburring hard tubing, eye and hand protection.
- Chemical handling: proper storage of coolants and disposal of contaminated fluids.
Tools and Materials
- Essentials: screwdrivers, hex keys, tubing cutter, deburring tool, heat gun (for PETG), funnel, paper towels.
- Testing: PSU jumper or dedicated pump power supply, leak test kit, pressure tester.
- Consumables: thermal paste, O-rings, thread sealant (if specified), biocide.
Installation Procedures
Pre-Installation Checklist
- Confirm component compatibility, mounting kits, and clearance.
- Flush radiators to remove manufacturing residues.
- Rinse and inspect blocks for debris; verify O-rings are seated.
- Plan tube runs and fitting angles before cutting.
Mounting Blocks
- Clean CPU/GPU surfaces with isopropyl alcohol.
- Apply appropriate amount of thermal compound.
- Attach block using specified torque pattern; verify uniform contact.
Pump and Reservoir Setup
- Position reservoir above pump inlet to maintain prime.
- Secure mounting to reduce vibration; use decoupling where possible.
- Connect PWM/voltage control cables to motherboard or controller.
Radiator and Fan Configuration
- Choose push, pull, or push-pull based on space/noise goals.
- Orient ports for convenient routing and air bleed.
- Use quality fans tuned for static pressure.
Tubing and Fittings
- For soft tubing: measure twice, cut once; avoid tight kinks; use 45/90-degree fittings as needed.
- For hard tubing: heat and bend gradually; use mandrels; always deburr ends.
- Verify compression rings and O-rings are correctly seated; hand-tighten, then a slight additional turn.
Filling and Bleeding
- Use a funnel and fill port; tilt the case to free trapped air.
- Run pump at low speed during initial fill; never run it dry.
- Cycle the system to dislodge bubbles; tap radiators and blocks gently.
Leak Testing
- Perform a 12–24 hour leak test with only the pump powered.
- Use tissue/paper towels under fittings to detect moisture.
- If pressure testing, follow device limits to avoid seal damage.
Operation and Maintenance
Monitoring
- Track coolant temperature, component temperatures, and pump RPM.
- Ensure stable flow rates; investigate abrupt changes promptly.
Routine Maintenance
- Inspect fittings and tubing quarterly for discoloration, clouding, or residue.
- Top off coolant as needed; check reservoir level and bleed air pockets.
- Clean dust from radiators and fans regularly to maintain airflow.
Fluid Service
- Replace coolant every 6–12 months for premixes; monitor inhibitors and dyes.
- For distilled water setups, refresh fluid and biocide at similar intervals.
- Flush loop with distilled water during full service; avoid harsh chemicals unless specified by the manufacturer.
Cleaning Components
- Disassemble blocks if flow drops; soak in mild solution approved by the vendor.
- Avoid abrasive cleaners that can scratch plating or acrylic windows.
Troubleshooting
Common Issues and Fixes
- High temperatures: check pump operation, remove airlocks, clean radiators, reapply thermal paste.
- Low flow: inspect for kinks, clogged microfins, failing pump, or collapsed tubing.
- Noise: decouple pump, reduce fan vibration, eliminate cavitation by repositioning reservoir.
- Leaks: re-seat fittings, replace damaged O-rings, verify tube cuts are square and burr-free.
- Corrosion or sludge: confirm metal compatibility, replace fluid, and flush loop thoroughly.
Diagnostic Steps
- Visual inspection and tissue test around all joints.
- Flow and temperature logging under load to identify bottlenecks.
- Component isolation: test segments individually to locate restrictions.
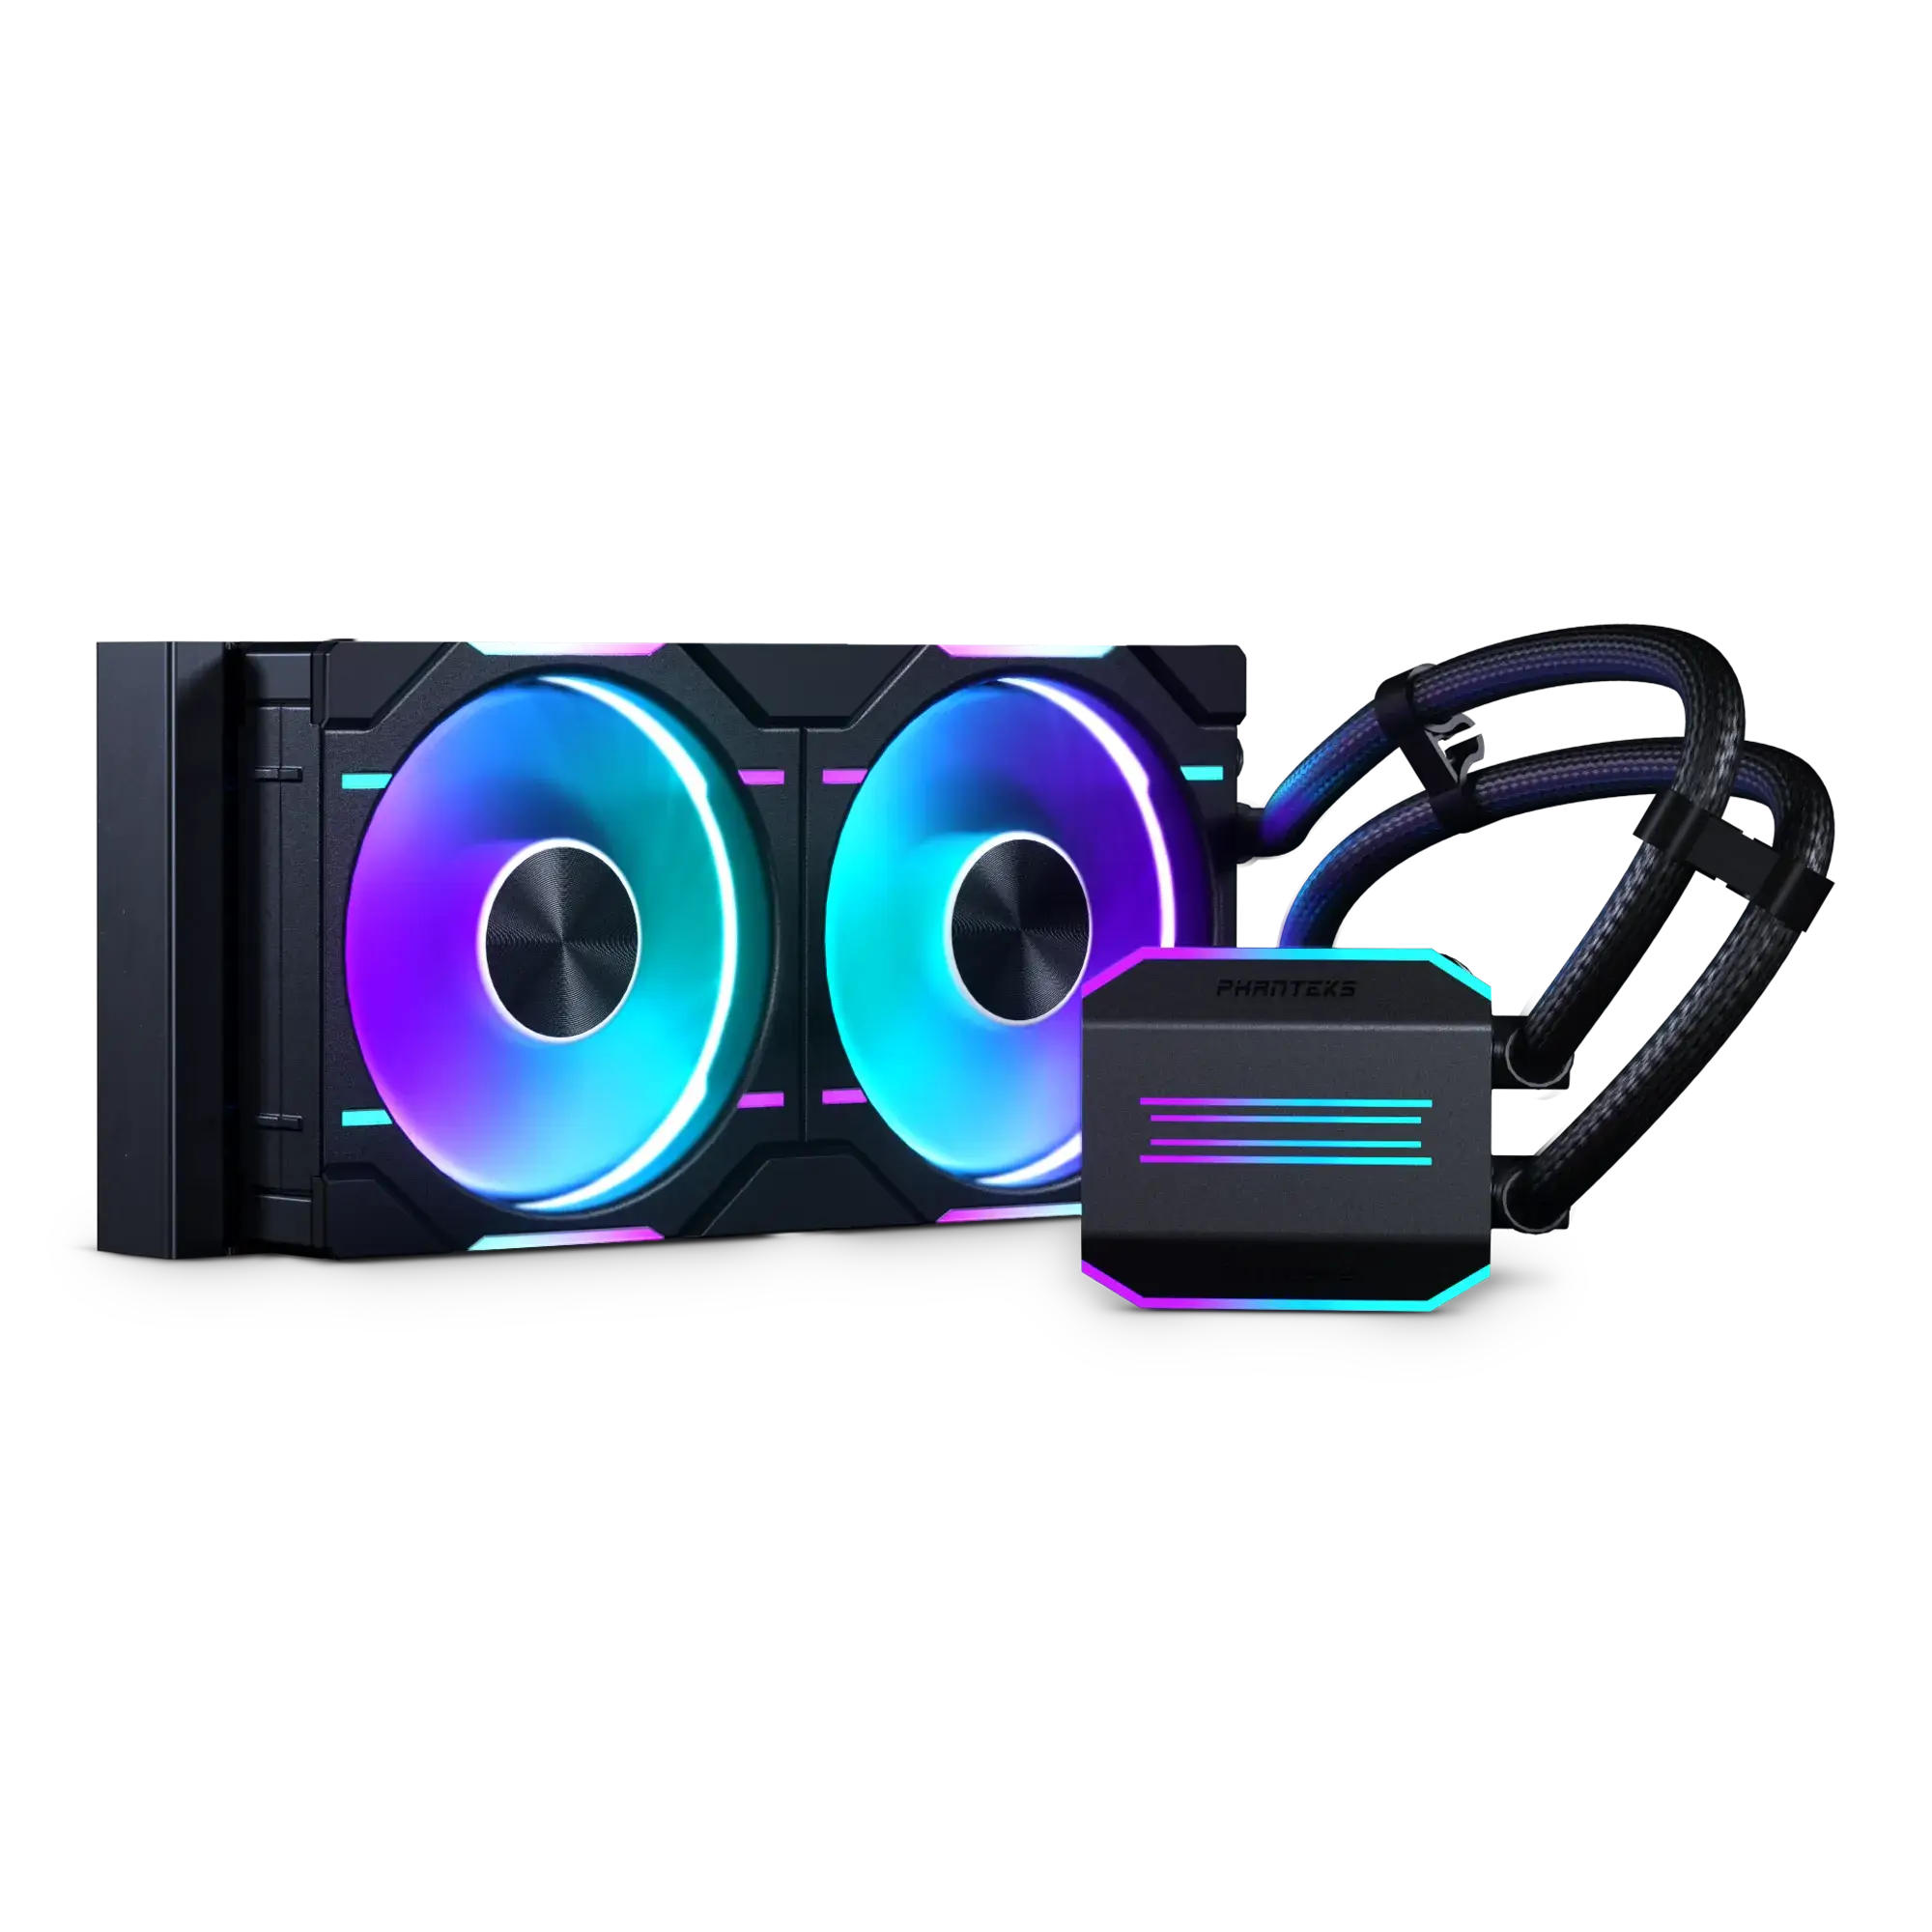
AIO vs. Custom Loops
All-in-One (Closed-Loop)
- Pros: quick installation, low maintenance, compact, pre-filled and sealed.
- Cons: limited expandability, fixed radiator size, pump replacement rare or impractical.
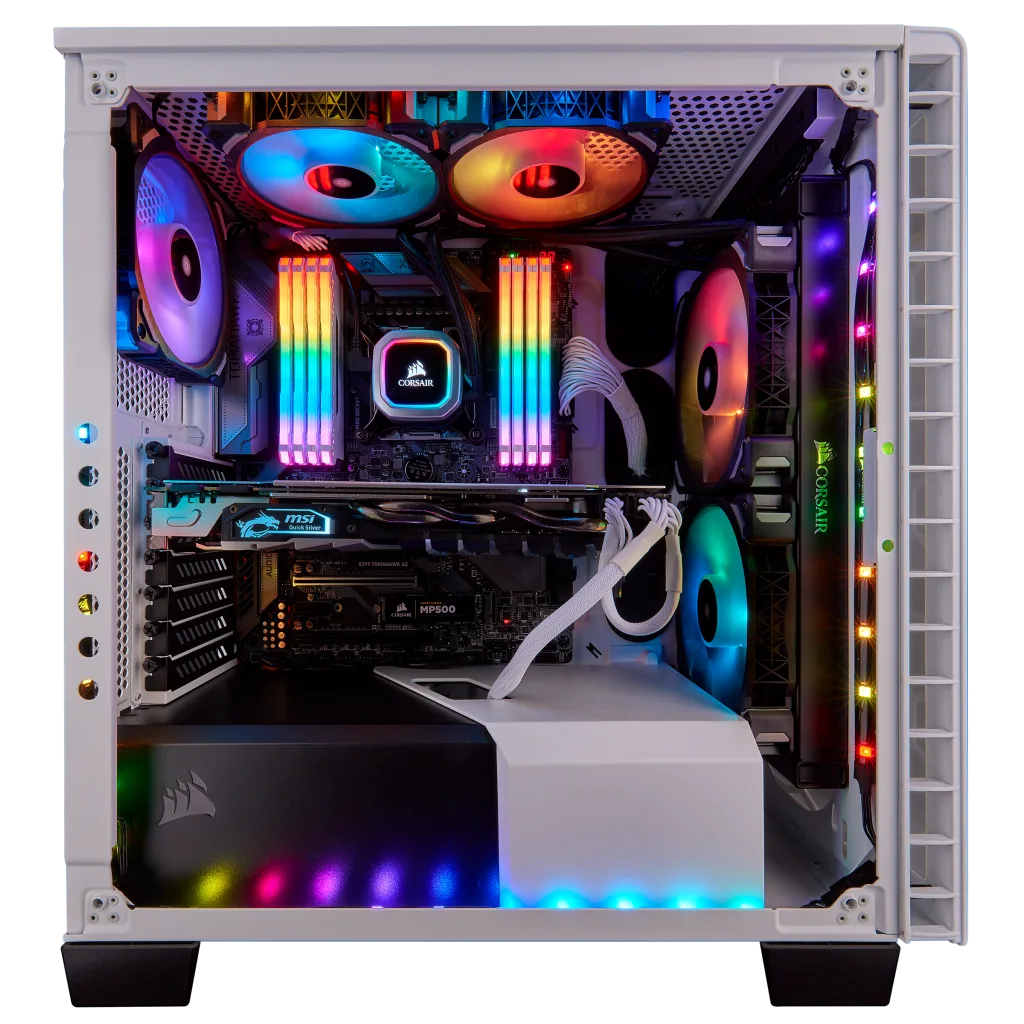
Custom Loops
- Pros: superior thermal headroom, aesthetics, modularity, component-level cooling.
- Cons: higher cost, installation complexity, ongoing maintenance.
Design Best Practices
Loop Order
- Prioritize reservoir-to-pump; otherwise, order has minimal impact compared to overall flow and radiator capacity.
Radiator Sizing
- For quiet operation, allocate generous surface area; lower fan speeds reduce noise without sacrificing performance.
Material Choices
- Prefer consistent metals (copper/brass/nickel together; avoid aluminum in mixed loops) to minimize galvanic reactions.
Coolant Selection
- Distilled water plus biocide for performance; premixes for convenience and enhanced corrosion protection.
Aesthetics and Accessibility
- Route tubing cleanly; ensure drain ports and fill ports are accessible.
- Use quick-disconnects for modular upgrades and easy servicing.
Advanced Topics
Parallel vs. Serial
- Serial loops are simpler and ensure consistent flow through each block; parallel can reduce restriction but needs careful balancing.
Flow Optimization
- Minimize sharp bends, use rotary fittings strategically, and avoid unnecessary adapters.
- Aim for sufficient, not maximal, flow; diminishing returns appear beyond a moderate flow threshold.
Sensors and Control Curves
- Implement coolant-based fan curves for smoother acoustics.
- Use motherboard or dedicated controllers to link pump speed to coolant temperature.
Pressure and Expansion
- Account for thermal expansion; do not overtighten acrylic components.
- Ensure a vented fill port when hot to avoid pressure buildup.
Environmental and Reliability Considerations
Dust and Particulate Management
- Use filters on intakes; schedule periodic cleaning.
Vibration and Shock
- Employ rubber mounts and brackets; secure tubing to prevent stress on fittings.
Data and Uptime
- For servers and workstations, add redundancy: dual pumps, flow alarms, and thermal shutdown failsafes.
Documentation and Record-Keeping
Build Logs
- Record component models, tube lengths, fitting counts, and coolant type.
Service History
- Note fill dates, fluid changes, and any observed issues to predict maintenance intervals.
Glossary
Key Terms
- FPI: Fins per inch, indicating radiator density.
- ID/OD: Inner/outer diameter of tubing.
- Head Pressure: Pump’s ability to overcome restriction.
- Cavitation: Formation of vapor bubbles causing noise and wear.
- Galvanic Corrosion: Electrochemical reaction between dissimilar metals.
Conclusion
A good water cooling manual provides clear, actionable guidance from planning to maintenance, ensuring safe installation, peak thermal performance, low noise, and long-term reliability. Whether using an AIO for simplicity or a custom loop for maximum control, following established procedures, monitoring key parameters, and maintaining a disciplined service schedule will keep your system cool, quiet, and dependable.
Search for 1. Mio Manuals online

Type-in Brand or Model