Manual.ly Logo

Halls Atrium Manual

0.0 · 0 Ratings

PDF manual · 32 Pages

English

M: gpt-5.6-terra
page

/ 32

Loading...
bee60d0c5648a14e0e0640bea1b773e151f4 page 4
B
Dear Customer!
e assembly of your new greenhouse requires no
technical knowledge. However, it is important that
the assembly instructions are strictly followed. e
assembly instruction is a combination of text and
illustrations. e proles are packed seperatly in
numbered packs corresponding to the order in the
assembly instruction. Erect one pack at a time. All
nuts and bolts and ttings are found in bag No. 0
(specied on page 12). Each pack is specied in
separate lists of components.
All detailed illustrations are marked with symbols:
seen from inside seen from outside.
Precautions.
• Assembly must only be carried out in dry and
calm weather.
• Always use working gloves while glazing.
Greenhouse glass has sharp edges, especially if
the glass breaks.
• Assistants and especially children must be
warned that broken glass is an element of
danger. Pick up broken glass at once and
remove it with care.
• We recommend to use protective glasses while
xing the spring wire clips.
• Place the ladder on a level support.
• It is essential to have an assistant.
References
e column marked indicates the page(s) on
which the component is used.
Page 13:
Foundation
e base is not included in this delivery. However,
an optional base can be bought separately. It ensures
you have a stable and easy to build base.
If you make your own base the measurements
indicated must be external measurements.
If you buy an optional base you furthermore need
about 75 litres of concrete and 6 plastic-/concrete
pipes of about 800 mm which are placed in a non-
freezing depth for the fastening of the corner and
middle anchors.
e base must be 100% level and square; the latter
is ensured by checking that the two diagonal
measurements are equal.
Tools
e mounting of the greenhouse requires the tools
shown on page 12.
Page 13:
(Fastening to the base).
When constructing your own base you have to drill
holes (7 mm) in the ground frame between all the
vertical frames, the greenhouse is then fastened to
the base with screws (A).
Using an optional base the greenhouse is fastened to
each vertical bar as shown on drawing B.
(For the original foundation, use 14205 to support
the bottom door rail externally. See picture C.)
Pages 14–29:
Position the components as shown on the drawing
and assemble in order as illustrated. Do not fully
tighten the nuts until the entire subassembly has
been assembled
Best order of installation:
1) Sides – 2) Roof – 3) Assembling the carcase –
4) Doors – 5) Windows – 6) Polycarbonate – 7) Glass
–
Installing glass/polycarbonate
Important before installation!
Check that the sides are vertical and square, and that
the door(s) and window(s) open and shut properly.
Page 29:
Installing polycarbonate
e general drawings on page 29 show how to install
these parts. e type designation indicates the length
in mm. If necessary, adjust with a ne-toothed saw.
Note: To reduce algae formation, do not let the
polycarbonate sheets touch the ground. Use a piece
of cardboard as a base.
Install mouldings 14250 and 14234 at the bottom of
the polycarbonate sheets as shown on page 29.
Tip:
To improve protection against water ingress, apply
aluminium foil (not included) to the sides and top
of the polycarbonate sheets. Microporous tape (not
included; available from DIY stores) can be applied
to the bottom of the polycarbonate sheets. en
install 14250 and 14234.
Another solution is to apply silicone sealant (not
included) between the aluminium and polycarbonate
in the roof.
Note: e more tightly sealed the greenhouse is, the
more condensation there is likely to be.
Page 29:
Installing the glazing
Clean the glass and proles with rubbing alcohol.
Before glazing, t the packing cord (no. 00411) to all
side bars, as shown on the drawing. Note: Do NOT
use in the roof.
Mount the mouldings as shown on the drawings on
page 28.
Note:
is structure is designed as a greenhouse, and the
design is not intended to be completely waterproof.
If you want to use the greenhouse as an outdoor
space, please be aware that it is not 100% waterproof
and that we cannot be held liable for any damage to
any contents placed inside.
Now your greenhouse is completely assembled.
However, please notice the following:
Maintenance
• Grease doors (hinges and lock or doortrack).
• Clean the gutter for leaves, etc.
• Adjustment of windows.
• Replacement of broken glass.
• Clean the greenhouse with disinfectant before
and aer the growing season.
Winter Protection
In areas with occurrence of snow we recommend the
following winter protection:
• Support the roof ridge at the centre of the
greenhouse.
• Remove greater snow loads from the roof.
• Take precautions against snow falling down
from for instance a tree or a roof.
• Dismount the cylinders for the automatic
window openers, if any (optional extras).
• Secure door(s) and window(s) preventing wind
damage to the greenhouse.
Insurance
Please note that not all insurance companies cover
greenhouses automatically. Please contact your
insurance company to ensure an insurance coverage.
Guarantee
Juliana grants a guarantee of 12 years which covers
replacement of faulty parts. e guarantee does
not cover polycarbonate, glass, transport, assembly,
freight etc.
Juliana grants a guarantee of 2 years on painted parts,
if any. Note that marks in the painting may occur due
to suspension of the proles.
e guarantee is invalid if the greenhouse is not
assembled according to these instructions.
Complaints
All our greenhouses are built to high standards of
quality. However, should a complaint occur please
contact your dealer at once. Remember to specify
the defect by indicating the greenhouse model and
number of the component and the quality control
number.
May we congratulate you on your new Greenhouse
GB
USA
www.hallsgreenhouses.com
Please refer to website for the most up to date instruction

Chat with your Halls Atrium manual using AI

Get instant AI answers from your Halls Atrium manual

Ask anything about the Halls Atrium. Answers come from this manual, with the pages they are based on.

Ask a Question

0/1000

Do you recommend Atrium?

Yes No

Frequently Asked Questions

A

This model uses 3 mm toughened safety glass. It provides a clear finish that lets natural daylight reach plants and has greater safety performance than ordinary greenhouse glass.

Is this answer helpful?

A

No. The foundation is not included. You can prepare a suitable level base yourself or purchase a compatible original base separately. The base must be level, square, and securely anchored.

Is this answer helpful?

A

At least two people are recommended. An assistant is especially important during frame construction and glazing, when larger parts must be held safely and accurately in position.

Is this answer helpful?

A

No. It is designed as a greenhouse for growing plants and is not intended to be 100 percent watertight. Some water ingress may occur during heavy rainfall.

Is this answer helpful?

A

Lubricate door hinges, locks, or tracks; remove leaves from gutters; adjust windows when needed; replace damaged glass; and disinfect the greenhouse before and after the growing season.

Is this answer helpful?

A

Support the roof ridge in the centre, remove significant snow loads, protect the structure from falling snow, secure doors and windows against wind, and remove automatic opener cylinders if fitted.

Is this answer helpful?

M: gpt-5.6-terra

Advantages and Disadvantages

Advantages

  • 3 mm toughened glass offers clear light transmission and a classic greenhouse appearance.
  • Aluminium framing is lightweight, durable, and resistant to corrosion in garden conditions.
  • Doors and roof windows help provide access and adjustable ventilation for plants.
  • Numbered component packs support an organised, step-by-step assembly process.
  • A 12-year guarantee covers replacement or repair of defective structural parts.
VS

Disadvantages

  • The greenhouse requires a level, square, securely anchored foundation, which is not included.
  • Assembly should be completed by at least two people in calm, dry weather.
  • It is not designed to be fully watertight, so it is unsuitable as a guaranteed dry outdoor room.
  • Heavy snow requires winter precautions, including roof support and snow removal.
  • Glass, polycarbonate, transport, freight, and assembly are excluded from the structural guarantee.
M: gpt-5.6-terra

Product Specification

Glazing

3 mm safety glass

Frame

Aluminum

Area

96.88 sq ft

Special features

3 lockable vent windows

Door

Double sliding door

Dimensions (L x W x H)

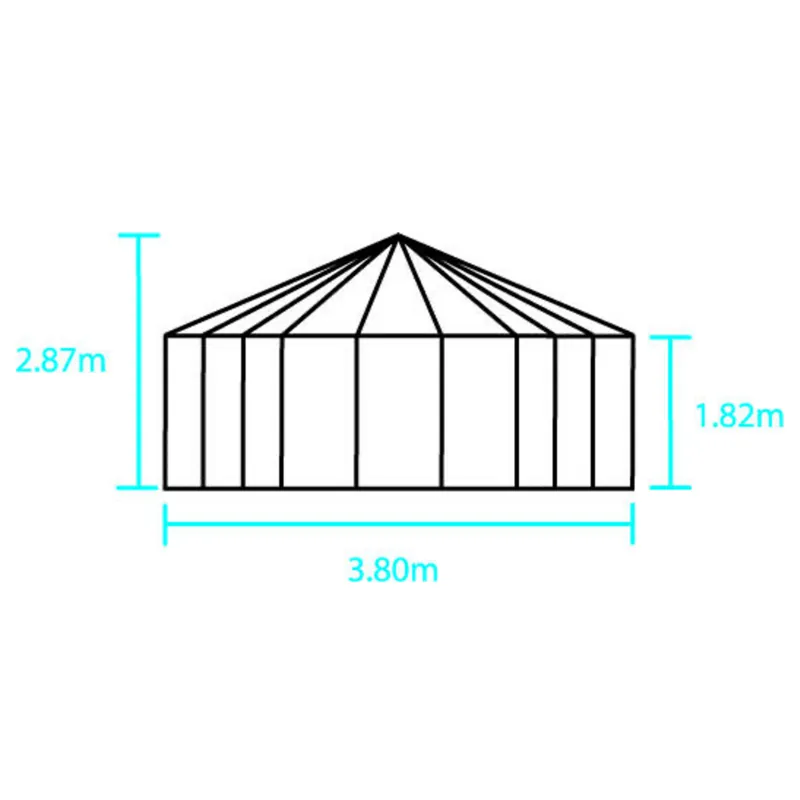
148.03 x 147.24 x 112.99 in

M: gpt-5.6-terra

Product Description

Halls Atrium SG 3mm Greenhouse - Read, Download & Print Free

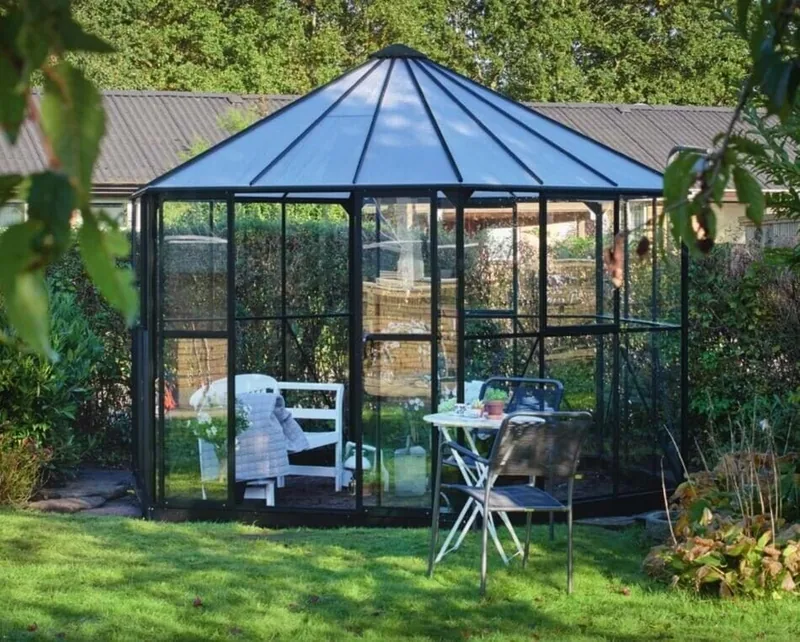
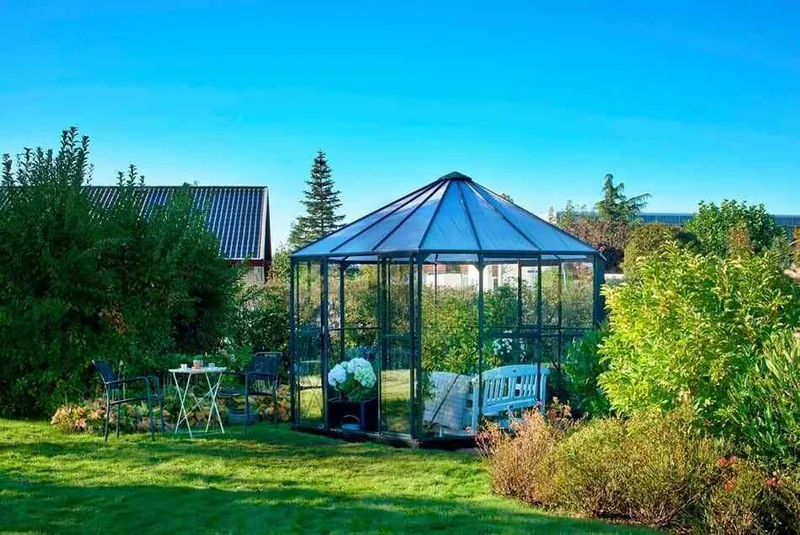
The Halls Atrium SG 3mm Greenhouse is designed for gardeners who want a bright, practical growing space with a strong aluminium frame and 3 mm toughened safety glass. Its traditional greenhouse layout provides room for seedlings, herbs, vegetables, flowers, and tender plants while creating a pleasant place to spend time close to the garden.

Built for Productive Growing

The clear toughened glass panels allow generous natural light to reach plants throughout the structure. Glass is a durable choice for gardeners who value clarity and a classic finish, while the aluminium profiles create a lightweight, corrosion-resistant frame. Doors and roof windows support daily access and ventilation, helping you manage heat and airflow as the seasons change.

A level, square foundation is essential for the best result. An optional original base can be used for straightforward anchoring, or the greenhouse can be fixed to a carefully prepared self-made base. Taking time to check the diagonals, level, and alignment before glazing helps ensure that the doors and windows operate smoothly.

Assembly and Everyday Care

The Halls Atrium SG 3mm Greenhouse is arranged in numbered component groups to support a logical build sequence. The recommended approach is to assemble the sides, roof, main frame, doors, and windows before fitting the glazing. Keep fittings loose until each section is correctly positioned, then complete the final tightening.

For safe installation, assemble in dry, calm weather with a second person available. Gloves are important when handling glass, and protective eyewear is useful when fitting glazing clips. Once built, routine care is simple: lubricate door hardware, clear leaves from gutters, check window adjustment, and clean the interior before and after the growing season.

Seasonal Protection and Important Notes

In snowy areas, support the roof ridge, remove heavy snow accumulation, and secure doors and windows against wind. Automatic window opener cylinders should be removed for winter where applicable. The greenhouse is made for cultivation and is not intended to be completely watertight like a conservatory. Additional sealing may reduce water ingress, but a tighter structure can also increase condensation.

Notes: A 12-year guarantee covers defective structural parts, subject to correct assembly. Glass, polycarbonate, transport, and installation are excluded. Check your home insurance provider to confirm greenhouse cover before installation.

M: gpt-5.6-terra

© Copyright 2026 Manual.ly