
Manual.ly Logo

Fluval Vicenza 260 Manual

0.0 · 0 Ratings

PDF manual · 63 Pages

English

M: OA-GPT-5-NAN
page

/ 63

Loading...
f9c3482361241fb23ae1aa181f97eb8f9cdb page 6
11
Locate the 2 openings (l) and (O) in the tank’s bottom glass and the
corresponding holes in the cabinet. The 2 openings in the tank’s
bottom glass come complete with factory-installed special plastic
fittings, which must never be removed, turned or loosened, and
with two sealing plugs (P) and (Q). The output system should be
installed in the opening (O), and the intake should be installed in
the opening (I).
Once the output/input systems are installed, do not shift
the tank with respect to the cabinet, as this may damage
the output/input systems and the glass tank.
Do not force, loosen or turn the factory-installed special fit-
tings on tank openings (I) and (O).
Output system installation
1. Manually unscrew plug (P) and remove plug (Q) from opening (O) (Pict.1).
Important: keep plugs (P) & (Q) for any future use.
2. Slip connector stem (A) fully through opening (O) until it stops (Pict.2)
3. Open the cabinet. Screw and tighten the ring nut (R) onto the bottom end
of stem (A) (Pict. 3).
4. Insert the outlet nozzle (N) into one end of outlet stem (B)
5. Insert outlet stem (B) in connector stem (A) (Pict.4).
6. Regulate the height of the outlet nozzles according to your requirement by
sliding outlet stem (B) along connector stem (A).
7. The outlet nozzles (N) can be easily rotated to divert the water flow
where desired.
Direct the water jets so as not to let water overflow from the tank.
Avoid directing the water jets toward the Strip-Light(s) of the canopy
Intake system installation
1. Manually unscrew plug (P) and remove plug (Q) from opening (I) (Pict.1).
Important: keep plugs (P) & (Q) for any future use.
2. Slip the second connector stem (A) fully through opening (I) until it stops (Pict.2).
3. Open the cabinet. Screw and tighten the nut ring (R) onto the bottom end of
the second stem (A) (Pict.3).
4. Insert the intake strainer (S) in connector stem (A) (Pict.5).
The height of the intake strainer is high enough to suit most standard aquarium decorations. When
decorating the aquarium, ensure that it remains at least 5 cm (2”) from the gravel bottom at all
times to prevent it from sucking gravel or sand and to ensure that decorations do not block the
passage of water. Ornaments and rocks should be placed while the aquarium is still dry.
CAUTION! Never force Connector Stems (A) sideways, as this may damagethe output/input
systems and the glass tank.
If using a different filtration system that does not require the inlet/outlet systems supplied with this unit
(e.g. an internal filter), restore the initial conditions by removing the 2 connector stems (A) and closing
openings (O) and (I) with plugs (P) & (Q). Plug (Q) ensures a watertight seal and has to be inserted into its
seat by pressing it. Plug (P) is designed to protect plug (Q) and ensure that plug (Q) remains in its seat
properly. Screw plug (P) by hand only until it will go without forcing it. DO NOT USE ANY TOOLS, AS
DOING SO MAY DAMAGE THE UNIT.
10
LOCATE THE 2 OPENINGS IN THE TANK’S
BOTTOM GLASS AND ENSURE THAT THE
CORRESPONDING OPENINGS IN THE
CABINET ARE ALIGNED WITH THEM.
PLUG (P) + (Q)
RNG NUT (R)
OUTPUT
NOZZLE (N)
OUTPUT
STEM (B)
INTAKE
STRAINER (S)
CONNECTOR
STEM (A)
PICT. 1
PICT. 3
PICT. 4 PICT. 5
PICT. 6
PICT. 2
Instruction Manual.qxd 29-05-2007 17:43 Pagina 10

Chat with your Fluval Vicenza 260 manual using AI

Get instant AI answers from your Fluval Vicenza 260 manual

Ask anything about the Fluval Vicenza 260. Answers come from this manual, with the pages they are based on.

Vicenza 260 Maintenance Schedule

Every 15 days
Clean saltwater components

Clean all aquarium components that come into contact with salt water at least every 15 days using a wet cloth. Lemon juice may be used for calcareous encrustation.

Periodically
Clean or replace filter media

Rinse foam and biological media with aquarium water or replace as needed. Replace chemical media as required. Never replace all biological media at once.

Show in the manual (page 28)
Periodically
Inspect and clean impeller

Remove the impeller cover and inspect the impeller. Rinse it under clean water if dirty to lengthen its life and the motor's life.

Show in the manual (page 29)
Periodically
Lubricate rubber parts

Periodically lubricate all rubber parts including the cover gasket, primer stem, Aquastop Valve, and seal rings.

Show in the manual (page 28)
Periodically
Clean heater glass

Clean the heater glass regularly to remove encrustation and deposits. Use lemon juice drops or soak in white vinegar, then rinse with fresh water.

Show in the manual (page 29)
Periodically
Clean Strip-Light canopy

Clean the canopy periodically with a damp cloth. Use mild acid like lemon juice for calcareous deposits. Saltwater requires regular thorough cleaning.

Show in the manual (page 33)
When discolored
Replace reflectors

Replace the reflectors when they become discolored to maintain optimal light output.

Show in the manual (page 33)
M: QW-35-FL

Ask a Question

0/1000

Do you recommend Vicenza 260?

Yes No

Product Specification

Type

Aquarium

Suitability

Freshwater

Tank shape

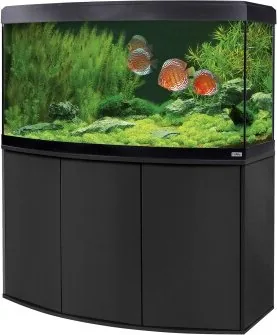
Lying cuboid, horizontal panorama, rectangular base with curved front

Capacity

68.69 gal

Dimensions

47.64x25.20x18.11in

Weight

132.28 lb

Special features

Base cabinet (47.64x18.11x27.56in, black), lighting (2x 39W LED, timer), filter (Fluval 306, external filter), heater (Fluval 300W)

M: OA-GPT-54-NAN

Product Description

M: OA-GPT-5-NAN

© Copyright 2026 Manual.ly