
Flashforge Creator Pro 2 Manual
PDF manual · 56 Pages
English



Quick check
Incorrect answer, please try again.
Chat with your Flashforge Creator Pro 2 manual using AI
Get instant AI answers from your Flashforge Creator Pro 2 manual
Ask anything about the Flashforge Creator Pro 2. Answers come from this manual, with the pages they are based on.
Ask a Question
Do you recommend Creator Pro 2?
Yes NoFrequently Asked Questions
The machine handles PLA ABS HIPS and PVA filaments. It supports different print modes including solid objects with soluble supports. Ensure you use recommended filament brands for best adhesion.
Is this answer helpful?
Use the leveling nuts under the platform. Place paper under the nozzle and adjust nuts until slight friction is felt. Repeat for all points to ensure flatness before printing begins.
Is this answer helpful?
Yes. Mirror and duplicate modes allow simultaneous printing of reversed or identical models. The X axis size of the model must be less than 80mm for these modes.
Is this answer helpful?
You can update via FlashPrint software using USB cable or by placing files on an SD card. Follow the specific folder instructions provided in the software menu.
Is this answer helpful?
Try running the filament change again. If it fails, use the provided unclogging pin tool. Heating the nozzle carefully can also help clear debris.
Is this answer helpful?
Yes. Some filament types emit odors during the printing process. The device must be operated in a well ventilated environment for safety.
Is this answer helpful?
Wait for the build plate to cool completely. Use a scraper knife gently from the bottom. Avoid peeling forcefully to prevent damage to the plate.
Is this answer helpful?
Advantages and Disadvantages
Advantages

- Dual independent extruders enable multi material and support printing
- Large build volume of 200mm by 148mm by 150mm suits big projects
- 3.5 inch touchscreen interface simplifies operation and monitoring
Disadvantages

- Nozzle maintenance is required frequently to prevent clogs
- Bed leveling process can be tricky for beginners to master
- Ventilation is mandatory due to fumes from heated plastic filaments
Product Specification
Process
FFF (Fused Filament Fabrication)
Configuration
2x movable print heads (front/back, left/right), 1x movable build platform (up/down)
Construction
Complete model, closed build chamber (removable lid, front door with viewing window), controller in device, integrated filament holder
Material Manufacturer Recommendation
1.75mm filament, open system, ABS, PETG/PET, PLA, PVA, HIPS, TPC, TPE, TPU, Flex
Build Volume
7.87x5.91x5.83 in (WxHxD)
Extruder System
2x Print Heads (1x nozzle with mono-feed, 0.4mm brass, replaceable, 122-464 deg F), 2x Direct Extruders
Layer Height
0.1-0.4mm
Accuracy X
11um
Accuracy Y
11um
Accuracy Z
2.5um
Print Speeds
10-100 mm/s Printing
Build Plate
Rectangular, Metal, heated (32-248 deg C)
Interfaces
USB-A 2.0, Card reader (SD Card)
Screen
Color, Touchscreen
Control
Touchscreen, optional via PC
Sound Pressure
55 dB(A)
Power Supply
100-240V, 320W
Operating Environment
59-86 deg F
Dimensions
20.71x15.87x14.17 in
Weight
32.63 lbs
Color
Black
Features
Build chamber lighting, build chamber ventilation
Manufacturer Warranty
One year
Product Description
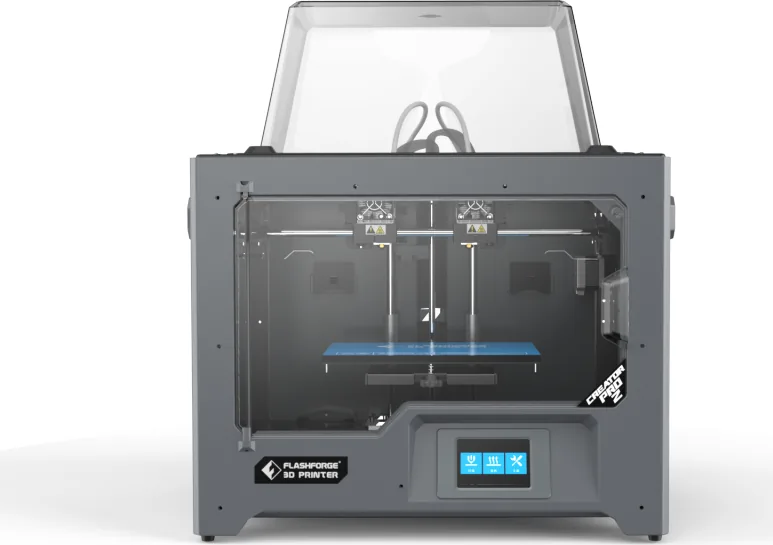
Three dimensional printing technology continues to evolve rapidly. The Flashforge Creator Pro 2 stands out among desktop 3D printers available today. It utilizes Fused Filament Fabrication to create objects layer by layer. This method melts plastic filament into precise shapes. The machine supports two independent extruders on separate axes. This dual setup enables multi material printing capabilities. You can print solid models with support structures simultaneously. The supported materials include PLA ABS HIPS and PVA filaments. PVA water soluble supports ease removal from complex designs. A large build volume accommodates various project sizes. The dimensions reach 200 by 148 by 150 millimeters. Mirror and duplicate modes allow printing two identical or reversed parts at once. This function saves time on batch production tasks. The 3.5 inch touchscreen provides intuitive control over settings. Operators can monitor temperature and progress directly on the screen. FlashPrint slicing software prepares models for the printer. Files export via USB or SD card connection for offline printing. Safety guidelines are critical for operational success. The device generates heat and moving parts during operation. Ventilation is required to manage potential odors from heated plastic. Keep the area free of flammable liquids or dust sources. Do not operate the printer while unattended for long periods. Always ensure the printer is plugged into a grounded outlet. Touch the nozzle with extreme caution due to high temperatures. Consult the Flashforge Creator Pro 2 Manual for detailed warnings. This information helps prevent accidents during maintenance or printing. Calibration plays a vital role in print quality. The Z axis compensation mechanism adjusts for nozzle height differences. X and Y axes calibration align the extruders for overlap. Leveling nuts under the platform adjust bed distance. Paper sheet method verifies the friction distance for bed leveling. Accurate calibration prevents strings and layer shifting errors. The printer requires regular cleaning of the extruder gears. Proper filament storage prevents moisture absorption issues. Troubleshooting common issues saves valuable time and material. If spaghetti mess appears check the bed leveling again. Extruder head building off center requires a homing process. Frozen screens usually need a power cycle to reset. Nozzle clogs may require unclogging with the provided tool. Filament loading requires alignment with the intake wheel. Maintenance schedules keep the machine running smoothly. Use the scraper knife to remove models gently. Do not peel models forcefully to avoid plate damage. Post processing involves drying the model after washing supports. Waste water treatment is simple as PVA is biodegradable. Update firmware regularly via the software for best features. Contact FlashForge support for unresolved technical challenges. In conclusion the Creator Pro 2 is a powerful tool. It serves both hobbyists and professional prototyping needs. Reliability is enhanced by robust engineering standards. Users can expect consistent results with proper care. The interface remains user friendly despite advanced capabilities. Quality control checks verify build plate adhesion before start. Investing in good filament improves the finished outcome significantly. Follow instructions carefully for longevity. This overview covers the basics of operation.
Search for 67,706 Manuals online


Type-in Brand or Model