
Exsys EX-1189HMVS Manual
PDF manual · 2 Pages
English



Quick check
Incorrect answer, please try again.
Chat with your Exsys EX-1189HMVS manual using AI
Get instant AI answers from your Exsys EX-1189HMVS manual
Ask anything about the Exsys EX-1189HMVS. Answers come from this manual, with the pages they are based on.
Ask a Question
Do you recommend EX-1189HMVS?
Yes NoFrequently Asked Questions
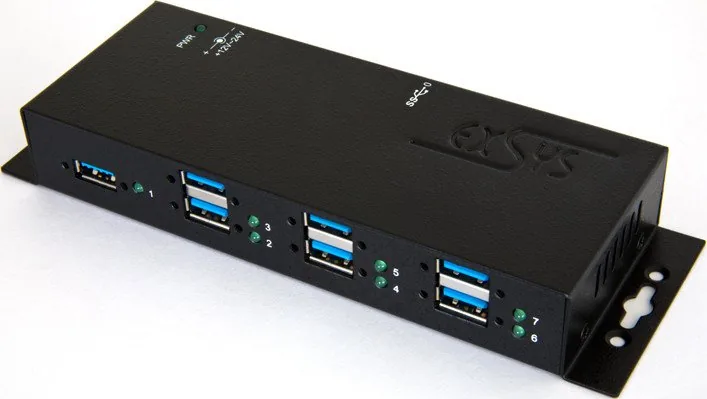
It expands one USB connection into seven USB-A 3.0 ports, letting you connect multiple devices to a single computer while keeping data transfer fast and stable.
Is this answer helpful?
Yes. The hub is compatible with both USB 2.0 and USB 3.0, so older devices can still be used without issue.
Is this answer helpful?
Usually no. Most operating systems detect the hub automatically and install the needed drivers during setup.
Is this answer helpful?
Yes. With the external power supply, each port can provide up to 1.5A, which is suitable for charging many mobile devices such as phones, tablets, and similar accessories.
Is this answer helpful?
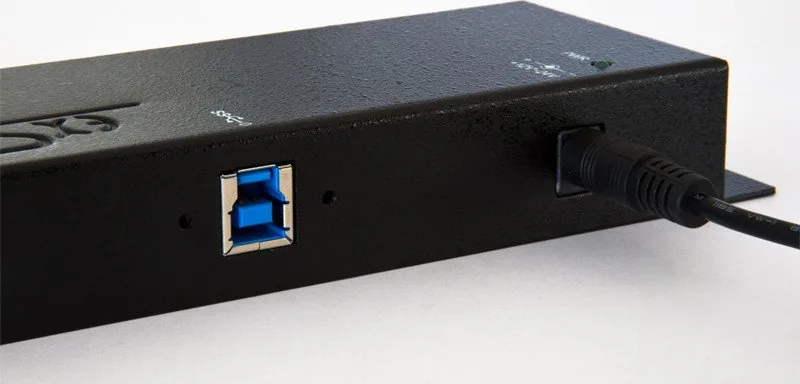
It uses a USB 3.0 B-port as the uplink connection to the host computer, which helps support fast and reliable communication.
Is this answer helpful?
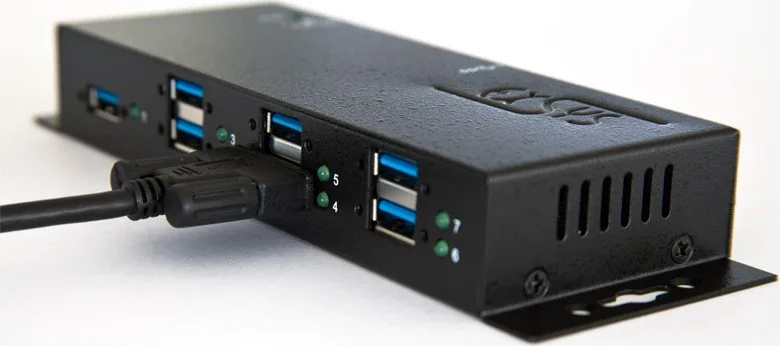
Yes. It includes screw-lock connectors, power surge protection, and a wallmount-friendly design, making it a good fit for fixed or demanding setups.
Is this answer helpful?
Advantages and Disadvantages
Advantages

- Seven USB-A 3.0 ports make it easy to connect many peripherals at once.
- Up to 5 Gbit/s transfer speed supports fast and efficient data handling.
- External power supply allows up to 1.5A per port for charging devices.
- Screw-lock connectors help keep cables secure in busy environments.
Disadvantages

- Requires the included power supply for proper operation.
- No manual IRQ or address configuration is available.
- Industrial design may be less suitable for users wanting a simple consumer-style hub.
Product Specification
Type
USB-Hub
Form factor
1x external wired (wall mount)
Connection
1x USB-B 3.0 (socket, screwable, 5Gb/s), 1x USB-A 3.0 (plug via cable, 59.06 in cable length)
Connectivity
7x USB-A 3.0 (socket, screwable)
Data transfer
7x USB-A 3.0 (socket, 5Gb/s, USB BC, 7x 5V/1.5A, 15kV ESD)
Power supply
Power supply also via connection, mains connection (1x barrel connector 12V/3A), external power supply unit possible and included (1x barrel connector, 12V/3A)
Chipset
Genesys Logic GL3521 (USB-Hub)
Dimensions
7.05x0.98x2.32in (WxHxD)
Weight
1.10lb
Housing color
black
Compatibility
universal
Special features
Metal housing, extended operating range (Temperature: 32 degrees F to 131 degrees F, Humidity: 5% to 95%)
USB notation
Link
Product Description
Exsys Industrial Wallmount USB Hub, 7x USB-A 3.0, USB-B 3.0 socket Manual
The Exsys Industrial Wallmount USB Hub is built for environments where reliable connectivity matters as much as speed. With seven USB-A 3.0 ports for end devices and a USB-B 3.0 uplink for the host PC, it offers a practical way to expand one computer connection into a compact multi-device setup. It is designed for USB 2.0 and USB 3.0 compatibility, so it fits smoothly into mixed hardware environments without forcing a full upgrade.
What makes this hub especially useful is its industrial-minded design. The external 12-24V power input supports stable operation, while the included power supply allows each port to deliver up to 1.5A. That makes the hub a smart choice for charging phones, tablets, and other mobile devices, not just transferring data. With USB 3.0 speeds reaching up to 5 Gbit/s, it is also ready for fast file movement, peripheral use, and high-performance workflows.
The hub uses a Genesys chipset to help maintain strong data performance and dependable communication across all ports. It also includes screw-lock USB connections, which are especially valuable in setups where cables should stay securely attached. The device supports both bus-powered and self-powered operation, giving it flexibility in different installation scenarios.
Installation is straightforward: connect the USB cable to the hub, attach the power supply, and link it to the PC. Most operating systems recognize the device automatically, so there is no complicated driver setup to manage. Built-in USB power surge protection adds another layer of confidence for everyday use in demanding spaces.
Key Takeaways
- 7x USB-A 3.0 ports provide flexible expansion for multiple devices.
- USB-B 3.0 uplink supports fast connection to the host computer.
- Up to 5 Gbit/s helps maintain high-speed data transfer.
- External power enables stronger charging support on every port.
- Screw-lock connectors improve stability in industrial or fixed installations.
Notes
- Use only the included power supply.
- Connect the plugs carefully; do not force the USB-B or power connector.
- Best suited for workstations, control systems, and permanent desk setups.
Search for 67,706 Manuals online


Type-in Brand or Model
Leonie Schneider
7 months ago
I tested my TS-RDF9K hub with different SD cards and external SSDs and every time I top out at about 250MB/s. Shouldn't I be able to reach around 500MB/s? Could it be related to Renesas/NEC USB3 controller compatibility?
Manual.ly
7 months ago
A 250MB/s cap is often normal when the hub is operating over a 5Gbps USB link (USB 3.0 / 3.1 Gen1). The theoretical peak (500MB/s) is not achievable in practice due to protocol overhead, device/controller behavior, and whether UASP is used. Please also confirm your hub model and upstream USB spec (Gen1 vs Gen2) and connect it to a native USB port using a good quality cable. For Renesas/NEC hosts where devices are not detected reliably, update the chipset/USB drivers (and BIOS if available), disable USB power-saving for troubleshooting, and try a different USB port/controller. If you share your OS, host controller model, and hub revision, we can help verify the expected maximum for your setup.