
Manual.ly Logo

Ergotec SP-7.0 Manual

0.0 · 0 Ratings

PDF manual · 2 Pages

English

M: OA-GPT-54-NAN
page

/ 2

Loading...
163c3c2acc673c405688f9689e43babf5bfd page 2
Thank you for deciding to buy your new seat post from our company.
Compare the level number on the seat post with the adjacent table
in order to check whether it is suitable for the intended use.
Before fitting the seat post please make sure that it is suitable for
the max. permitted weight of the bike. You will find the relevant
details on the packing card, or alternatively you can ask your
bicycle dealer.
Before use please read the following assembly and safety
instructions carefully. Keep them in a safe place and pass
them on to the next owner if necessary.
Assembly
Basic technical knowledge is required for the assembly of this product. If you do
not have this knowledge, please use the services of a specialist bicycle dealer.
Before assembly you should check that the external diameter of the seat post
(27.2 mm) fits the internal diameter of the frame’s seat base.
If the clamping area of the seat base is larger, you can adjust the diameter
with a suitable seat post sleeve (min. length 80 mm). For safety reasons we
recommend the use of original Humpert seat post sleeves. These can be
ordered from a specialist bicycle dealer.
The end of the tubing of the frame’s seat base must be free
from burrs, otherwise there is a risk of breakage!
Before mounting the seat post the clamping area of the frame’s seat base must
always be treated with water-resistant grease, because corrosion could later
make it difficult to adjust the seat height.
Now insert the seat post into the frame’s seat base tubing.
For safety reasons the seat post must be inserted into the tubing
of the frame’s seat base to the mark (75 mm) unless the bicycle
manufacturer prescribes a greater depth of insertion. Please refer
to the bicycle manufacturer’s user information!
To fix the seat post in the frame you tighten the seat post clamping screw or
the quick action mechanism to the tightness value specified by the bicycle
manufacturer.
Before you mount the saddle please check that the seat post and the saddle
are compatible.
Now place the frame of the saddle in the guide slots of the saddle block and
tighten it slightly.
Now adjust the position of the saddle to your individual requirements.
Now tighten the two screw nuts of the saddle clamp
c
with a 5 mm
hexagonal key to a tightness value of 8-10 Nm.
Adjustment
You can adjust the suspension individually to your body weight, your cycling style
and the road surface.
For this purpose you sit on the saddle. At the correct setting the displacement
of the seat post (approx. 9 mm) should be approx. 20 %.
To increase suspension strength you turn the adjusting nut
d
on the lower
end of the seat post adapter in a clockwise direction – for a softer suspension
in an anti-clockwise direction.
If the standard settings does not suit you, you can buy the right MCU elastomers
from a specialist cycle dealer, which we supply in three degrees of firmness:
up to 45 kg / Art.Nr. 06050000, 45-75 kg / Art.Nr. 06051000
and 85-100 kg / Art.Nr. 06052000
To remove the elastomers you release the seat post clamping screw or the
quick action mechanism.
Now withdraw the seat post from the tubing of the frame’s seat base.
With pliers you remove the retaining ring
e
, which is located at the
lower end.
Turn the adjusting nut
d
out of the seat post in an anti-clockwise direction.
Now you can remove the distance piece
f
and the MCU elastomers
g
.
Assembly takes place in reverse order.
Assembly and safety instructions for
Suspension seat post SP-7.0
Mountain-Bike/Race-Bike Safety Level
max. 100 kg max. 100 kg
max. 120 kg max. 120 kg
E-BIKE
25 km/h + 45 km/h
max. 100 kg max. 100 kg
max. 120 kg max. 120 kg
Trekking-Bike Safety Level
max. 100 kg max. 100 kg
max. 120 kg max. 120 kg
max. 140 kg max. 140 kg
max. 160 kg max. 160 kg
E-BIKE
25 km/h max. 140 kg max. 100 kg
E-BIKE
25 km/h max. 160 kg max. 140 kg
E-BIKE
45 km/h* max. 140 kg max. 140 kg
E-BIKE
45 km/h* max. 160 kg max. 140 kg
City-Bike Safety Level
max. 100 kg max. 100 kg
max. 120 kg max. 120 kg
max. 140 kg max. 140 kg
max. 160 kg max. 160 kg
max. 180 kg max. 180 kg
E-BIKE
25 km/h max. 140 kg max. 100 kg
E-BIKE
25 km/h max. 160 kg max. 140 kg
E-BIKE
25 km/h max. 180 kg max. 160 kg
E-BIKE
45 km/h* max. 140 kg max. 140 kg
E-BIKE
45 km/h* max. 160 kg max. 140 kg
Jugend/Young adult Safety Level
max. 100 kg max. 100 kg
Kinderrad/Youth-Bike Safety Level
12"-24"
Lenksystem
Steering system
Sattelstütze
Seatpost
The product classification of the ergotec Safety Level corresponds
to the DIN EN ISO 4210 norm for bikes and DIN EN 15194 for e-bikes.
E-bike-type: pedal assist up to the indicated speed.
* Retrofitting only with the approval of a recognised certifying
body and entry in the documents for the bike.
english
Valid: 01.12.2015
Guarantee
For ergotec suspension seat posts the following guarantee periods apply:
with safety level 6 6 years or 35,000 km
with safety level 5 5 years or 30,000 km
with safety level 4 4 years or 25,000 km
with safety level 3 3 years or 20,000 km
with safety level 2 3 years or 15,000 km
Guarantee claims should be processed
through a specialist bicycle dealer.
Maintenance
To ensure good performance, safety and long life, regular maintenance is required
after approx. 200 operating hours or at least 1 x per year.
Adjusting sideways play
Turn the cap nut
h
in a clockwise direction until there is no longer any
sideways play or resistance.
To avoid damage you should not use pliers
or similar tools.
Greasing the bearings
Carefully clean the whole area of the sliding tube
i
with a bio-degradable
cleaning agent.
Now you grease the whole area of the sliding tube
i
with an acid-free
grease, which can be bought from a specialist bicycle dealer.
Make sure you use acid-free grease, because otherwise the
elastomer can be chemically changed or destroyed.
Safety instructions
The tightness of the bolts must be checked after approx. 500 km and once more
during the regular service intervals (with once a year as a minimum).
This seat post is not suitable for mountain biking or competitions.
The heavy demands could lead to breakage.
No additional weights such as child seats, luggage racks or trailers
should be attached to the seat post. Excessive loading can cause the
seat post to break.
For reasons of material fatigue aluminium seat posts must be replaced
after 10,000 km or 3 years at the latest.
To prevent the risk of a fall or accident the seat post must always
be replaced if it has been damaged.
For safety reasons the load on the seat post must not
exceed 100 kg.
CYCLINGRIGHT.COM
h
i
d
c
c
f
g
d
e

Chat with your Ergotec SP-7.0 manual using AI

Get instant AI answers from your Ergotec SP-7.0 manual

Ask anything about the Ergotec SP-7.0. Answers come from this manual, with the pages they are based on.

SP-7.0 Maintenance Schedule

Remind me when maintenance is due
Yearly
Check bolt tightness

Check the tightness of bolts after approx. 500 km and regularly during service intervals, at least once per year.

Every 200 hours
Perform regular maintenance

Regular maintenance is required after approx. 200 operating hours or at least once per year to ensure safety and performance.

Every 3 years
Replace seat post

Aluminium seat posts must be replaced after 10,000 km or 3 years due to material fatigue.

Free maintenance reminders

Timed to your purchase date. Always free, unsubscribe anytime.

By submitting you agree to the privacy policy. Unsubscribe with one click in any email.
M: QW-35-FL

Ask a Question

0/1000

Do you recommend SP-7.0?

Yes No

Frequently Asked Questions

A

Check the seat tube internal diameter and ensure it matches the seatpost size. The seatpost is 27.2 mm externally. If the clamping area is larger, use a compatible seatpost sleeve (minimum length 80 mm).

Is this answer helpful?

A

For safety reasons, insert the seatpost at least to the 75 mm mark into the frame seat tube, unless your bike manufacturer specifies a greater insertion depth. Always follow the bicycle manufacturer guidance for your specific frame.

Is this answer helpful?

A

Sit on the saddle and adjust until the seatpost compresses to about 20 percent of its travel (approximately 9 mm) in a correct setting. Use the adjusting nut on the lower end of the adapter and choose the direction that matches the firmness you want.

Is this answer helpful?

A

For safety, do not exceed a maximum of 100 kg load on the seatpost. This includes rider and any additional forces during normal use.

Is this answer helpful?

A

No. The product instructions state that it is not suitable for mountain biking or racing. The higher demands and impacts could lead to breakage.

Is this answer helpful?

A

You can optionally purchase replacement elastomers from a specialist bicycle dealer in different firmness levels. The elastomer swap requires releasing the seatpost clamp or quick action, removing the retaining ring at the lower end, and reassembling in reverse order.

Is this answer helpful?

A

Plan maintenance after about 200 operating hours or at least once per year. Clean the sliding tube area carefully and grease it using acid-free grease from a bicycle dealer. Also recheck fastener tightness after about 500 km and during service intervals.

Is this answer helpful?

M: OA-GPT-54-NAN

Advantages and Disadvantages

Advantages

  • Adjustable spring feel so you can tune comfort to body weight, riding style, and road conditions
  • Elastomer swapping allows custom firmness for different rider ranges
  • Clear safe setup guidance, including correct insertion depth and even saddle clamp tightening
  • Helps reduce vibration at the saddle with targeted suspension travel (about 20 percent)
  • Regular maintenance support: periodic lubrication and scheduled bolt rechecks enhance safety
VS

Disadvantages

  • Not suitable for mountain biking or racing, where higher stresses can cause failure
  • Strict maximum load limit of 100 kg for safety reasons
  • Requires routine checks (after about 500 km and at least yearly) to maintain proper torque
  • Installation demands basic technical knowledge and correct frame compatibility
  • Avoid mounting extra accessories like child seats, carriers, or trailers on the seatpost
M: OA-GPT-54-NAN

Product Specification

Type

Suspension seatpost

Colors

black

Material

Alu 6061

Length

13.78 in

Diameter

1.07 in

Travel

1.77 in

Weight

0.93 lb

M: GO-GEM-FL-25

Product Description

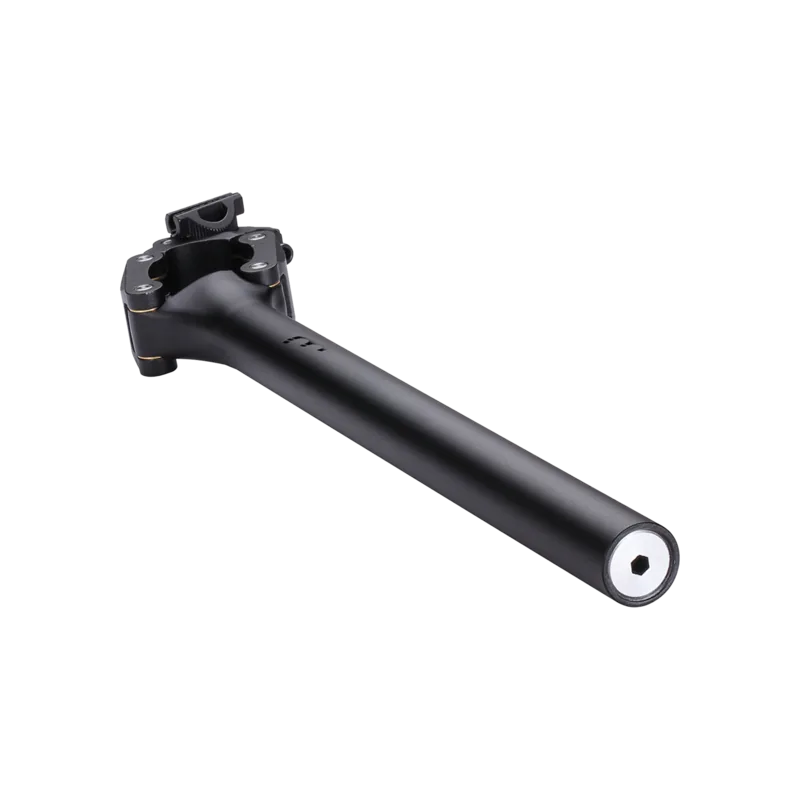
Ergotec SP-7.0 Spring Suspension Seatpost: Smooth Comfort, Tuned to You

The Ergotec SP-7.0 Spring Suspension Seatpost is designed to add controlled comfort to everyday rides by softening bumps and reducing vibration at the saddle. Built for a wide range of bike uses, it lets you fine-tune the suspension so your body weight, riding style, and typical road conditions feel more natural.

Getting started is straightforward, but it is important to set it up correctly. Before installation, confirm that the seatpost matches your frame: the seatpost has an external diameter of 27.2 mm, and it must fit the frame seat tube internal diameter. The clamping area should be kept corrosion-resistant with water-resistant grease, and the frame end must be burr-free to prevent stress and breakage.

For safe mounting, insert the seatpost into the frame seat tube to the 75 mm mark unless your bike manufacturer specifies a deeper insertion. Then tighten the seatpost clamp or quick-release mechanism to the tightness value specified by the bicycle manufacturer. Saddle positioning also matters: check that the saddle is compatible with the seatpost hardware and tighten the saddle clamp evenly to 8-10 Nm with a 5 mm hex key.

Once installed, adjust the suspension to your preference. The target is about 20 percent of the suspension travel (about 9 mm) when you sit in a correct setting. To increase suspension feel, turn the adjusting nut on the lower end of the adapter. Turn directions allow you to tailor softness and resistance to your comfort.

If the standard elastomer setting is not ideal, you can optionally swap to elastomers offered in different firmness levels through a bicycle dealer. These are supplied in three hardness ranges, matching different rider weights.

For practical setup and safe handling, follow the Ergotec SP-7.0 Spring Suspension Seatpost Manual for installation, adjustment, and service reminders.

Key Takeaways

  • Spring suspension travel targets about 20 percent (approx. 9 mm) for the best feel.
  • Seatpost must be installed to the 75 mm mark and clamped to manufacturer-specified tightness.
  • Max safe load is limited to 100 kg, and it should not be used for mountain biking or competitions.
  • Regular service includes checking fasteners and periodic lubrication of sliding surfaces.
  • Use acid-free grease on the sliding tube to protect the elastomer.

Notes

  • Tighten-check: verify bolt tightness after about 500 km, then at regular service intervals (at least yearly).
  • Maintenance: perform cleaning and lubrication after around 200 operating hours or at least once per year.
  • Do not attach extra loads (child seats, luggage carriers, trailers) to the seatpost.
M: OA-GPT-54-NAN

© Copyright 2026 Manual.ly