5 6
7 8
C D
1 2 3 4
A
B
9
E
P
L
R
Q
N
I
I
F
S
H
M
E
D
C
B
A
G
G
1
G
2
G
T
NORME DI SICUREZZA
Verificare che la tensione riportata sull’etichetta corrisponda a quella di rete.
Installare sempre un interruttore differenziale (salvavita) con corrente di
intervento di = 0.03A. Prima di immergere le mani in acqua, scollegare
tutti gli apparecchi elettrici. Il cavo di questo apparecchio non può essere
riparato o sostituito; in caso di danneggiamento sostituire l’unità completa.
Apparecchi contrassegnati dal marchio , sono per esclusivo uso interno.
L’uso in vasche da bagno o piscine di questo apparecchio, non è consentito.
Questo apparecchio è destinato all’uso in liquidi con temperatura massima
di 35°C. Conservare queste istruzioni per ogni futura necessità.
MANUTENZIONE
Per le operazioni di manutenzione, sostituzione del materiale filtrante, pulizia ecc.
si raccomanda di seguire attentamente le seguenti istruzioni:
- Scollegare tutti gli apparecchi elettrici prima di procedere alle operazioni di
manutenzione.
- Svitare le ghiere di bloccaggio dei tubi e sfilarli dai collettori di aspirazio-
ne e mandata (fig. 8) per evitare un effetto sifone che potrebbe svuotare
l’acquario.
- Spostarsi con il filtro completo di tubi su di un lavandino.
- Aprire il filtro premendo sul pulsante arancio delle clips e farle scorrere verso
destra come in fig. 2.
- Aprire la precamera (fig. 9).
- Estrarre la girante e pulirla accuratamente sotto acqua tiepida assieme alla
precamera ed alla sede della girante stessa.
- Rimontare il tutto facendo attenzione al corretto posizionamento del tubicino (fig.
9) che deve trovarsi rivolto verso la parte alta del filtro.
Uno speciale sistema interno (fig. 9) scarica l’aria che si ferma nella parte
superiore della testa. La durata di questa operazione dipende dalla quantità d’aria
presente e potrebbe richiedere alcuni minuti. L’eventuale rumorosità, scomparirà
non appena il sistema avrà scaricato tutta l’aria.
GARANZIA
di alta qualità per garantire la massima affidabilità nel tempo ed elevate presta-
zioni. La garanzia non copre usi impropri, manomissioni o modifiche tecniche di
La garanzia sarà riconosciuta solo se l’unità sarà restituita nella sua integrità,
con lo scontrino fiscale o la fattura di acquisto. Nel caso si presenti la necessità di
ricorrere alla garanzia, il prodotto dovrà essere restituito assieme al presente certi-
ficato e alla prova d’acquisto, al negoziante. I prodotti rientranti nelle condizioni di
garanzia saranno riparati o sostituiti a nostro insindacabile giudizio. Sono esclusi
dalla garanzia, tutti i danni derivanti da uso improprio, mancata manutenzione
o dalla non osservanza delle norme di sicurezza. Le parti soggette ad usura (es. il
rotore) non sono oggetto della presente garanzia.
NORMAS DE SEGURIDAD
Verificar que la tensión eléctrica del enchufe corresponda a la de la etiqueta.
Instalar siempre un interruptor diferencial (Salvavidas) con corriente de inter-
vención = 0.03 A. Antes de sumergir las manos en el agua, desconecte todos los
aparatos eléctricos. Los aparatos con el símbolo sólo pueden ser utilizados
en el interior. El cable de esta bomba no se puede reparar o sustituir; en el caso
de que esté dañado sustituir la bomba entera. Atención no esta permitido el uso
de este aparato en piscinas o bañeras. Este aparato está destinado para usarlo
a una temperatura Máx. de 35°C. Conserva estas instrucciones para referencias
posteriores.
MANTENIMIENTO
Para cualquier operación de mantenimento, sostitución del materal filtrante,
limpieza. etc., se recomienda seguir las siguientas intrucciones:
- Desenchufar todos los aparatos eléctricos antes de poner las manos en el
agua
- Quitar los tornillos y sacar los tubos del los orificios de entrada y de salida del
aqua (fig.8) para evitar sifonar el acuario.
- Depositar el filtro completo en una cubeta o en el fregadero.
- Abrir el filtro presionando sobre el sistema de seguridad naranja y empujando
los clips hacia la derecha (fig. 2).
- Abrir el compartimiento de la bomba como se indica (fig. 9).
- Extraer la turbina y limpiarla cuidadosamente en agua corriente junto con las
otras partes del filtro.
- Volver a montar todo teniendo cuidado de que sea correcta la posición del
tubo de aspiracíon (fig. 9) que debe estar orientado hacia la parte superior
del filtro.
Un sistema interno especial (fig. 9) extrae el aire que se acumula en la parte
superior de la cabeza del filtro. La duración de esta operación depende de la
cantidad de aire presente y podría tardar algunos minutos. El ruido ocasional
Estándares de Seguridad de IEC EN 335-2-41; usando materiales de alta calidad y el
mejor proceso de fabricación para asegurar una mayor satisfacción y durabilidad.
unidad. No se reemplazarán unidades abiertas o sucias. Esta garantía será válida
sólo si la unidad es devuelta con su empaque original y junto con el recibo o factura
de compra. En caso de una devolución por garantía, por favor anexar este certifi-
cado de garantía y el recibo de compra de su proveedor. Nos reservamos el derecho
de reparar o reemplazar esta unidad en los casos de certificado de garantía. Esta
garantía no cubre daños que pueden resultar del mal uso, taponamiento, negligen-
cia o por no haber observado las instrucciones de seguridad. Esta garantía no cubre
partes sujetas a desgaste natural (por ejemplo rotores o propelas).
SICHERHEITSVORSCHRIFTEN
Prüfen Sie vor Anschluss des Gerätes, ob die Betriebspannung (siehe Aufdruck) mit
der Netzspannung übereinstimmt. Betrieb nur mit installiertem Fehlerstromschutzschalter
(max. = 0.03A Empfindlichkeit). Vor jeglichem Wasserkontakt und Eintauchen der Händen
sind alle im Wasser befindlichen Geräte vom Netz zu trennen. Das Netzkabel dieses Gerätes
kann weder repariert noch ausgetauscht werden; bei Beschädigung muss das Gerät durch
ein neues ersetzt werden. Geräte mit dem aufgedruckten Symbol sind ausschließlich
für den Gebrauch in Zimmer und Innenräumen. Die Pumpe darf nur für Flüssigkeiten bis zu
einer Temperatur von 35°C verwendet werden. Bitte bewahren Sie diese Vorschriften für eine
eventuelle spätere Kontrolle sorgfältig auf.
PFLEGE
Vor jeglicher Wartung und Reinigung des Filters sowie vor dem Austausch der Filterpatronen,
usw. lesen Sie bitte die folgenden Gebrauchsanweisungen aufmerksam durch :
- Trennen Sie alle elektrischen Geräte vom Netz, bevor Sie Ihre Hände in das Wasser tauchen.
- Die Überwurfmutter der Schläuche aufschrauben und Schläuche aus den Ansaug-und
Ausströmvorrichtungen herausziehen (fig.8), damit wird der “Siphoneffekt” vermieden, der
das Aquarium entleeren könnte.
- Stellen Sie den kompletten Filter in ein Waschbecken oder ähnliches.
- Zum Öffnen des Filters drücken Sie zuerst den orangenen Sicherheitsknopf und schieben
dann die Halterungen nach rechts (siehe fig. 2).
- Die Vorkammer öffnen (fig. 9).
- Ziehen Sie den Rotor aus seiner Halterung und säubern Sie ihn zusammen mit der
Vorkammer und der Halterung unter lauwarmem Wasser.
- Setzen Sie alle Teile wieder sorgfältig zusammen und stellen Sie sicher, dass der Rohr richtig
zu den oberen Seite des Filters positioniert ist (fig. 9).
Ein spezielles inneres System (fig. 9) entlässt die Luft, die auf der oberen Seite des Filterkopfes
verblieben ist. Die Dauer dieses Vorgangs hängt von der Luftmenge im Filterkopf ab und kann
einige Minuten in Anspruch nehmen.
Das entstehende Geräusch verschwindet, sobald das System die Luftmenge vollständig
ausgelassen hat.
auf Material und werkseitige Montage. Das Gerät wurde nach den IEC EN 60 335-2-
41 Sicherheitsvorschriften konstruiert, nach sorgfältigen Arbeitsmethoden und unter
Verwendung von Materialien höchster Qualität hergestellt. Damit ist eine dauerhaft
hohe Zuverlässigkeit und Leistungsstärke garantiert. Die Garantie erstreckt sich nicht
auf unsachgemäße Handhabung, Beschädigung aller Art und technische Veränderungen
am Gerät. Insbesondere für verschmutzte Geräte wird kein Ersatz geleistet. Die Garantie
wird gewährt, wenn das Gerät in allen Teilen vollständig und zusammen mit der
Empfangsbestätigung oder Rechnung eingereicht wird. Im Garantiefall schicken Sie das
Gerät zusammen mit dieser Urkunde und dem Rechnungsbeleg an Ihren Händler zurück.
Bei gerechtfertigtem Garantieanspruch behalten wir uns vor, das Gerät zu reparieren
oder zu ersetzen. Ansprüche und Folgeschäden, die aus unsachgemäßem Gebrauch,
mangelnder Pflege oder Missachtung der Sicherheitsvorschriften entstehen, sind von der
Garantie ausgenommen. Verschleißschäden an Verschleißteilen (z. B. Rotor) fallen nicht
unter unseren Garantieschutz.
PRECAUTIONS D’EMPLOI
Vérifier que la tension de votre ligne corresponde au voltage indiqueé sur
l’etiquette. A’ utiliser seulement avec un disjoncteur différentiel = 0.03A.
Debrancher toutes les installations électriques avant de mettre vos mains
dans l’eau. Le cable de cet appareil ne peut pas être reparé ou remplacé. En
cas de dommage il faut remplacer l’unité complète. Si l’unité est munie du
symbole celle-ci doit être utilisée uniquement à l’interieur. Ne pas utiliser
dans piscines ou salles de bain. Cet appareil est à utiliser dans des eaux à
température de 35°C maxi.
ENTRETIEN
Avant toutes opérations d’entretien, replacement des matériaux de filtration,
nettoyage etc. lire avec attention les instructions qui suivent :
- Débrancher tous les appareils électriques avant de mettre vos mains dans
l’eau.
- Débloquer les vis et enlever les tuyaux des raccords entrée et sortie de l’eau
(fig. 8) pour éviter de siphonner l’aquarium.
- Se déplacer avec le filtre complet sur une cuvette ou évier.
- Ouvrir le filtre en appuyant sur le système de sécurité orange et en poussant les
clips vers la droite (fig. 2).
- Ouvrir la chambre de la pompe comme indiqué (fig. 9).
- Enlever la turbine et laver-la soigneusement sous eau courante avec les autres
parties du filtre.
- Re-assembler le tout en faisant attention au repositionnement correct du tuyau
(fig. 9) qui doit être orienté vers la partie supérieure du filtre.
Un système interne spécial (fig. 9) enlève l’air qui s’accumule dans la partie
supérieure de la tête du filtre. La durée de cette opération dépend de la quantité
d’air présent et pourrait prendre quelques minutes. Le bruit éventuel disparaite-
ra dès que toute l’air sera enlevé.
GARANTIE
Sécurité IEC EN 60 335-2-41 avec les technologies les plus modernes en
utilisant des matériaux de qualité pour garantir la puissance, la fiabilité
et une longue satisfaction. Cette garantie ne couvre pas les défauts dus à
altération, négligence, mauvaise utilisation, modifications techniques ou
le mauvais entretien. La garantie sera reconnue uniquement si l’unité est
retournée dans son intégrité, accompagnée par la preuve ou facture d’achat.
Pour utiliser cette garantie retourner l’unité au fournisseur avec ce bon
de garantie complété et la preuve d’achat. Nous nous réservons le droit de
remplacer ou réparer les unités retournées sous garantie. Cette garantie ne
couvre pas les défauts causés par emploi non convenable, par négligence ou
la non-observance des normes de sécurité. Les pièces (ex. la turbine) sujets
à l’usure ne sont pas couvertes par cette garantie.
SAFETY WARNINGS
Check that the voltage shown on the label of the unit corresponds to the voltage
of the mains supply. Connect the unit only to power supplies with residual
current circuit breaker (RCCD) with sensitivity of 30mA. Always disconnect all
electrical appliances from the mains before placing your hands in the water. The
line cord cannot be replaced or repaired. Should the cord become damaged the
appliance must be discarded. Units marked with on the label are for indoor
use only. This unit must not be used in swimming pools or bathrooms. This
appliance has been designed for use in fluids up to 35°C. Keep these instructions
for future reference.
MAINTENANCE
Follow these instructions carefully for any maintenance, replacement of filter
media, cleaning operation, etc.:
- Always disconnect all electrical appliances before placing your hands in
water.
- Unlock the screw nuts and detach the hoses from the intake and outlet spigots
(fig. 8) to avoid siphoning of the tank.
- Move the complete filter on to a sink or similar place.
- Open the filter by pushing first the orange safety device and then sliding the
clips toward the right side (fig. 2).
- Open the pump chamber (fig. 9).
- Take off the rotor system and carefully wash under running water together with
the other components.
- Reassemble the parts paying care to the right positioning of the hose (fig. 9)
that must be oriented towards the upper side of the filter.
A special internal device (fig. 9) discharges the air that remains in the upper
part of the filter head. The length of this operation depends on the quantity of
air inside and may take a few minutes. The noise will disappear as soon as the
system has discharged all the air.
WARRANTY
of purchase on materials and manufacturing faults. This unit has been
manufactured according to the IEC EN 60 335-2-41 Safety Standards, using
high quality materials and the most accurate manufacturing processes to
grant the highest satisfaction and long lasting. This guarantee does not
cover any mishandling, damage or technical modification to the unit. No
replacement will be given for units that have not been properly maintained.
The guarantee will be honoured only if the unit is returned in its whole and
together with the receipt or proof of purchase. In case of returning under
guarantee, please return it accompanied by this certificate of guarantee and
the proof of purchase to your supplier. We do reserve the right to repair or
replace the unit. The guarantee does not cover cases of damages that may
result from misuse, tampering and negligence or from not observing of the
Safety Warnings. This guarantee does not cover parts subjected to natural
wearing and tear (i.e. rotors).
STAMP AND SIGNATURE OF SELLER
CACHET ET SIGNATURE DU REVENDEUR
STEMPEL UND UNTERSCHRIFT DES HÄNDLERS
TIMBRO E FIRMA DEL RIVENDITORE
SELLO Y FIRMA DEL VENDEDOR
DATE OF SALE
DATE DE VENTE
VERKAUFSDATUM
DATA DI VENDITA
FECHA DE VENTA
COD. 3322-0100
Parts and spare parts numbers
Pièces et parties de rechange
Bestand- und Ersatzteile
Tabella ricambi
Partes y piezas de recambio
A 9922-01
B 9922-02
C 9922-03
D1 50 Hz 9901-01
D2 60 Hz 9901-02
E 9922-04
F 9922-05
G 9922-06
H 9922-07
I 9922-08
L 9901-07
M 9922-09
N 9922-10
P 9922-11
Q 9908-04
R 9922-12
S 9922-13
T 9922-14
Open the top cap and fill up completely. To close the tap, rotate it until
the locking device clicks.
Ouvrir le bouchon et remplir complètement. Fermer le bouchon en le
tournant jusqu’à l’encliquetage.
Öffnen Sie den oberen Deckel und füllen Sie den Filter vollständig auf.
Schrauben Sie den Deckel wieder zu, bis Sie ihn einrasten hören.
Aprire il tappo e riempire completamente; rimontare facendo ruotare il
tappo sino allo scatto di bloccaggio.
Abrir el tapón y llenar por completo. Cerrar el tapón girándolo hasta
notar el “clik”.
Thoroughly clean the wall before pressing the suction cups and tube
against it.
Poussez le tuyau contre la paroi soigneusement nettoyée.
Drücken Sie das Ansaugrohr an die sorgfältig gereinigte Rückwand.
Premere il tubo e le ventose contro la parete precedentemente pulita.
Presionar el tubo y las ventosas contra la pared previamente limpiada.
Press the suckers on the spray bar against the thoroughly cleaned wall.
Poussez le tuyau du spray-bar contre la paroi soigneusement nettoyée.
Drücken Sie den Spray bar mit Saugnäpfen gegen die sorgfältig geputzte
Wand.
Premere lo spray-bar e le ventose contro la parete precedentemente
pulita.
Presionar el tubo spray-bar y las ventosas contra la pared previamente
limpiada.
Push the pipes onto their spigots and lock with the screw nuts.
Insérer les tuyaux flexibles sur leurs raccords et bloquer avec les vis
fournies.
Schieben Sie die Schläuche auf die Vorrichtungen und sichern Sie diese
mit den Überwurfmuttern.
Inserire i tubi flessibili sui raccordi e bloccarli avvitando le ghiere di
fissaggio.
Insertar los tubos flexibles en los orificios y fijar con los tornillos
suministrados.
Insert the feet in their locations.
Monter les pieds dans ses sièges.
Drücken Sie die Füße in die entsprechenden Vorrichtungen.
Inserire i piedini in gomma nelle apposite sedi.
Insertar los pies en su lugar correspondiente.
GB - Identify the parts you have found in
the box and in the accessories bag.
Assemble the suction cups (G1) onto the
clips (G2).
Mount the screw-nuts (E) onto the hard
elbows (I) and on the filter head.
Insert the strainer (H) onto the intake
tube (N).
Close one end of the spray bar tube (tube
with holes P) with the tap supplied.
Mount the rubber elbow (M) onto the one
hard elbow (I).
If you prefer to use the diverter (L) mount
it directly onto the rubber elbow (M).
F - Identifizieren Sie die Teile die Sie in
der Schachtel und dem Beutel mit dem
Zubehör finden.
Montieren Sie die Saugnäpfen (G1) auf
die Halterungen (G2).
Schrauben Sie die Muttern (E) auf die
Winkelstück (I) und den Filterkopf.
Stecken Sie den Filterkorb (H) auf das
Ansaugrohr (N). Verschließen Sie ein
Ende des Ausströmrohrs (Rohr mit
Löchern P) mit der beiliegenden Kappe.
Stecken Sie den flexiblen Winkelstück
(M) auf das eine Winkelstück (I).
Wenn Sie den Diffusor verwenden
möchten, stecken Sie diesen direkt auf
den flexiblen Winkelstück (M).
D - Identifiez les composants trouvés
dans la boite et dans le sachet des
accessoires.
Assemblez les ventouses (G-1) sur les
clips (G2).
Vissez les pièces (E) sur les raccords durs
(I) et sur la tête du filtre.
Insérez la crépine (H) sur le tuyau
d’aspiration (N).
Fermez un des cotés du spray bar de la
flute (tuyau avec trous P) avec le bouchon
fournis.
Montez la pièce en caoutchouc (M) sur la
pièce rigide (I).
Si l’on préfère utiliser le diffuseur (L)
installer-le directement sur la pièce en
caoutchouc (M).
I - Identificare i componenti trovati nel-
l’imballo e nel sacchetto accessori.
Montare le ventose (G1) sulle clips (G2).
Avvitare le ghiere (E) sui gomiti rigidi (I)
e sulla testa del filtro.
Inserire il prefiltro (H) sul tubo di aspi-
razione (N).
Chiudere una delle estremità dello spray-
bar (tubo forato P) con il tappo fornito.
Montare il gomito in gomma (M) sul
gomito rigido (I).
Se si preferisce usare il deflettore di
mandata (L) montarlo direttamente sul
gomito in gomma (M).
E - Identificar los componentes encon-
trados en la caja y en las bolsitas de
accesorios.
Acoplar las ventosas (G1) sobre los clips
(G2).
Roscar las piezas (E) sobre las conexio-
nes duras (I) y sobre la cabeza del filtro.
Insertar la rejilla de entrada (H) en el
tubo de aspiración (N).
Cerrar uno de los lados del tubo perfora-
do (P) con el tapón suministrado.
Montar la pieza de caucho (M) sobre la
pieza rígida (I).
Si se prefiere usar el difusor (L)
instalarlo directamente sobre la pieza
de caucho (M)
Open the filter by pushing first on the orange safety device, and then slide
the clip towards the right end side.
Ouvrir le filtre en appuyant sur le système de sécurité orange et en
poussant les clips vers la droite.
Öffnen Sie den Filter, in dem Sie erst auf den orange Sicherheitsknopf
drücken und dann die Halterung nach rechts schieben.
Aprire il filtro, premendo sul pulsante arancio di sicurezza, e facendo
scivolare la clip verso destra.
Abrir el filtro presionando sobre el sistema de seguridad aranciones y
desplazando los clips hacia la derecha.
Open the ceramic media bag, wash them under running water and insert
them in the filter chamber.
Ouvrir le sachet des pièces céramique, laver-les sous eau et les mettre
dans la chambre du filtre.
Öffnen Sie die Tüte mit dem Keramik Filtersubstrat, waschen Sie es unter
laufendem Wasser und platzieren Sie es in der Filterkammer.
Aprire il sacchetto cannolicchi, risciacquarli in acqua corrente, ed
inserirli nella camera del filtro.
Abrir la bolsita con las cerámicas, lavarlas con agua corriente y ponerlas
en el compartimento del filtro.
Close the filter by pressing down the head completely and slide each
locking clip from right to left.
Fermer le filtre en poussant la tête jusqu’au son arrête et en mouvant
chaque clip de la droite à gauche.
Schließen Sie den Filter indem Sie den Kopf ganz nach unten drücken
und alle Halterungen von rechts nach links schieben.
Chiudere il filtro premendo la testa sino in fondo e far scorrere ciascuna
clip di bloccaggio da destra a sinistra.
Cerrar el filtro empujando la tapa hasta el fondo y moviendo cada clip
de derecha a izquierda.
The filter will be closed only after pushing fully down the head and the clips from
the right to the left hand side.
Le filtre sera fermé seulement après avoir placé jusqu’au fond la tête et les clips
de la droite à la gauche.
Der Filter wird nur geschlossen werden, wenn der Kopf ganz nach unten
gedrückt ist und die Halterungen von rechts nach links geschoben sind.
Il filtro sarà chiuso solo dopo aver posizionato il coperchio sino in fondo e le
clips da destra a sinistra.
El filtro será cerrado sólo después de haber colocado la tapa hasta el fondo y
moviendo cada clip de derecha a izquierda.
For best performance place the filter in an upright position beside the tank.
Le filtre doit être placé vertical à coté de l’aquarium.
Für die beste Leistung stellen Sie den Filter am besten aufrecht neben das
Aquarium.
Il filtro deve essere posto verticalmente di fianco all’acquario.
El filtro se debe colocar verticalmente al lado del acuario.
Avoid tight bends or kinks in the (inlet or outlet) pipes.
Ne pas plier les tuyaux.
Vermeiden Sie enge Knicke und Knoten in den Schläuchen.
Evitare le strozzature dei tubi.
No doblar los tubos.
It is recommended that the filter is placed on the same level as the tank.
Il est recommandé de placer le filtre au même niveau que l’aquarium.
Es wird empfohlen, den Filter auf die selbe Höhe wie das Aquarium zu stellen.
E’ sconsigliato posizionare il filtro al di sotto dell’acquario.
Se recomienda situar el filtro al mismo nivel que el acuario.




sapiente43
8 months ago
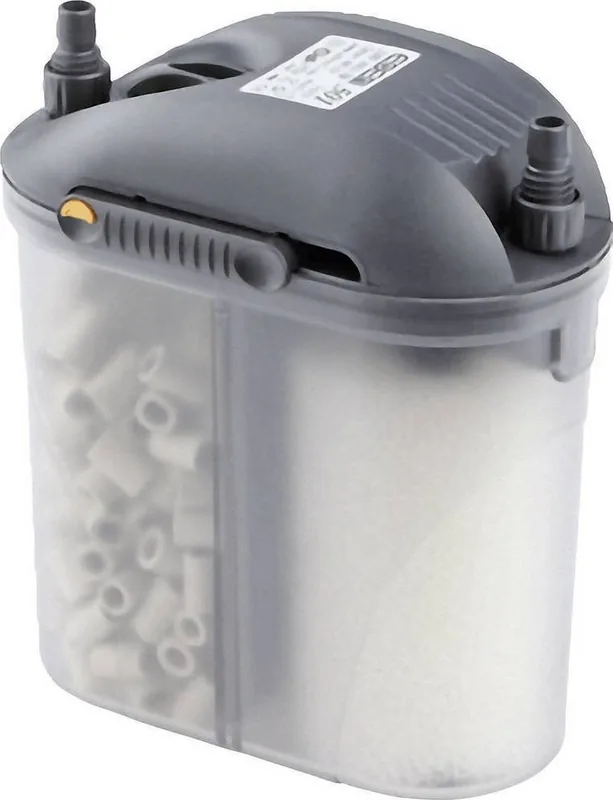
Is this external filter easy to use, suitable for about a 60-liter aquarium, and is it quiet?
Manual.ly
8 months ago
Yes. Reviewers highlight the straightforward, uncomplicated handling and easy setup. It is also described as a small and quiet external filter that fits well for an aquarium around 60 liters. For the best results, please match the filter to your tank size and water conditions (especially stocking and desired flow), and confirm the product specifications for flow rate and recommended tank volume before purchase.