
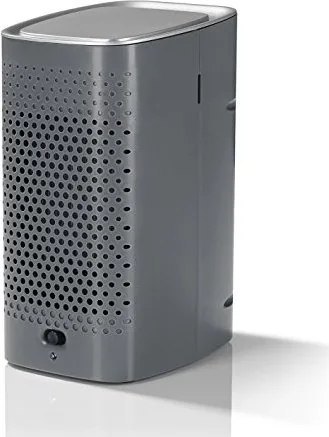
EASYmaxx F5M-A1E Manual
PDF manual · 8 Pages
English



Quick check
Incorrect answer, please try again.
Chat with your EASYmaxx F5M-A1E manual using AI
Get instant AI answers from your EASYmaxx F5M-A1E manual
Ask anything about the EASYmaxx F5M-A1E. Answers come from this manual, with the pages they are based on.
F5M-A1E Maintenance Schedule
Wipe the device with a damp cloth if necessary. Do not use caustic or abrasive cleaning agents.
Remove the lamella insert, immerse in cold water, shake off excess, and reinsert. Fill the water tank with cold tap water.
Replace all four batteries when performance decreases. Always replace all batteries together.
Ask a Question
Do you recommend F5M-A1E?
Yes NoFrequently Asked Questions
It is designed to cool and humidify air in small personal spaces. It works well on a desk, table, or bedside area when you want a light refreshing effect rather than full-room air conditioning.
Is this answer helpful?
Yes. It supports both. You can use four 1.5 V C batteries for portable operation or connect it by USB with a suitable USB mains adapter for stationary use.
Is this answer helpful?
No. The USB cable is included, but the USB mains adapter is not. You need a compatible adapter that matches the device’s technical requirements.
Is this answer helpful?
It has two cooling levels. You can switch between a lower setting and a stronger setting using the front control switch.
Is this answer helpful?
The water tank holds 380 ml. That is enough for short and moderate use, but it may need refilling if you run the device for a longer period.
Is this answer helpful?
It is mainly intended for small areas and personal use. It can improve comfort nearby, but it is not meant to replace a standard air-conditioning system.
Is this answer helpful?
Advantages and Disadvantages
Advantages

- Dual power support lets you choose USB or 4x C batteries for flexible use.
- Compact tabletop design fits easily on desks, nightstands, and small spaces.
- Two cooling levels provide simple control over airflow and comfort.
- Humidifying function helps freshen dry indoor air during warm periods.
Disadvantages

- Not powerful enough to replace a real air-conditioning system.
- USB mains adapter is not included, so an extra purchase may be needed.
- Battery operation requires four C batteries, which are not included.
- Small 380 ml water tank may need frequent refilling during longer use.
Product Specification
Type
Evaporative principle
Power
2.5W
Color
grey
Power levels
2
Humidification capacity
1.27 qt/24h
Water tank capacity
12.85 fl oz
Dimensions
4.84x9.13x6.22in (WxHxD)
Product Description
EASYmaxx F5M-A1E Compact 6V Humidifier
The EASYmaxx F5M-A1E Compact 6V Humidifier is a practical tabletop air cooler designed for people who want a simple way to add a little freshness to a small room, desk, or personal workspace. It combines cooling and humidifying in one lightweight device, making it a convenient option for warm days when a full air-conditioning system is unnecessary.
What makes this model stand out is its flexible power design. You can run it through USB or use four C batteries, which means it can move easily from a home office to a bedroom or even a small travel setup. The compact build also helps it fit neatly on a table without taking up much space. If you are searching for the EASYmaxx F5M-A1E Compact 6V Humidifier Manual, you will find that the basic setup is straightforward and focused on everyday use.
The cooling process is simple: cold water is added to the tank, the lamella insert is moistened, and the device pulls in warm air from the back before releasing cooler air through the front. With two cooling levels, it offers a bit of control depending on how much airflow you want. A 380 ml water tank supports short to moderate use, while the operating lamp helps show when the unit is switched on.
This humidifier is best suited for personal comfort rather than whole-room climate control. It is ideal for small areas where you want a gentle breeze and a fresher atmosphere. Because it is designed for private use, it works well as a desk companion, a bedside helper, or a small indoor refresher during dry weather.
Maintenance is minimal, which adds to its appeal. The device can be wiped clean with a damp cloth, and the removable parts make everyday handling easy. Just remember to keep the water tank clean, use the correct batteries if needed, and avoid letting liquid enter the base.
Notes
- Best for small spaces and personal cooling
- Requires a USB adapter for mains use
- Not a replacement for a full air conditioner
- Keep the lamella insert moist for best results
- Store in a dry place when not in use
Search for 67,706 Manuals online


Type-in Brand or Model
Lena Schmidt
8 months ago
Does this air cooler really cool a room, or is it basically just a loud/weak fan?
Manual.ly
8 months ago
It is not an air conditioner, so it will not lower room temperature dramatically. Reviews match that many people mainly feel a light airflow and minimal cooling. Cooling depends on room size, ventilation, and conditions like humidity. For best results: fill the water tank correctly and use ice packs or chilled water if supported, run the fan on a higher speed, place it close to where you sit/sleep, and keep the cooling media/pads clean and properly fitted. For larger rooms or expectations of AC-level cold, it may feel ineffective. If you tell us your room size and typical conditions, we can help you decide if it will work for your use case.