
D-Link DGS-1210 Manual
PDF manual · 56 Pages
English



Quick check
Incorrect answer, please try again.
Chat with your D-Link DGS-1210 manual using AI
Get instant AI answers from your D-Link DGS-1210 manual
Ask anything about the D-Link DGS-1210. Answers come from this manual, with the pages they are based on.
Ask a Question
Do you recommend DGS-1210?
Yes No
maria_k
9 months ago
If power goes out, will my switch configuration (IP settings, port trunking, etc.) be kept, or do I need to save/export the settings manually?

Manual.ly
9 months ago
After changing settings in the web interface, you should save the configuration. The switch can forget recent changes after a power loss if the configuration was not written to its storage. We recommend using the web frontend to "Save" (or "Apply and Save") and, if available, export the configuration to a file for your own backup. After a restart or power outage, you can then re-apply from that saved config if needed. For IP and VLAN-related changes, always verify that the saved configuration is the one that is active after reboot.
Video Manual
Home Networking Switches Explained | Home Networking 101
Frequently Asked Questions
The factory default IP address is 10.90.90.90 with a subnet mask of 255.0.0.0 and a default gateway of 0.0.0.0. You need to connect your PC to the same network range to access the web interface.
Is this answer helpful?
You can install the software via the autorun program on the installation CD or manually by opening the CD drive and double-clicking the setup.exe file. After installation, locate it under Start Programs D-Link DNA.
Is this answer helpful?
Yes, users may access the switch through Telnet using the PC Command Prompt. Enter the command telnet followed by the IP address. The default user name and password are admin for access.
Is this answer helpful?
As a precaution, you should unplug the switch in case of power failure. When power resumes, plug the switch back in. Always use a grounded and surge-protected outlet for safety.
Is this answer helpful?
The Smart Wizard guides you through quick configuration for settings like passwords, SNMP, and System Settings. You can exit the wizard to enter the main Web-based Management interface if you do not plan changes.
Is this answer helpful?
You can place the switch on a desktop or shelf using the rubber feet, or mount it in a standard 19-inch EIA rack using the provided brackets. Ensure adequate ventilation around the device.
Is this answer helpful?
Advantages and Disadvantages
Advantages

- Versatile management options via Web, DNA, Telnet, and SNMP
- Flexible installation supports desktop racks and EIA 19-inch racks
- D-Link Network Assistant simplifies multi-switch discovery on L2 segments
- Includes Smart Wizard for quick initial configuration steps
- Durable hardware with rubber feet for desktop stability
Disadvantages

- SNMP function is disabled by default for security
- DNA tool only supports legacy Windows up to version 7
- IP addressing must match PC range for management access
- Power cord installation requires manual clip securing
- No PoE support mentioned in standard model specifications
Product Specification
Feature
Switch
Type
Standalone, Rackmount (via mounting brackets)
Network Ports
24x RJ-45, 4x SFP
Speeds
24x RJ-45 (10/100/1000Base-T), 4x SFP (1Gb/s)
PoE
N/A
Backplane
56 Gb/s, 41.7 Mpps, 10 kB Jumboframes, 4.1 MB packet buffer, 8K MAC addresses
Officially Supported Standards
802.1AX, 802.1D, 802.1Q, 802.1X, 802.1p, 802.1s, 802.1w, 802.3, 802.3ab, 802.3az, 802.3u, 802.3x, IGMPv3, MLDv2
Configuration
Web interface, Console, Configuration Software (Windows)
Cooling
Passive
Dimensions (WxHxD)
17.32x1.73x5.51 in, 1U
Weight
4.74 lbs
Color
Black, White
Features
Metal enclosure, removable mounting brackets, firmware updates available, anti-theft (Kensington Lock)
Manufacturer Warranty
2 years (lifetime (10 years in AT/DE + 5 years after registration))
Note
For this device, "link aggregation" was officially specified using the obsolete IEEE 802.3ad standard. The function is no longer managed by IEEE "Working Group 3" (IEEE 802.3, CSMA/CD - Ethernet) since 2008, but by "Working Group 1" (IEEE 802.1, High Level Interface - Internetworking) and defined technically unchanged via IEEE 802.1AX.
Product Description
D-Link DGS-1210 Network Solutions
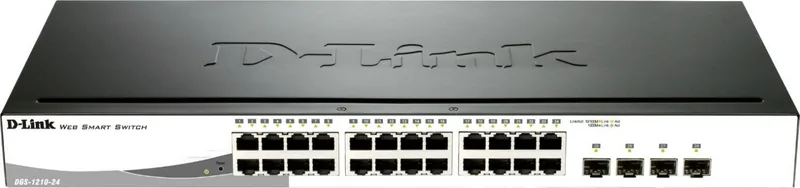
Upgrade your business infrastructure with the D-Link DGS-1210 Rackmount Gigabit Smart Switch. This robust device provides twenty-four RJ-45 ports for standard copper connections and four SFP slots for fiber optic integration. It ensures seamless connectivity for small to medium enterprises requiring high performance and reliability. The hardware is designed for flexible deployment in various settings, supporting both desktop and wall mounting configurations effectively.
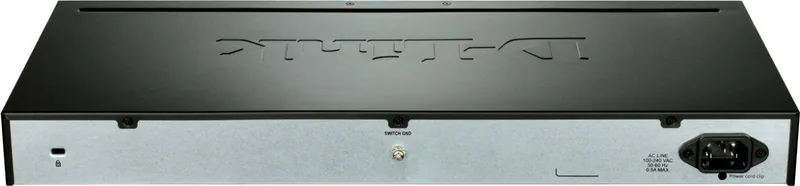
Proper setup is essential for longevity and performance. Begin by unpacking the carton carefully to inspect components like the power cord and rack mounting brackets. For shelf placement, attach the included rubber feet to the base corners. If installing in a standard 19-inch rack, use the provided brackets to secure the unit firmly. Ensure adequate ventilation surrounds the device to allow proper heat dissipation. Do not place heavy objects on the switch. Connect the power cord to a grounded and surge-protected outlet. Install the power cord clip to prevent accidental disconnection of the AC cable during operation. For rack mounting, attach the brackets to the side panels and secure them with screws provided. Use the screws included with the equipment rack for the final unit placement. Tighten the cable retainer until the power cord is fully secured. If power fails, unplug the device immediately and reconnect when power resumes to ensure safety during fluctuations or outages.
Management capabilities simplify network administration. You can configure settings via a web browser using the factory default IP address. The DNA (D-Link Network Assistant) tool helps discover multiple switches on the same L2 segment without changing PC IP settings. Telnet access offers command-line control for experienced administrators. The Smart Wizard streamlines initial configuration for passwords and system settings. If you need deeper insights, consult the D-Link DGS-1210 Rackmount Gigabit Smart Switch, 24x RJ-45, 4x SFP Manual. It includes wiring charts and error codes for troubleshooting. Support is available online through local D-Link offices. Ensure your PC runs supported Windows versions for the installation utility to function correctly. The tool supports Windows 2000, XP, Vista, and Windows 7. You can install via autorun CD or manual setup using setup.exe. This flexibility ensures compatibility with existing network environments.
Installation Notes
- Verify all ports connect properly before powering on.
- Ground your electrical supply to prevent voltage spikes.
- Keep backup configurations to restore settings in emergencies.
Search for 67,706 Manuals online


Type-in Brand or Model
Andreas Weber
7 months ago
Does this managed switch include enterprise-level security features at this price, and can they be configured per port?
Manual.ly
7 months ago
Yes, this managed switch offers a comprehensive range of security functions typically only found in premium high-end models. All features can be configured with granular control down to the individual port, enabling support for complex network scenarios. You get first-class value while maintaining enterprise-grade security standards tailored to your specific network needs.