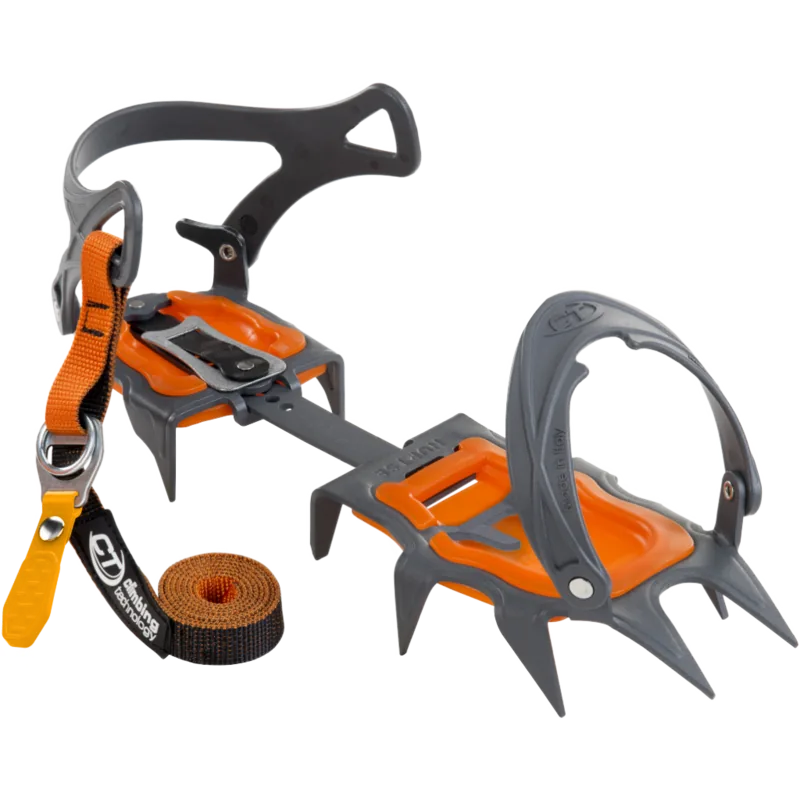
Manual.ly Logo

Climbing Technology Nuptse Evo Classic Manual

0.0 · 0 Ratings

PDF manual · 6 Pages

English

M: QW-35-FL
page

/ 6

Loading...
3eb0ecc19ea5db6b09f174221c0b37561a1b page 2
Made in Italy
SNOW FLEX NEVIS FLEX
ENGLISH
The instruction manual for this device consists of general and
specific instructions, both must be carefully read and understood
before use. Attention! This leaflet shows the specific instruction
only.
SPECIFIC INSTRUCTIONS EN 893:2010.
This note contains the necessary information for a correct use of
the following product/s: crampons for mountaineering.
1) FIELD OF APPLICATION.
EN 893:2010. Mountaineering equipment – Crampons. This
product, that complies with Regulation (EU) 2016/425, is a Per-
sonal Protective Equipment (PPE) against the risk of slips on ice,
snow or mixed terrain, depending on the intended use of the de-
vice. See the summary table to check, depending on the model,
the range of use recommended: ski touring (Fig. 12.1), glacier
travel (Fig. 12.2), classic mountaineering (Fig. 12.3÷12.6), tech-
nical mountaineering (Fig. 12.7÷12.8), ice falls (Fig. 12.9). At-
tention! Light-alloy crampons are intended for snow travel only:
do not use them for progression on ice or mixed terrain.
2) NOTIFIED BODIES. Refer to the legend in the general in-
structions (paragraph 9 / table D): M1, M6.
3) NOMENCLATURE (Fig. 2). Parts of the crampon: Front half
(A); Rear half (B); Adjustment bar with holes (C); Size adjustment
system (D); Front anti-balling plate (E); Rear anti-balling plate (F);
Binding strap (G); Strap fastening system with double rings (H1);
Fastening system with quick-release buckle (H2); Toe binding (I);
Heel binding (L); Heel lever (M); Wire toe bail (N); Anti-wear
buckle (O). Binding systems: CLASSIC (Fig. 2.1) for all types of
boot; SEMIAUTOMATIC (Fig. 2.2) for boots with heel welt to hold
lever; AUTOMATIC (Fig. 2.3) with front and rear grooves/welts.
3.1 - Main materials. Refer to the legend in the general instruc-
tions (paragraph 2.4): 2 (levers and rivets); 7 (strap & bindings).
Attention! The materials of bodies (A-B) e bars (C) are indicated
in the table (Fig. 1): 1) Steel alloy; 2) Stainless steel; 3) Light alloy.
4) MARKING.
Numbers/letters without caption: refer to the legend in the gen-
eral instructions (paragraph 5).
4.1 - General (Fig. 3). Indications: 4; 6; 7; 30) Bar numbering
for size adjustment.
4.2 - Traceability (Fig. 3). Indications: T3 ; T8; T9.
5) CHECKS.
Further to the checks listed below, comply with what indicated in
the general instructions (paragraph 3).
Before each use, verify that: the size adjustment system can be
securely fastened and the adjustment bar slides freely through
the crampon body; the buckle is working properly; the heel lever
adjustment screws turn without sticking; the wire toe bails can ro-
tate freely in their mounting holes; the points are well-sharpened
(for sharpening see the relative paragraph). Attention! During
use check regularly that the crampons are properly adjusted and
well fastened to the boots. Attention! Even if the crampons are
equipped with an anti-balling system, it is necessary to be cau-
tious and to pay attention to snow built-up under the crampons:
danger of slipping and falling.
6) ADJUSTMENT AND MOUNTING. The crampons must fit
perfectly onto the boots that will be used. Attention! It is advis-
able to check the compatibility and proper fitting of the cram-
pons indoors before using them outdoors. Attention! The Flex
models are equipped with an adjustment bar, ideal for use with
boots with a semi-rigid sole. Attention! Please make sure that
the adjustment bars that come standard on the Snow Flex model
are always correctly equipped with anti-wear buckles. (Fig. 13).
Adjusting the crampons is a two-stage process: the first is to the
broad size range 36÷43 or 42÷47 (macro-adjustment), the sec-
ond is the adjustment inside on of these broad size ranges (size
adjustment). Attention! Some views are simplified for a better
understanding.
6.1 - Macro-adjustment. There are two macro-adjustment
systems:
• screw system (Ice): push the adjustment bar forwards, insert
the shortening screw into the square hole in the bar and screw
on the auto-locking nut. Pull the bar rearwards until the shorten-
ing screw fits into the front half of the crampon. To return to size
range 42÷47 remove the shortening screw.
• rapid system (Hyper Spike, Lycan, Nuptse Evo): push the adjust-
ment bar forwards, lifting it over the intermediate crossbar, and
then pull it backwards so that the end of the adjustment bar is
stopped fro m moving further backwards by the attachment to
the crossbar (Fig. 4.3). To return to size range 42÷47 repeat the
operation in reverse.
6.2 - Size adjustment. There are two size adjustment systems:
• single lever system (Ice, Nevis Flex, Snow Flex): lift the lever with
your fingers and move the bar to the desired position. Release the
lever making sure that the locking pin is correctly inserted into the
hole of the bar (Fig. 4.1).
• double lever system (Hyper Spike, Lycan, Nuptse Evo): lift the
command lever so as to be able to lift the main lever and adjust
the bar to the desired position. Then release the command lever
making sure that that the locking pin is correctly inserted into
the hole of the bar (Fig. 4.2). Important! The bar should not
protrude more than 10 mm (Fig. 4.6). Important! Check the fit
of the rear crampon half to the heel of the boot (Fig. 4.4-4.5).
6.3 - Additional adjustment. For larger boots (size 44÷50)
you can buy a longer adjustment bar (LONG BAR / LONG FLEX
BAR, LONG FLEX BAR-B), except for the Nevis Flex and Snow Flex
models that are sold with two adjustment bars of different lengths
(a short one for EU sizes 34÷41 and a long one for EU sizes
40÷47). For all crampons with SEMIAUTOMATIC or AUTO-
MATIC bindings adjust the height of the heel lever by loosening
and then retightening the adjustment screws, so that when it is
snapped on the heel lever stays firmly in position (Fig. 4.7). For
only the models Hyper Spike, Lycan, Nuptse Evo and Snow Flex
with AUTOMATIC bindings is it possible to adjust how much the
front points stick out by modifying which of the holes in the front
half of the crampon the toe bail wire is inserted into (Fig. 7).
6.4 - Fitting to the boot. For all models there is a right foot
and a left foot crampon and they cannot be fitted to the other
boot. Check the curve of the adjustment bar and the bind-
ing strap with buckle is always on the outside of the foot (Fig.
6.1-6.2).
• CLASSIC binding (Fig. 5.1): put the toe of the boot into the
toe binding; position the heel of the boot onto the rear half of
the crampon; thread the strap through the rear binding, then
through the front binding, then through the buckle and tighten
it. Remember to always pass the strap back through the second
ring (Fig. 6.3).
• SEMIAUTOMATIC binding (Fig. 5.2): put the toe of the boot
into the toe binding; Position the heel of the boot onto the rear
half of he crampon; position the heel lever on the rear welt of
the boot and rotate it forwards until it snaps onto the closed po-
sition; thread the strap through the front binding, then through
the buckle and tighten it. Remember to always pass the strap
back through the second ring (Fig. 6.3).
• Binding AUTOMATIC / A (mod. Hyper Spike / Lycan / Nuptse
Evo - Fig. 5.3): position the welt on the toe of the boot under
the toe bail wire; position the heel of the boot onto the rear half
of he crampon; position the heel lever on the rear welt of the
boot and rotate it forwards until it snaps into the closed posi-
tion; pass the binding band around the upper part of the boot
, then through the buckle and tighten it. Remember to always
pass the strap back through the second ring (Fig. 6.3).
• Binding AUTOMATIC / B (Mod. Ice - Fig. 5.4): follow the in-
structions already indicated for AUTOMATIC / A version, pass-
ing in this case the webbing binding band through the eyelet of
the tongue, connected to the front wire toe bail, as illustrated.
• Binding AUTOMATIC / C (mod. Snow Flex - Fig. 5.5): posi-
tion the welt on the toe of the boot under the toe bail wire;
position the heel of the boot onto the rear half of he crampon;
position the heel lever on the rear welt of the boot and rotate it
forwards until it snaps into the closed position; close the quick-
release buckle and pull the strap until tight.
6.5 - Test of function. After having tightened the strap, check
the crampon is fitted correctly by kicking into the ice or snow:
if the boot can be moved, remove it from the crampon and re-
adjust the fitting of the crampon. Attention! During use check
periodically that the crampon is firmly fitted to the boot, since
during use the binding can work loose.
6.6 - Hyper Spike. The Hyper Spike model is equipped with
a modular front section, compatible with the main Hook point
and with the Blade accessory point. The Blade point, mounted
to one side of laterally onto the Hook point, provides greater
stability on ice and mixed climbing. The possible combinations
configurations are shown in Fig. 9.5. Attention! The Blade
accessory point must always be used together with the main
Hook point.
7) MANUTENTENANCE. 1) Always check before and during
use that the crampons are in good condition. 2) If the cram-
pons are very heavily loaded or you are unsure of their condi-
tion, replace them. 3) We recommend having the crampons
checked annually by a competent person (e.g. manufacturer).
4) If the points are worn, sharpen them with a hand file: don’t
use a powered grinder since the heat generated could affect
the characteristics of the metal (steel or light alloy) and reduce
holding power (Fig. 8). For Hyper Spike and Lycan models do
not file back to beyond the first half of the first tooth. Atten-
tion! Maintain the thickness of the metal or you may reduce the
point’s holding power.
8) REPLACEMENT PARTS / ACCESSORIES. The accessories
/ spare parts are listed in the table (Fig. 9): antibots*; standard,
long (Long Bar model) and/or flexible (Flex Bar/Long Flex Bar
models) regulation bars*; additional tips* for the Hyper Spike
model. Attention! The use of the flexible adjustment regulation
bars is recommended with semi-rigid and/or oversized boots
(over 42 size), since they improve the comfort of use and the
life span of the crampons. Attention! Spare bars 4AST19 e
4AST20 include two anti-wear buckles that can only be used
with the Snow Flex model, never with Nevis Flex crampons.
(Fig. 13). Attention! Accessories/spare parts marked with an
asterisk (*) by themselves do not constitute PPE. Attention! Be-
fore installing an accessory/replacement part, carefully read
and understand the instructions for use of the device on which
it will be installed. Attention! Before use make sure that the
accessory/spare part is correctly installed.
ANTIBOTTS FOR
LYCAN / NUPTSE EVO
(Ref. No 6V834)
ANTIBOTTS FOR
HYPER-SPIKE
(Ref. No 6V894)
ANTIBOTTS FOR
ICE / PRO LIGHT
(Ref. No 6V816)
ANTIBOTTS FOR
NEVIS / SNOW FLEX
(Ref. No 6V825)
HOOK
(Ref. No
APUN03
)
BLADE
(Ref. No
APUN04)
2,5 mm
STANDARD BAR
(Ref. No
3I787
)
2x
STANDARD BAR
(Ref. No 3I788)
2x
LONG BAR
(Ref. No 3I794)
2x
HYPER-SPIKE BAR
(Ref. No AAST18)
2x
FLEX BAR
(Ref. No
4I787
)
2x
LONG FLEX BAR
(Ref. No 4I794)
2x
FLEX BAR-B
(Ref. No
4AST19
)
2x
LONG FLEX BAR-B
(Ref. No
4AST20
)
2x
OK
NO
NO
OK
NO
OK
L
MAX L/2
NO
OK
NO
1
3
3
2
1
2
ANTIBOTTS 6V834 - INSTALLATION
10.1 10.2 10.3
10
ANTIBOTTS 6V894 - INSTALLATION
11
TECHNIQUES
12.1 - SKI TOURING 12.2 - GLACIER TRAVEL
12.3 -
CLASSIC
12.4 -
CLASSIC
12.5 -
CLASSIC
12.6 -
CLASSIC
12.7 - TECHNICAL
12.8 -
TECHNICAL
12.9 -
ICE FALLS
12
ANTI-WEAR BUCKLE
13
SHARPENING
8.1 8.2 8.3
8
ACCESSORIES / SPARE PARTS
9.1- ANTIBOTTS 9.2 - BARS
9.3 - HYPER-SPIKE POINTS
9.4 - CHANGE OF POINTS
9.5 - EXAMPLES OF CONFIGURATION
PRODUCT REF. No.
HYPER-SPIKE
LYCAN
NUPTSE EVO
ICE
NEVIS FLEX
SNOW FLEX
ANTIBOTTS
6V894
6V816
6V825
6V834
STANDARD BAR
3I787
(36÷47)
(36÷47)
3I788
(36÷46)
(33÷44)
LONG BAR 3I794
(50)
(50)
(50)
(47)
HYPER-SPIKE BAR AAST18
(36÷47)
FLEX BAR 4I787
(36÷47)
LONG FLEX BAR 4I794
(50)
FLEX BAR-B 4AST19
(33÷44)
(33÷44)
LONG FLEX BAR-B 4AST20
(
47)
(
47)
HOOK APUN03
BLADE
APUN04
9

Chat with your Climbing Technology Nuptse Evo Classic manual using AI

Get instant AI answers from your Climbing Technology Nuptse Evo Classic manual

Ask anything about the Climbing Technology Nuptse Evo Classic. Answers come from this manual, with the pages they are based on.

Nuptse Evo Classic Maintenance Schedule

Remind me when maintenance is due
Yearly
Have crampons checked by competent person

It is recommended to have the crampons checked at least once a year by a competent person, such as the manufacturer.

Before and during use
Inspect crampons for good condition

Always check before and during use that the crampons are in good condition. Verify size adjustment, buckles, screws, wire bails, and sharpness of points.

As needed
Sharpen worn points with hand file

If points are worn, sharpen them with a hand file. Do not use a powered grinder as heat can damage metal characteristics and reduce holding power.

Free maintenance reminders

Timed to your purchase date. Always free, unsubscribe anytime.

By submitting you agree to the privacy policy. Unsubscribe with one click in any email.
M: qwen/qwen3.8-flash

Ask a Question

0/1000

Do you recommend Nuptse Evo Classic?

Yes No

Frequently Asked Questions

A

Use the double lever system to size between EU 36-43 and 42-47 ranges. Ensure the pin locks into the bar hole correctly.

Is this answer helpful?

A

No, it is not suitable for ski touring due to its steel construction and weight profile compared to light alloy options.

Is this answer helpful?

A

Use a hand file only. Do not use a powered grinder as heat can damage the metal and reduce holding power.

Is this answer helpful?

A

The bodies and points are made from steel alloy, ensuring strength and durability in harsh conditions.

Is this answer helpful?

A

Check before every use and have it inspected annually by a competent person for safety and longevity.

Is this answer helpful?

A

Always pass the strap back through the second ring to ensure maximum security and load distribution during climbs.

Is this answer helpful?

A

It complies with EN 893:2010 and Regulation EU 2016/425 for personal protective equipment against falls.

Is this answer helpful?

M: QW-35-FL

Advantages and Disadvantages

Advantages

  • High-grade steel alloy bodies for durability
  • Rapid adjustment system for easy sizing
  • Complies with EN 893 safety standards
VS

Disadvantages

  • Not suitable for ski touring
  • Heavier than light alloy options
  • Requires hand file for sharpening
M: QW-35-FL

Product Specification

Type

Crampons

Colors

gray, orange

Points

12

Sizes

36-47 (EU)

Weight

2.08 lbs

M: QW-35-FL

Product Description

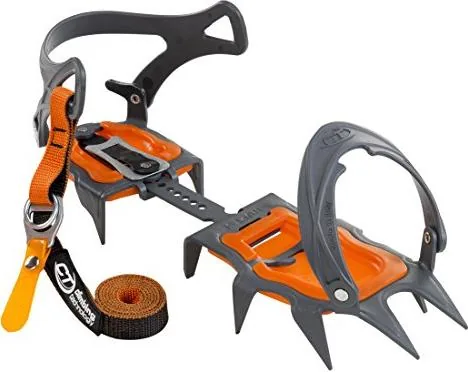
Unleash Your Alpine Potential with the Climbing Technology Nuptse Evo Classic

When venturing into challenging alpine terrain, reliable gear is essential for safety. The Climbing Technology Nuptse Evo Classic stands out as a robust choice for mountaineers seeking precision and ease of use. This guide highlights specific features designed for heavy-duty alpinism and glacier travel.

Performance and Build Quality

Crafted with high-grade steel alloy bodies, this model withstands harsh conditions. It features a classic binding system compatible with various boot types. The rapid adjustment system allows quick sizing between EU 36-43 and 42-47 ranges. This ensures a secure fit without compromising speed. Users should follow the Climbing Technology Nuptse Evo Classic Manual for detailed assembly instructions to ensure optimal function. Users must remain cautious of snow buildup. Always ensure compatibility with footwear.

Technical Specifications

The crampon utilizes a double lever system for precise sizing adjustments. It features a rear anti-balling plate to prevent snow accumulation. The hook points provide excellent grip on ice. The heel lever adjusts for boots with specific welt configurations. All models include a wire toe bail that rotates freely for correct fitting.

Ideal for glacier travel, classic alpinism, and technical climbing. It is highly recommended for ice falls where stability is paramount. The equipment complies with the EN 893:2010 standard. It is not suitable for ski touring due to steel construction. It serves as essential protection against slips on ice, snow, or mixed terrain environments.

Maintenance and Safety

Regular checks are crucial for longevity. Before every use, verify the size adjustment system locks securely. Check buckle functions properly. Points must be sharpened with a hand file rather than a grinder. Replace equipment if heavily loaded or uncertain. An annual check by a competent person is recommended. Ensure spare parts are installed correctly.

Final Thoughts

This equipment offers strength. This balances strength with durability. Proper usage ensures safety. Always wear the straps passing them back through the second ring. Check the fit of the rear crampon half to the heel of the boot regularly during ascents.

Notes

Confirm adjustments indoors. Watch for snow buildup under crampons. Keep the strap outside the foot to avoid tripping hazards.

M: QW-35-FL

© Copyright 2026 Manual.ly