


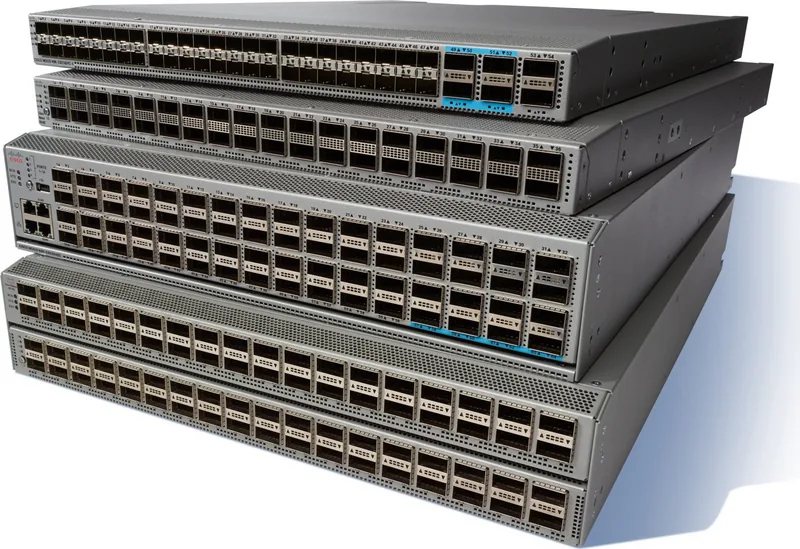
Cisco Nexus 92160YC-X Manual
PDF manual · 66 Pages
English



Quick check
Incorrect answer, please try again.
Chat with your Cisco Nexus 92160YC-X manual using AI
Get instant AI answers from your Cisco Nexus 92160YC-X manual
Ask anything about the Cisco Nexus 92160YC-X. Answers come from this manual, with the pages they are based on.
Nexus 92160YC-X Maintenance Schedule
Clean the connectors regularly depending on the environment and if exposed to dust or accidentally touched. Use wet or dry cleaning techniques.
Inspect fiber ends routinely for dust and damage. If damage is suspected, clean and inspect under a microscope.
Ask a Question
Do you recommend Nexus 92160YC-X?
Yes NoFrequently Asked Questions
It is designed for high-density data center access and aggregation. The 48 SFP28 ports serve servers and leaf connections, while the six QSFP28 uplinks provide fast paths to upstream switches or fabric layers.
Is this answer helpful?
The downlink side supports 1G, 10G, and 25G operation. That makes it useful for mixed environments where some devices are still at lower speeds while others are ready for higher-bandwidth links.
Is this answer helpful?
Yes. The QSFP28 uplinks can support 40G or 100G depending on the optics and port configuration. This gives the switch a path to higher-capacity aggregation without changing the chassis.
Is this answer helpful?
Yes. It is built for dual power supplies, allowing operational redundancy. In some setups, each supply can be tied to a separate source for stronger protection against power loss.
Is this answer helpful?
All fan and power modules must share the same airflow direction. Correct airflow keeps the chassis cool and prevents overheating, especially in hot-aisle/cold-aisle data center layouts.
Is this answer helpful?
Yes, many service tasks are designed to be simple. Fans, power supplies, and optics can be replaced with minimal disruption, as long as the correct procedures and compatibility rules are followed.
Is this answer helpful?
Advantages and Disadvantages
Advantages

- 48 SFP28 downlinks support 1G, 10G, and 25G for flexible server connectivity.
- Six QSFP28 uplinks provide strong bandwidth for aggregation or spine links.
- Redundant, hot-swappable fans and power supplies help reduce downtime.
- Compact 1RU design saves rack space while keeping high port density.
Disadvantages

- Airflow direction must match across modules, so planning is required before deployment.
- Power and circuit sizing can be complex, especially when designing for redundancy.
- Optics and fiber links need regular cleaning to maintain signal quality.
- Rack depth, clearance, and grounding requirements may limit installation options.
Product Specification
Function
Switch, SAN switch
Type
Standalone, Rackmount (via mounting brackets)
Network ports
48x SFP28, 6x QSFP28
Speeds
48x SFP28 (1G/10G/25Gb/s), 4x QSFP28 (10G/25G/40G/100Gb/s), 2x QSFP28 (10G/25G/40Gb/s)
PoE
N/A
Backplane
3.2Tb/s, 2.5Gp/s, 20MB packet buffer, 92k Mac addresses
Officially supported standards
IGMP
Configuration
Web interface, Console, serial (RJ-45, USB-A 2.0, rear), Network (SFP, RJ-45, dedicated, 10/100/1000Base-T, rear)
Cooling
active, 4x fans (1.57in, 1x hot-plug each)
Dimensions (WxHxD)
17.28x1.73x22.48in, 1U
Weight
14.11lbs
Color
silver
Special features
Metal housing, removable mounting brackets, firmware updates possible, redundant power supply (redundant power feed), 2x hot-plug power supply
Manufacturer's warranty
one year
Product Description
Cisco Nexus 9200 Rackmount 25G Managed Switch, 48x SFP28, 6x QSFP28
The Cisco Nexus 9200 Rackmount 25G Managed Switch, 48x SFP28, 6x QSFP28 is built for dense, high-speed networking in modern data centers where performance and flexibility matter. In a compact 1RU form factor, it combines forty-eight 10/25G SFP28 downlinks with six QSFP28 uplinks, making it a practical fit for server access layers, aggregation roles, and leaf-spine designs. For teams that need a clean balance between port density and bandwidth headroom, this platform stands out as a strong foundation.
What makes this switch especially appealing is its adaptability. The downlink ports support 1G, 10G, and 25G speeds, allowing gradual migration without replacing the entire fabric. The uplink side can operate at 40G or 100G depending on the optics and configuration, which helps architects match connectivity to current demand while preserving upgrade paths. That flexibility is valuable in environments that evolve quickly and cannot afford frequent hardware swaps.
Operational design is another major strength. The chassis supports redundant power supplies, hot-swappable fan modules, and clear airflow choices for hot-aisle or cold-aisle deployments. Those details matter in real deployments because uptime often depends on how easily a switch can be maintained under pressure. The Cisco Nexus 9200 Rackmount 25G Managed Switch, 48x SFP28, 6x QSFP28 Manual highlights careful installation planning, from rack depth and grounding to cable management and environmental controls, all of which help keep the system stable and efficient.
Management is equally straightforward for network teams. Dedicated management interfaces, console access, and support for standard NX-OS workflows simplify day-to-day administration. The switch is also designed with enterprise compliance in mind, including visibility through status LEDs and practical maintenance procedures for optics, power modules, and fans. This makes it a solid choice for organizations that value not just speed, but predictable operations and controlled growth.
Notes
- Match airflow direction across all fan and power modules.
- Plan power carefully for redundancy and peak load.
- Use supported transceivers and clean optical connectors regularly.
- Confirm rack spacing, grounding, and aisle placement before installation.
Search for 67,706 Manuals online


Type-in Brand or Model