Manual.ly Logo

Cameo Control 54 Manual

0.0 · 0 Ratings

PDF manual · 52 Pages

English

M: OA-GPT-54-NAN
page

/ 52

Loading...
fc877915885968ecb9218c7b8ab82ce97d35 page 3
ITALIANOPOLSKIESPAÑOL
FRANCAISDEUTSCHENGLISH
3
ENGLISH
YOU‘VE MADE THE RIGHT CHOICE!
We have designed this product to operate reliably over many years. Please read this User‘s Manual carefully, so that you can begin making
optimum use of your Cameo Light product quickly. Learn more about Cameo Light on our website WWW.CAMEOLIGHT.COM.
PREVENTIVE MEASURES
1. Please read these instructions carefully.
2. Keep all information and instructions in a safe place.
3. Follow the instructions.
4. Observe all safety warnings. Never remove safety warnings or other information from the equipment.
5. Use the equipment only in the intended manner and for the intended purpose.
6. Use only sufficiently stable and compatible stands and/or mounts (for fixed installations). Make certain that wall mounts are properly installed and
secured. Make certain that the equipment is installed securely and cannot fall down.
7. During installation, observ e the applicable safety regulations for your country.
8. Never install and operate the equipment near radiators, heat registers, ovens or other sources of heat. Make certain that the equipment is
always installed so that is cooled sufficiently and cannot overheat.
9. Never place sources of ignition, e.g., burning candles, on the equipment.
10. Ventilation slits must not be blocked.
11. This appliance is designed exclusively for indoor use, do not use this equipment in the immediate vicinity of water (does not apply
to special outdoor equipment - in this case, observe the special instructions noted below). Do not expose this equipment to flammable
materials, fluids or gases.
12. Make certain that dripping or splashed water cannot enter the equipment. Do not place containers filled with liquids, such as vases or
drinking vessels, on the equipment.
13. Make certain that objects cannot fall into the device.
14. Use this equipment only with the accessories recommended and intended by the manufacturer.
15. Do not open or modify this equipment.
16. After connecting the equipment, check all cables in order to prevent damage or accidents, e.g., due to tripping hazards.
17. During transport, make certain that the equipment cannot fall down and possibly cause property damage and personal injuries.
18. If your equipment is no longer functioning properly, if fluids or objects have gotten inside the equipment or if it has been damaged in
anot her way, switch it off immediately and unplug it from the mains outlet (if it is a powered device). This equipment may only be repaired
by authorized, qualified personnel.
19. Clean the equipment using a dry cloth.
20. Comply with all applicable disposal laws in your country. During disposal of packaging, please separate plastic and paper/cardboard.
21. Plastic bags must be kept out of reach of children.
FOR EQUIPMENT THAT CONNECTS TO THE POWER MAINS:
22. CAUTION: If the power cord of the device is equipped with an earthing contact, then it must be connected to an outlet with a protective
ground. Never deactivate the protective ground of a power cord.
23. If the equipment has been exposed to strong fluctuations in temperature (for example, after transport), do not switch it on immediately.
Moisture and condensation could damage the equipment. Do not switch on the equipment until it has reached room temperature.
24. Before connecting the equipment to the power outlet, first verify that the mains voltage and frequency match the values specified on the
equipment. If the equipment has a voltage selection switch, connect the equipment to the power outlet only if the equipment values and the
mains power values match. If the included power cord or power adapter does not fit in your wall outlet, contact your electrician.
25. Do not step on the power cord. Make certain that the power cable does not become kinked, especially at the mains outlet and/or power
adapter and the equipment connector.
26. When connecting the equipment, make certain that the power cord or power adapter is always freely accessible. Always disconnect the
equipment from the power supply if the equipment is not in use or if you want to clean the equipment. Always unplug the power cord and
power adapter from the power outlet at the plug or adapter and not by pulling on the cord. Never touch the power cord and power adapter
with wet hands.
27. Whenever possible, avoid switching the equipment on and off in quick succession because otherwise this can shorten the useful life of
the equipment.
28. IMPORTANT INFORMATION: Replace fuses only with fuses of the same type and rating. If a fuse blows repeatedly, please contact an
authorised service centre.
29. To disconnect the equipment from the power mains completely, unplug the power cord or power adapter from the power outlet.
30. If your device is equipped with a Volex power connector, the mating Volex equipment connector must be unlocked before it can be re-
moved. However, this also means that the equipment can slide and fall down if the power cable is pulled, which can lead to personal injuries
and/or other damage. For this reason, always be careful when laying cables.
31. Unplug the power cord and power adapter from the power outlet if there is a risk of a lightning strike or before extended periods of disuse.
32. The device must only be installed in a voltage-free condition (disconnect the mains plug from the mains).
33. Dust and other debris inside the unit may cause damage. The unit should be regularly serviced or cleaned (no guarantee) depending on
ambient conditions (dust etc., nicotine, fog) by qualified personnel to prevent overheating and malfunction.
34. Please keep a distance of at least 0.5 m to any combustible materials.
35. Power cables to power multiple devices must have a cross-section of at least 1.5 mm². Within the EU, the cables must correspond to
H05VV-F, or similar. Suitable cables are offered by Adam Hall. With these cables, you can connect multiple devices via the power OUT con-
nection to the power IN connection of an additional device. Make sure that the total current consumption of all connected devices does not
exceed the specified value on all connected devices (label on the device). Make sure to keep power cable connections as short as possible.

Chat with your Cameo Control 54 manual using AI

Get instant AI answers from your Cameo Control 54 manual

Ask anything about the Cameo Control 54. Answers come from this manual, with the pages they are based on.

Ask a Question

0/1000

Do you recommend Control 54?

Yes No

Frequently Asked Questions

A

It is a 54-channel DMX controller for operating lighting fixtures or groups of fixtures. It helps manage color, brightness, effects, and sound-based programs in small to medium lighting setups.

Is this answer helpful?

A

It can control up to 9 DMX fixtures or fixture groups. Each one can be addressed separately, which makes it useful for managing multiple lights from one controller.

Is this answer helpful?

A

Yes. It includes COLOUR FADE, COLOUR JUMP, and AUTO modes, plus color preset buttons. These features make it easy to build animated lighting looks quickly.

Is this answer helpful?

A

Yes. Besides the included external power supply, it can also operate with a 9V block battery. That makes it more flexible for portable or temporary setups.

Is this answer helpful?

A

Yes. It uses the DMX-512 protocol and a 3-pin XLR output, so it works with many standard DMX-compatible fixtures, as long as addressing is set correctly.

Is this answer helpful?

A

Yes. The SOUND mode uses the built-in microphone to react to music, especially bass pulses. You can also adjust microphone sensitivity for better response in different rooms.

Is this answer helpful?

A

Yes. It is designed for tabletop use, installation, and wall mounting. The housing includes mounting preparation, making it suitable for fixed lighting control positions.

Is this answer helpful?

M: OA-GPT-54-NAN

Advantages and Disadvantages

Advantages

  • 54 DMX channels with control for up to 9 fixtures or fixture groups.
  • Offers manual, auto, sound-reactive, strobe, and color preset modes.
  • Backlit LCD and direct buttons make setup and live use straightforward.
  • Works with either the included power supply or a 9V battery.
  • Compact metal housing supports tabletop, wall, or installed use.
VS

Disadvantages

  • Limited to indoor use, so it is not meant for outdoor environments.
  • Only 3-pin DMX output is provided, which may not suit every rig.
  • Best results depend on correct DMX addressing and wiring setup.
  • The built-in microphone may need tuning to match the room volume.
M: OA-GPT-54-NAN

Product Specification

Type

Lighting control desk

Control channels max.

54

Controllable devices max.

9

DMX universes

1

Controller

6x Fader

Connections

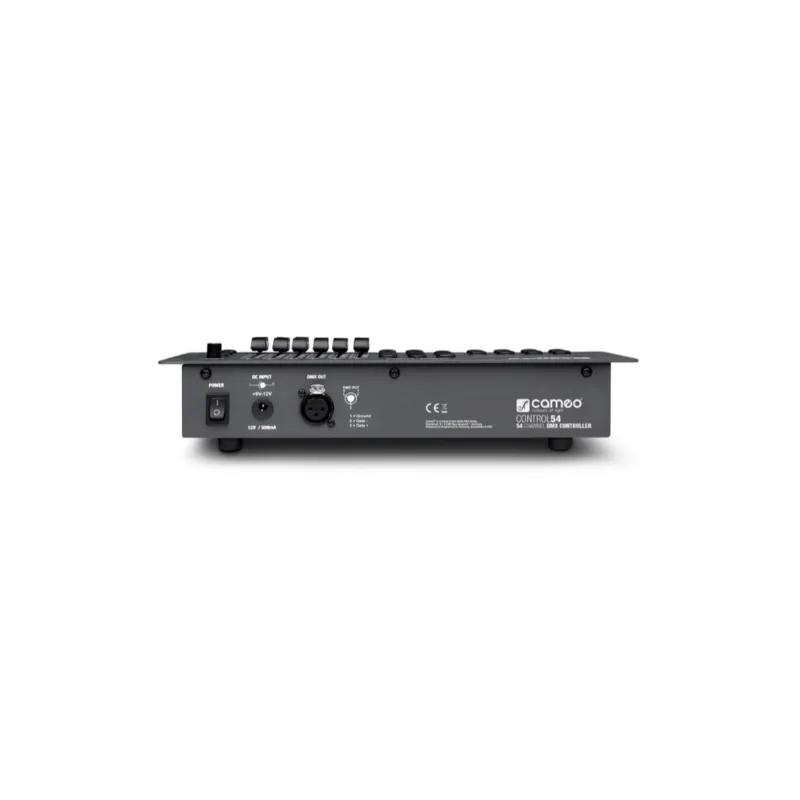
1x DMX Out (3-pin)

Special features

Blackout, Music control

Dimensions

10.24x2.56x5.51in (WxHxD)

Weight

2.65 lb

M: OA-GPT-54-NAN

Product Description

Cameo Control 54: A Flexible DMX Controller for Creative Lighting

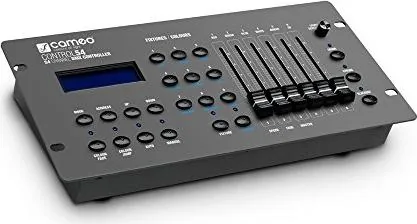
The Cameo Control 54 Manual introduces a compact yet capable DMX controller built for users who want hands-on control over stage lighting, venue effects, or small event setups. With 54 DMX channels spread across 9 independently manageable fixtures or groups, this controller gives you a practical way to shape color, intensity, and motion without needing a complex console.

Built for quick control and smooth operation

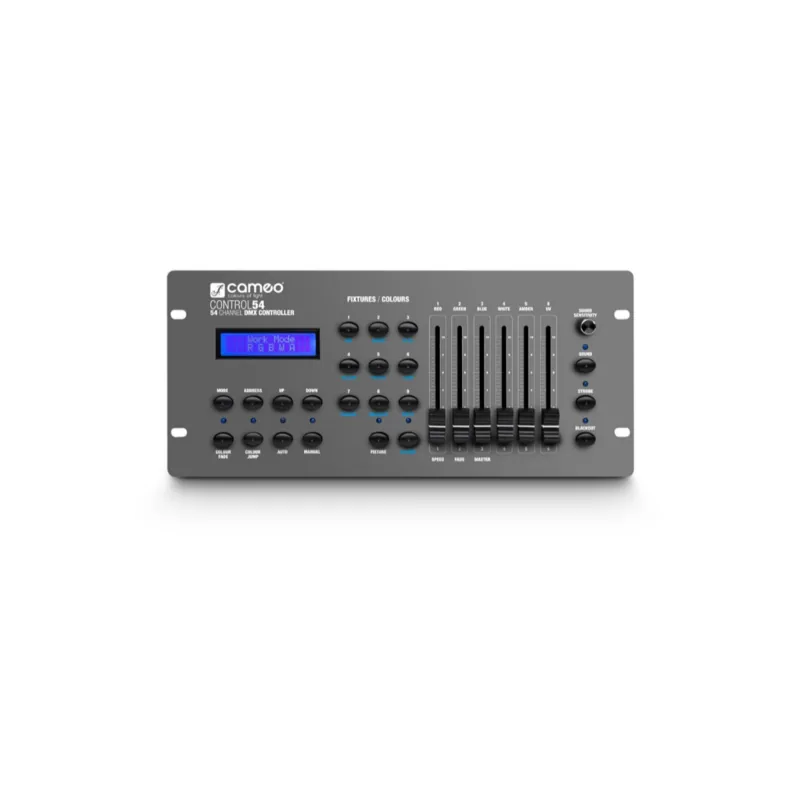
One of the biggest strengths of the Cameo Control 54 is its simple workflow. The layout centers around 6 smooth channel faders, direct selection buttons, and a backlit two-line LCD that keeps fixture addresses and modes easy to read. That makes it especially useful in live environments where speed matters. Whether you are fine-tuning a single fixture or managing several lights at once, the controller is designed to stay intuitive.

The available operating modes add real value. Manual control is ideal for precise adjustments, while COLOUR FADE, COLOUR JUMP, and AUTO let you create dynamic scenes with adjustable speed. The SOUND function reacts to music through the built-in microphone, and STROBE adds extra punch for effect-heavy moments. A blackout button is also included for instant fade-to-dark control.

Practical for installations and mobile use

This controller is more than a tabletop unit. It can be mounted or installed in a fixed position, and it is prepared for wall mounting as well. Power flexibility is another advantage: it works with the included external power supply or a 9V battery, which is helpful when portability or backup operation is needed. The metal housing, compact dimensions, and light weight make it a solid choice for mobile operators and permanent setups alike.

DMX compatibility and setup confidence

The unit supports standard DMX-512 communication and uses a 3-pin XLR output, so it fits well into common lighting rigs. It can handle RGB, RGBW, and RGBWA fixtures, and it automatically spaces fixture addresses in steps of six for easier configuration. That makes setup smoother when controlling multiple lights in a chain.

Notes

  • Best suited for indoor professional lighting applications.
  • Keep DMX cable runs short for cleaner signal transmission.
  • Use a terminator at the end of the DMX chain to reduce errors.
  • Always follow safety guidance before installation or transport.
M: OA-GPT-54-NAN

© Copyright 2026 Manual.ly