
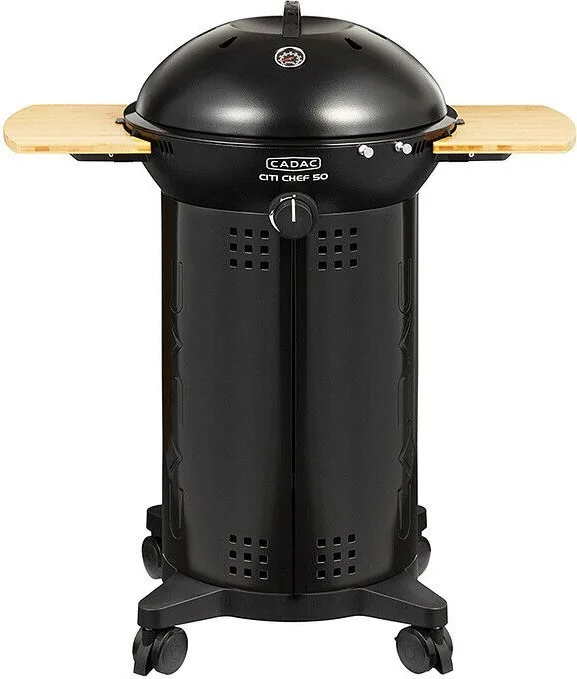
Cadac Citi Chef 50 Manual
PDF manual · 94 Pages
English



Quick check
Incorrect answer, please try again.
Chat with your Cadac Citi Chef 50 manual using AI
Get instant AI answers from your Cadac Citi Chef 50 manual
Ask anything about the Cadac Citi Chef 50. Answers come from this manual, with the pages they are based on.
Citi Chef 50 Maintenance Schedule
Inspect the gas hose for signs of wear or damage before every use and before connecting to the gas container. Replace if damaged.
Remove fat from the moat at the bottom of the Fat Pan. Wash the grid in warm water with non-abrasive detergent after wiping off excess fat.
Ensure the seal on the regulator is in position and in good condition before fitting it to a gas container. Do this with every connection.
After cleaning, recondition ceramic non-stick surfaces with a light wipe of vegetable oil. Use only plastic or wooden utensils to avoid damage.
Ask a Question
Do you recommend Citi Chef 50?
Yes NoFrequently Asked Questions
No, this appliance is designed for outdoor use only. It requires significant ventilation to operate safely and efficiently. Using it in enclosed spaces like balconies or porches is dangerous and prohibited.
Is this answer helpful?
You can use refillable gas containers up to 9kg that comply with local regulations. The cylinder height should not exceed 500mm and width 350mm. Specific pressure requirements vary by region (e.g., 28-30 mbar or 50 mbar).
Is this answer helpful?
If the piezo igniter fails, you can light the burner manually using a barbecue lighter. Insert the lighter through the vent holes underneath the burner until it aligns with the burner, then turn the control knob to ignite.
Is this answer helpful?
No, the pizza stone is an optional accessory sold separately. It is a 10mm thick baking stone capable of withstanding temperatures up to 500°C and comes with a nickel-plated wire holder.
Is this answer helpful?
You should check all connections for leaks before every use. Use soapy water on the joints; if bubbles form, there is a leak. Immediately close the gas supply and inspect the fittings.
Is this answer helpful?
To protect the ceramic non-stick coating, you must use plastic or wooden utensils. Metal utensils can scratch and permanently damage the surface, voiding the effectiveness of the non-stick layer.
Is this answer helpful?
Advantages and Disadvantages
Advantages

- High 3.7 kW heat output for fast and efficient cooking
- Modular design supports multiple interchangeable cooking surfaces
- Piezo ignition system ensures reliable and easy lighting
- Durable ceramic non-stick coatings on available accessories
- Five-year manufacturer warranty against factory defects
Disadvantages

- Strictly limited to outdoor use due to ventilation requirements
- Gas cylinder and hose must be purchased separately in most regions
- Ceramic surfaces can be damaged by metal utensils if not careful
- Requires regular maintenance checks for jets and vents
- Dome handle can become very hot during extended use
Product Specification
Type
Grill cart
Power
3.5kW
Number of burners
1
Burner
1x main burner
Grill attachments
Grill grate (aluminum, non-stick coated), grill lid with thermometer
Grilling area
46cm (diameter), 1662cm² (area)
Gas consumption
270g/h
Shelf areas
2x side shelves (removable, wood), under-cabinet, gas bottle cabinet, 2x cutlery hooks
Features
Wheels, grease collection container
Dimensions
860x1023x550mm (WxHxD)
Weight
20.00kg
Product Description
Experience the Ultimate Outdoor Cooking with Cadac Citi Chef 50
The Cadac Citi Chef 50 represents the pinnacle of portable outdoor cooking, designed specifically for those who wish to live the braai life anywhere. This versatile appliance transforms patios, campsites, and gardens into gourmet kitchens. Its robust construction ensures durability while maintaining a sleek profile that fits easily into any outdoor setting.
At the heart of the Citi Chef 50 is its powerful 3.7 kW heat input, capable of delivering consistent performance whether you are grilling meat, fish, or vegetables. The unit features an adjustable valve that allows users to control flame intensity precisely, ensuring perfect results every time. The piezo ignition system makes lighting the burner effortless, even in slightly damp conditions, provided proper precautions are taken.
One of the standout features of this grill is its modularity. The Citi Chef 50 supports a wide range of optional cooking surfaces, including a ceramic non-stick BBQ grid, a chef pan, an enamel roast pan, and a pizza stone. Each accessory is designed to enhance your culinary capabilities, allowing you to prepare everything from seared steaks to crispy pizzas. The ceramic coatings on these surfaces ensure easy cleaning and long-lasting performance when used with wooden or plastic utensils.
Safety is paramount in the design of the Cadac Citi Chef 50. It is strictly intended for outdoor use only, requiring adequate ventilation to prevent carbon monoxide buildup. The appliance includes safety mechanisms such as a wind shield dome, which not only protects the flame but also serves as a cooking lid. Users are advised to maintain safe distances from flammable materials and to always check hoses and regulators before each use. The unit operates with approved gas cylinders up to 9kg, complying with various international standards depending on the region of use.
Maintenance is straightforward, placing the responsibility on the consumer. Regular cleaning of the fat pan and grates, along with occasional checks of the jet and venturi, keeps the unit running smoothly. The manufacturer offers a five-year guarantee against factory faults, providing peace of mind for long-term investment. Whether you are a seasoned grill master or a beginner, the Cadac Citi Chef 50 offers the flexibility and power needed to elevate your outdoor dining experience.
Important Notes
- Always use protective gloves when handling hot surfaces.
- Ensure the gas cylinder is upright during operation.
- Use only genuine CADAC accessories to maintain warranty validity.
Search for 67,706 Manuals online


Type-in Brand or Model