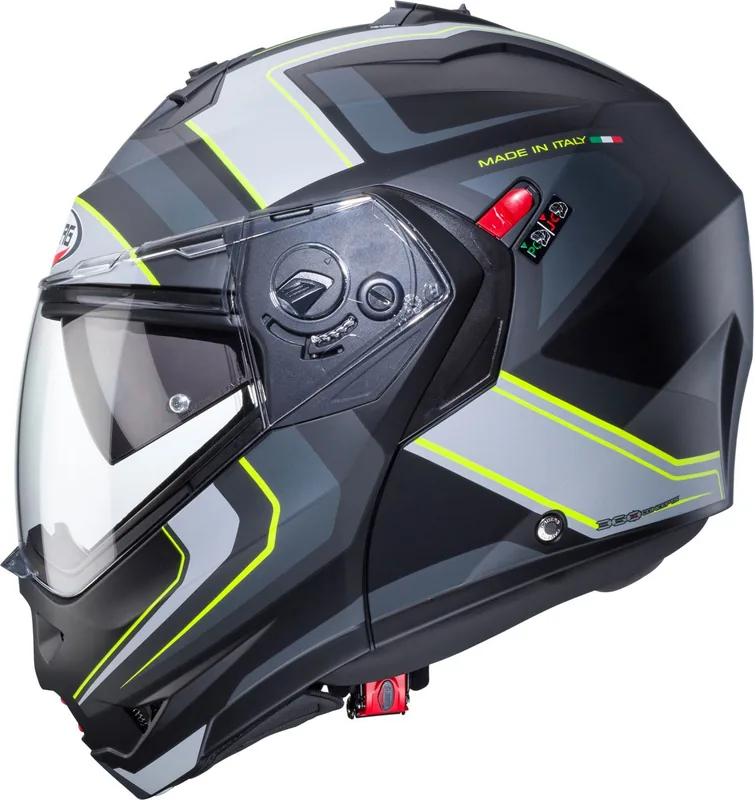
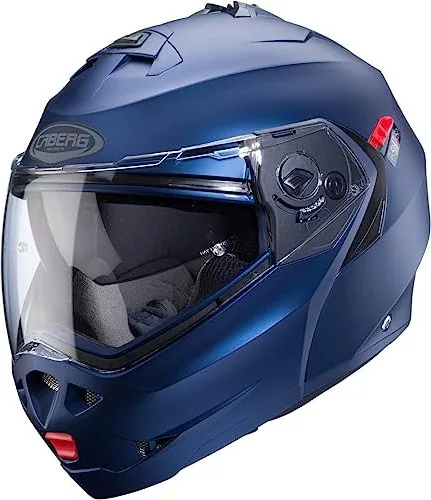
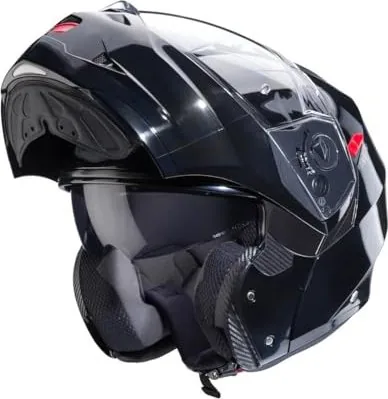
Your helmet DUKE thanks to the double homologation P/J can be used in 2 confi-
gurations (chinguard closed “P” and chinguard open “j”)
Lever P/J
When the P/J lever is positioned on “J” it is possible to block the chinguard in the
open position (Fig.1). The selection on the position “J” can be done before the ope-
ning of the chinguard.
WARNING!In this position it is not possible to close the chinguard. Do not
force the closure as this could cause damages to the closing mecha-
nism of the helmet.
To be able to close the chinguard it is necessary to move the P/J lever
to the “P” position.
When the lever P/J is positioned on “P” the chinguard can be opened and closed (Fig.2)
WARNING!
The level of protection of this helmet is in function of the configuration adopted by
the user: full protection with the chinguard closed and partial protection when the
chinguard is open.
Whilst on the move do not ride with the chinguard in the open postion if
the P/J lever is not positioned in the configuration “J”
1.HOW TO FIX AND REMOVE THE CLEAR VISOR
1.1Open the visor until the arrow on the ground plate and the arrow on the visor
meet. Press button Atowards the back of the helmet and detach the visor (Fig.3)
1.2Repeat the same process on the other side and remove the visor.
To assemble back the visor, repeat the above process in inverse order
2.INSTRUCTION TO REMOVE THE SMOKED VISOR
2.1 Drive forward the top lever to remove the smoked visor (Fig.4)
2.2 Demount the smoked visor putting up with a flat screwdriver the slider which
fix it to the lever (Fig.5)
2.3 Release the smoked visor by pulling slightly outward (Fig.6)
3.INSTRUCTION TO ASSEMBLE THE SMOKED VISOR
3.1Clip the smoked visor accommodating its side parts into their seating slightly
pressing. (Fig.7)
3.2 Drive forward the top lever (Fig.4)
3.3 Drive the smoked visor inside till to fix it to the slider (Fig.7)
4
ENG
CABERG CASCO DUKE NERO:CASCO RYNO 4-10-2011 17:47 Pagina 3
onfi-
n the
ope-
not
cha-
ever
Fig.2)
d by
n the
on if
visor
Fig.3)
hich
ghtly
5
ENG
WARNING:Never use the smoked visor during the night or with scarce visibility condition
WARNING: Any adjustments to the smoked visor must be done with the two-whee-
ler in still position
4.REMOVING/FIXING THE OPENING CHIN GUARD
The chin guard on this helmet can be removed to make it easier to clean the
various mechanisms.
4.1Repeat steps 1.1.
4.2Unscrew the screw B(Fig.8).
4.3Release the opening chin guard.
Repeat the above steps in the reverse order to return the opening chain guard
to its original position.
CAUTION!Never use the helmet without the chin guard.
5.REMOVING THE WASHABLE INTERNAL LINING
You can start to remove the internal padding from either the right or left cheek.
5.1 With the chin guard raised, remove the cheek pad by detaching the
studs at the back. Then repeat for the other side (Fig.9).
5.2Extract the cheek pad by extracting it from the chin strap through the slot. Then
repeat for the other side.
5.3 Starting from the neck protection, release the lining by pulling slightly towards
the inside of the helmet (Fig.10).
Still pulling slightly, detach the front fixing strips from the support fixed to the
shell.
5.4 Now extract all the lining from the helmet.
CLEANING THE WASHABLE LINING
• Scrub by hand with neutral soap and water (max 30° C).
• Rinse with cold water. Do not wring. Dry at room temperature.
CAUTION! Never wash the lining in the washing machine. Never use petrol or
other solvents to clean the lining.
6. FITTING THE WASHABLE INTERNAL LINING
6.1 Place the internal lining in the helmet.
6.2 Introduce left-hand fixing strip Cbetween the polystyrene of the helmet and
the shell (Fig.11). Repeat the operation for the right-hand fixing strip.
6.3Introduce and attach the front fixing strips to the support fixed on the shell (Fig.12).
6.4 Introduce the fixing strips in the neck area between the polystyrene of the hel-
met and the shell (Fig. 13).
6.5 Insert the chin strap in the slot in the cheek pad. Repeat for the other cheek.
6.6 Attach the cheek pads by pressing the studs at the back (Fig.9).
CAUTION!You must always stop your bike before opening/closing thechin guard.
CABERG CASCO DUKE NERO:CASCO RYNO 4-10-2011 17:47 Pagina 4
DUKE
Your helmet DUKE thanks to the double homologation P/J can be used in 2 confi-
gurations (chinguard closed “P” and chinguard open “j”)
Lever P/J
When the P/J lever is positioned on “J” it is possible to block the chinguard in the
open position (Fig.1). The selection on the position “J” can be done before the ope-
ning of the chinguard.
WARNING!In this position it is not possible to close the chinguard. Do not
force the closure as this could cause damages to the closing mecha-
nism of the helmet.
To be able to close the chinguard it is necessary to move the P/J lever
to the “P” position.
When the lever P/J is positioned on “P” the chinguard can be opened and closed (Fig.2)
WARNING!
The level of protection of this helmet is in function of the configuration adopted by
the user: full protection with the chinguard closed and partial protection when the
chinguard is open.
Whilst on the move do not ride with the chinguard in the open postion if
the P/J lever is not positioned in the configuration “J”
1.HOW TO FIX AND REMOVE THE CLEAR VISOR
1.1Open the visor until the arrow on the ground plate and the arrow on the visor
meet. Press button Atowards the back of the helmet and detach the visor (Fig.3)
1.2Repeat the same process on the other side and remove the visor.
To assemble back the visor, repeat the above process in inverse order
2. INSTRUCTION TO REMOVE THE SMOKED VISOR
2.1 Drive forward the top lever to remove the smoked visor (Fig.4)
2.2 Demount the smoked visor putting up with a flat screwdriver the slider which
fix it to the lever (Fig.5)
2.3 Release the smoked visor by pulling slightly outward (Fig.6)
3. INSTRUCTION TO ASSEMBLE THE SMOKED VISOR
3.1Clip the smoked visor accommodating its side parts into their seating slightly
pressing. (Fig.7)
3.2 Drive forward the top lever (Fig.4)
3.3 Drive the smoked visor inside till to fix it to the slider (Fig.7)
4
ENG
CABERG CASCO DUKE NERO:CASCO RYNO 4-10-2011 17:47 Pagina 3
onfi-
n the
ope-
not
cha-
ever
Fig.2)
d by
n the
on if
visor
Fig.3)
hich
ghtly
5
ENG
WARNING:Never use the smoked visor during the night or with scarce visibility condition
WARNING: Any adjustments to the smoked visor must be done with the two-whee-
ler in still position
4.REMOVING/FIXING THE OPENING CHIN GUARD
The chin guard on this helmet can be removed to make it easier to clean the
various mechanisms.
4.1Repeat steps 1.1.
4.2Unscrew the screw B(Fig.8).
4.3Release the opening chin guard.
Repeat the above steps in the reverse order to return the opening chain guard
to its original position.
CAUTION!Never use the helmet without the chin guard.
5.REMOVING THE WASHABLE INTERNAL LINING
You can start to remove the internal padding from either the right or left cheek.
5.1 With the chin guard raised, remove the cheek pad by detaching the
studs at the back. Then repeat for the other side (Fig.9).
5.2Extract the cheek pad by extracting it from the chin strap through the slot. Then
repeat for the other side.
5.3 Starting from the neck protection, release the lining by pulling slightly towards
the inside of the helmet (Fig.10).
Still pulling slightly, detach the front fixing strips from the support fixed to the
shell.
5.4 Now extract all the lining from the helmet.
CLEANING THE WASHABLE LINING
• Scrub by hand with neutral soap and water (max 30° C).
• Rinse with cold water. Do not wring. Dry at room temperature.
CAUTION! Never wash the lining in the washing machine. Never use petrol or
other solvents to clean the lining.
6. FITTING THE WASHABLE INTERNAL LINING
6.1 Place the internal lining in the helmet.
6.2 Introduce left-hand fixing strip Cbetween the polystyrene of the helmet and
the shell (Fig.11). Repeat the operation for the right-hand fixing strip.
6.3Introduce and attach the front fixing strips to the support fixed on the shell (Fig.12).
6.4 Introduce the fixing strips in the neck area between the polystyrene of the hel-
met and the shell (Fig. 13).
6.5 Insert the chin strap in the slot in the cheek pad. Repeat for the other cheek.
6.6 Attach the cheek pads by pressing the studs at the back (Fig.9).
CAUTION!You must always stop your bike before opening/closing thechin guard.
CABERG CASCO DUKE NERO:CASCO RYNO 4-10-2011 17:47 Pagina 4
DUKE
Your helmet DUKE thanks to the double homologation P/J can be used in 2 confi-
gurations (chinguard closed “P” and chinguard open “j”)
Lever P/J
When the P/J lever is positioned on “J” it is possible to block the chinguard in the
open position (Fig.1). The selection on the position “J” can be done before the ope-
ning of the chinguard.
WARNING!In this position it is not possible to close the chinguard. Do not
force the closure as this could cause damages to the closing mecha-
nism of the helmet.
To be able to close the chinguard it is necessary to move the P/J lever
to the “P” position.
When the lever P/J is positioned on “P” the chinguard can be opened and closed (Fig.2)
WARNING!
The level of protection of this helmet is in function of the configuration adopted by
the user: full protection with the chinguard closed and partial protection when the
chinguard is open.
Whilst on the move do not ride with the chinguard in the open postion if
the P/J lever is not positioned in the configuration “J”
1.HOW TO FIX AND REMOVE THE CLEAR VISOR
1.1Open the visor until the arrow on the ground plate and the arrow on the visor
meet. Press button Atowards the back of the helmet and detach the visor (Fig.3)
1.2Repeat the same process on the other side and remove the visor.
To assemble back the visor, repeat the above process in inverse order
2.INSTRUCTION TO REMOVE THE SMOKED VISOR
2.1 Drive forward the top lever to remove the smoked visor (Fig.4)
2.2 Demount the smoked visor putting up with a flat screwdriver the slider which
fix it to the lever (Fig.5)
2.3 Release the smoked visor by pulling slightly outward (Fig.6)
3.INSTRUCTION TO ASSEMBLE THE SMOKED VISOR
3.1Clip the smoked visor accommodating its side parts into their seating slightly
pressing. (Fig.7)
3.2 Drive forward the top lever (Fig.4)
3.3 Drive the smoked visor inside till to fix it to the slider (Fig.7)
4
ENG
CABERG CASCO DUKE NERO:CASCO RYNO 4-10-2011 17:47 Pagina 3
onfi-
n the
ope-
not
cha-
ever
Fig.2)
d by
n the
on if
visor
Fig.3)
hich
ghtly
5
ENG
WARNING:Never use the smoked visor during the night or with scarce visibility condition
WARNING: Any adjustments to the smoked visor must be done with the two-whee-
ler in still position
4.REMOVING/FIXING THE OPENING CHIN GUARD
The chin guard on this helmet can be removed to make it easier to clean the
various mechanisms.
4.1Repeat steps 1.1.
4.2Unscrew the screw B(Fig.8).
4.3Release the opening chin guard.
Repeat the above steps in the reverse order to return the opening chain guard
to its original position.
CAUTION!Never use the helmet without the chin guard.
5.REMOVING THE WASHABLE INTERNAL LINING
You can start to remove the internal padding from either the right or left cheek.
5.1 With the chin guard raised, remove the cheek pad by detaching the
studs at the back. Then repeat for the other side (Fig.9).
5.2Extract the cheek pad by extracting it from the chin strap through the slot. Then
repeat for the other side.
5.3 Starting from the neck protection, release the lining by pulling slightly towards
the inside of the helmet (Fig.10).
Still pulling slightly, detach the front fixing strips from the support fixed to the
shell.
5.4 Now extract all the lining from the helmet.
CLEANING THE WASHABLE LINING
• Scrub by hand with neutral soap and water (max 30° C).
• Rinse with cold water. Do not wring. Dry at room temperature.
CAUTION! Never wash the lining in the washing machine. Never use petrol or
other solvents to clean the lining.
6. FITTING THE WASHABLE INTERNAL LINING
6.1 Place the internal lining in the helmet.
6.2 Introduce left-hand fixing strip Cbetween the polystyrene of the helmet and
the shell (Fig.11). Repeat the operation for the right-hand fixing strip.
6.3Introduce and attach the front fixing strips to the support fixed on the shell (Fig.12).
6.4 Introduce the fixing strips in the neck area between the polystyrene of the hel-
met and the shell (Fig. 13).
6.5 Insert the chin strap in the slot in the cheek pad. Repeat for the other cheek.
6.6 Attach the cheek pads by pressing the studs at the back (Fig.9).
CAUTION!You must always stop your bike before opening/closing thechin guard.
CABERG CASCO DUKE NERO:CASCO RYNO 4-10-2011 17:47 Pagina 4
INSTRUCTION TO REMOVE THE SUN SHIELD
Drive forward the top lever to remove the sun shield (Fig.4)
Demount the sun shield putting up with a flat screwdriver the slider which
fix it to the lever (Fig.5)
Release the sun shield by pulling slightly outward (Fig.6)
INSTRUCTION TO ASSEMBLE THE SUN SHIELD
Clip the sun shield accommodating its side parts into their seating slightly
pressing (Fig.7)
Drive forward the top lever (Fig.4)
Drive the sun shield inside till to fix it to the slider (Fig.7)
DUKE
Your helmet DUKE thanks to the double homologation P/J can be used in 2 confi-
gurations (chinguard closed “P” and chinguard open “j”)
Lever P/J
When the P/J lever is positioned on “J” it is possible to block the chinguard in the
open position (Fig.1). The selection on the position “J” can be done before the ope-
ning of the chinguard.
WARNING!In this position it is not possible to close the chinguard. Do not
force the closure as this could cause damages to the closing mecha-
nism of the helmet.
To be able to close the chinguard it is necessary to move the P/J lever
to the “P” position.
When the lever P/J is positioned on “P” the chinguard can be opened and closed (Fig.2)
WARNING!
The level of protection of this helmet is in function of the configuration adopted by
the user: full protection with the chinguard closed and partial protection when the
chinguard is open.
Whilst on the move do not ride with the chinguard in the open postion if
the P/J lever is not positioned in the configuration “J”
1.HOW TO FIX AND REMOVE THE CLEAR VISOR
1.1Open the visor until the arrow on the ground plate and the arrow on the visor
meet. Press button Atowards the back of the helmet and detach the visor (Fig.3)
1.2Repeat the same process on the other side and remove the visor.
To assemble back the visor, repeat the above process in inverse order
2.INSTRUCTION TO REMOVE THE SMOKED VISOR
2.1 Drive forward the top lever to remove the smoked visor (Fig.4)
2.2 Demount the smoked visor putting up with a flat screwdriver the slider which
fix it to the lever (Fig.5)
2.3 Release the smoked visor by pulling slightly outward (Fig.6)
3.INSTRUCTION TO ASSEMBLE THE SMOKED VISOR
3.1Clip the smoked visor accommodating its side parts into their seating slightly
pressing. (Fig.7)
3.2 Drive forward the top lever (Fig.4)
3.3 Drive the smoked visor inside till to fix it to the slider (Fig.7)
4
ENG
CABERG CASCO DUKE NERO:CASCO RYNO 4-10-2011 17:47 Pagina 3
onfi-
n the
ope-
not
cha-
ever
Fig.2)
d by
n the
on if
visor
Fig.3)
hich
ghtly
5
ENG
WARNING:Never use the smoked visor during the night or with scarce visibility condition
WARNING: Any adjustments to the smoked visor must be done with the two-whee-
ler in still position
4.REMOVING/FIXING THE OPENING CHIN GUARD
The chin guard on this helmet can be removed to make it easier to clean the
various mechanisms.
4.1Repeat steps 1.1.
4.2Unscrew the screw B(Fig.8).
4.3Release the opening chin guard.
Repeat the above steps in the reverse order to return the opening chain guard
to its original position.
CAUTION!Never use the helmet without the chin guard.
5.REMOVING THE WASHABLE INTERNAL LINING
You can start to remove the internal padding from either the right or left cheek.
5.1 With the chin guard raised, remove the cheek pad by detaching the
studs at the back. Then repeat for the other side (Fig.9).
5.2Extract the cheek pad by extracting it from the chin strap through the slot. Then
repeat for the other side.
5.3 Starting from the neck protection, release the lining by pulling slightly towards
the inside of the helmet (Fig.10).
Still pulling slightly, detach the front fixing strips from the support fixed to the
shell.
5.4 Now extract all the lining from the helmet.
CLEANING THE WASHABLE LINING
• Scrub by hand with neutral soap and water (max 30° C).
• Rinse with cold water. Do not wring. Dry at room temperature.
CAUTION! Never wash the lining in the washing machine. Never use petrol or
other solvents to clean the lining.
6. FITTING THE WASHABLE INTERNAL LINING
6.1 Place the internal lining in the helmet.
6.2 Introduce left-hand fixing strip Cbetween the polystyrene of the helmet and
the shell (Fig.11). Repeat the operation for the right-hand fixing strip.
6.3Introduce and attach the front fixing strips to the support fixed on the shell (Fig.12).
6.4 Introduce the fixing strips in the neck area between the polystyrene of the hel-
met and the shell (Fig. 13).
6.5 Insert the chin strap in the slot in the cheek pad. Repeat for the other cheek.
6.6 Attach the cheek pads by pressing the studs at the back (Fig.9).
CAUTION!You must always stop your bike before opening/closing thechin guard.
CABERG CASCO DUKE NERO:CASCO RYNO 4-10-2011 17:47 Pagina 4
/16
%
Quick check
I'm not a robot
Incorrect answer, please try again.
Chat with your Caberg Duke X manual using AI
Get instant AI answers from your Caberg Duke X manual
Ask anything about the Caberg Duke X. Answers come from this manual, with the pages they are based on.
Ask a Question
0/1000
Do you recommend Duke X?
YesNo
Frequently Asked
Questions
A
Position the lever to J to lock the chin guard open for ventilation. Use P to allow the chin guard to be opened and closed while driving. Always stop the vehicle before changing these positions to prevent injury or damage.
Is this answer helpful?
A
No, never wash the lining in a washing machine. Scrub it gently by hand with neutral soap and water up to 30 degrees Celsius. Rinse with cold water and dry at room temperature to avoid damaging the material.
Is this answer helpful?
A
No, you must never use the smoked visor during night hours or when visibility is scarce. Always switch to the clear visor to ensure you can see the road clearly and safely while riding in low light conditions.
Is this answer helpful?
A
Open the visor and unscrew the screws labeled B on both sides. Release the opening chin guard carefully. To reattach, reverse these steps and ensure the screws are tight for safety.
Is this answer helpful?
A
If your communication system has a separate BT controller, place it in the designated slot found on the back of the inner shell. There is also specific space for microphone and wiring to manage cables neatly.
Is this answer helpful?
A
Avoid using petroleum, gasoline, or other solvents to clean the lining. These substances can degrade the foam and fabric. Stick to neutral soaps and cold water only for cleaning purposes.
Is this answer helpful?
A
No, you must always stop the vehicle before adjusting or changing the visor. Riding with tools or attempting changes while moving is dangerous and can cause loss of control or injury to your eyes.
Is this answer helpful?
M: qwen/qwen3.5-flash-20260224
Advantagesand
Disadvantages
Advantages
Dual P/J homologation provides flexibility for closed or open chin guard riding positions.
Removable and washable internal lining ensures hygiene and long-term comfort for the rider.
Compatible with multiple communication system models for seamless audio integration inside helmet.
VS
Disadvantages
Visor adjustments require the vehicle to be completely stopped to ensure safety and prevent accidents.
Chin guard cannot be closed in J position without moving lever which risks mechanism damage or failure.
Sun shield and smoked visors are unsafe for use during night or low visibility conditions.
M: qwen/qwen3.5-flash-20260224
Product
Specification
Type
Flip-up helmet
Features
integrated sun visor
Weight
3.42 lbs
M: qwen/qwen3.5-flash-20260224
Product
Description
The Ultimate Flip-Up Experience with Caberg Duke X
Riders seeking versatility often look to the Caberg Duke X Manual for guidance on maximizing their safety gear. This flip-up helmet stands out in the crowded market by offering dual homologation standards designed for different riding styles. Whether you prefer an open chin guard for city cruising or a closed shell for highway speeds, the P/J lever system allows you to switch configurations easily. However, understanding the manual is crucial because safety depends on proper usage of every mechanism.
Versatility and Safety Features
The helmet features a robust mechanism for the chin guard system. When set to position J, the chin stays locked open, providing excellent ventilation for warm weather riding. In position P, it functions normally to close and open while riding without locking risks. Crucially, the manufacturer warns against riding with the chin up unless the lever is locked in J. This ensures the locking mechanism remains secure and your head is protected fully by the shell structure. The double homologation P/J confirms its reliability for various riding conditions, ensuring structural integrity in both modes.
Customization Options
Riders can switch between a clear visor and a smoked visor to match their style and lighting needs during the day. A sun shield is also included for bright days and glare protection. To change these, you must follow specific steps detailed in the guide involving levers and screws. Always make sure the vehicle is stopped completely before adjusting these parts to avoid accidents. Never use dark visors during night hours or low visibility to maintain clear visibility while on the road. Cleaning is another key area for maintenance. The internal lining is washable but requires hand washing only to preserve materials.
Comfort and Maintenance
Maintenance ensures longevity of the product over time. The inner padding can be removed for easy cleaning with neutral soap and cold water only. Avoid using the washing machine or harsh chemicals like gasoline which could damage the foam. Proper care keeps the helmet fresh and comfortable for long rides. Communication devices fit well inside, with space for control units behind the head and speaker placement for clear audio.
Final Thoughts
Investing in quality gear means reading the instructions thoroughly. The Caberg Duke X Manual provides detailed steps for everything from installing speakers to cleaning the liner properly. By following these guidelines, riders enjoy a safe and comfortable journey without mechanical failures.