
Brunner Beyond Manual
PDF manual · 1 Pages
English


Quick check
Incorrect answer, please try again.
Chat with your Brunner Beyond manual using AI
Get instant AI answers from your Brunner Beyond manual
Ask anything about the Brunner Beyond. Answers come from this manual, with the pages they are based on.
Ask a Question
Do you recommend Beyond?
Yes NoFrequently Asked Questions
Lay the flysheet on a level, clean surface beside the vehicle. Insert fiberglass poles into their respective channels, then connect pole capsules to the pins fixed at the tent base (RingGPin System). Pull the front guy lines simultaneously to erect the tent.
Is this answer helpful?
The RingGPin System refers to capsule-style pole ends that connect to fixed pins at the tent base, creating secure anchors and correct pole alignment for quicker, more reliable assembly.
Is this answer helpful?
Tensioning metal poles slide into dedicated internal pockets sewn into the flysheet. Once inserted and tensioned, they stiffen the flysheet’s profile and stabilize the structure, improving wind resistance and internal space shape.
Is this answer helpful?
Use the supplied pegs to fix the flysheet to the ground and deploy the delivered guy lines for additional stability. Choose appropriate peg types for soil conditions and consider additional anchors in soft or windy environments.
Is this answer helpful?
Always fold and stow the tent clean and dry to avoid mildew and material damage. Inspect poles, pins and zippers before packing. Replace or repair worn components and keep a small repair kit in your vehicle.
Is this answer helpful?
The combination of tensioning poles, guy lines and pegs provides good stability, but performance depends on proper setup, anchoring and site conditions. In strong winds, add extra anchors and reduce exposed surface area where possible.
Is this answer helpful?
Avoid erecting on uneven or dirty ground, failing to close door and window zips before tensioning, and mishandling fiberglass segments. Properly aligning pole capsules with base pins ensures smoother assembly and reduces stress on components.
Is this answer helpful?
Advantages and Disadvantages
Advantages

- Modular pole system (fiberglass + metal) balances flexibility and strength
- RingGPin capsule-to-base pin system simplifies pole anchoring and alignment
- Internal pockets for tensioning poles improve structural stability
- Supplied pegs and guy lines provide reliable ground anchoring
- Pre-sewn piping profiles give neat edges and easier assembly
Disadvantages

- Requires level, clean ground for optimal setup and sealing
- Multiple segments and pins add setup complexity for first-time users
- Fiberglass segments can be fragile if mishandled during packing
- Zippers must be closed before tensioning to avoid damage
- Needs thorough drying before storage to prevent mildew
Product Specification
Type
Bus tent
Outer dimensions (LxWxH)
94.49x133.86x82.68in
Pack size
29.53x9.84in
Weight
26.46lb
Product Description
Brunner Beyond Buszelt — Practical Guide and Manual Overview
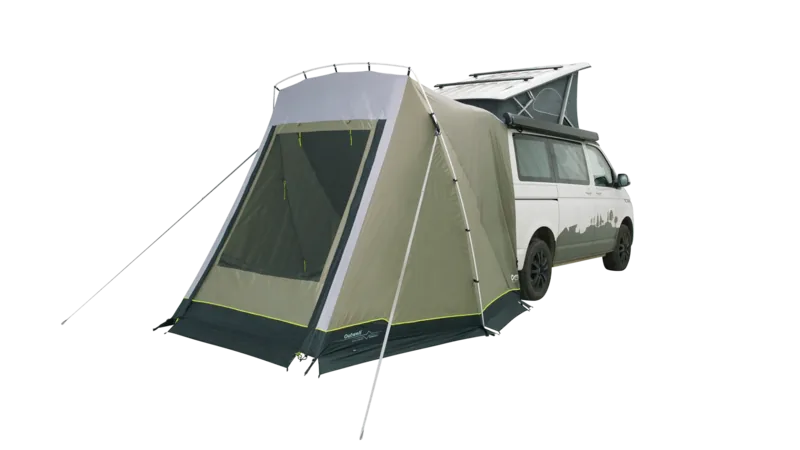
The Brunner Beyond Buszelt is a robust, travel-ready awning designed to transform the rear of a van or bus into a sheltered living or storage area. Built with a combination of fiberglass and metal pole segments, the tent emphasizes reliable assembly, stable anchoring and practical details like sewn-in piping profiles and dedicated pockets for tensioning poles. Its design suits weekend campers, overlanders and families seeking quick shelter attached to a vehicle.
What it offers
This model focuses on ease of setup through a segmented pole system that connects via capsule pins to base-mounted pins (RingGPin System). The flysheet spreads over a level surface and receives poles through dedicated channels. Front guy lines are pulled simultaneously to erect the structure, while tensioning metal poles inserted into inside pockets add stiffness and shape. Supplied pegs and additional guy lines secure the flysheet to the ground for wind resistance.
Construction and materials
The tent combines fiberglass pole segments for flexibility with metal segments for structural strength. Pole channels are pre-sewn into the flysheet and piping profiles are integrated for finished edges and reliable fits. Components are meant to be folded and stowed dry and clean to preserve materials and prolong lifespan.
Setup highlights
- Lay the flysheet on a clean, level surface adjacent to the vehicle.
- Insert fiberglass poles into their respective channels, then connect pole capsules to base pins (RingGPin System).
- Erect by pulling front guy lines and then insert tensioning metal poles into internal pockets to finalize shape and stability.
- Anchor the flysheet with supplied pegs and add guy lines for extra security.
Care and storage
Always fold and stow the tent dry and clean to avoid mildew and material degradation. Inspect pole connections and pins before each use, and replace worn pegs or guy lines as needed.
Notes:
- Ensure all door and window zips are closed before tensioning to prevent stress on zippers.
- Verify the final position relative to the vehicle to ensure proper sealing and fit.
- Keep a small repair kit for pole clips, pins and patching fabric in the vehicle.
Search for 67,706 Manuals online


Type-in Brand or Model