
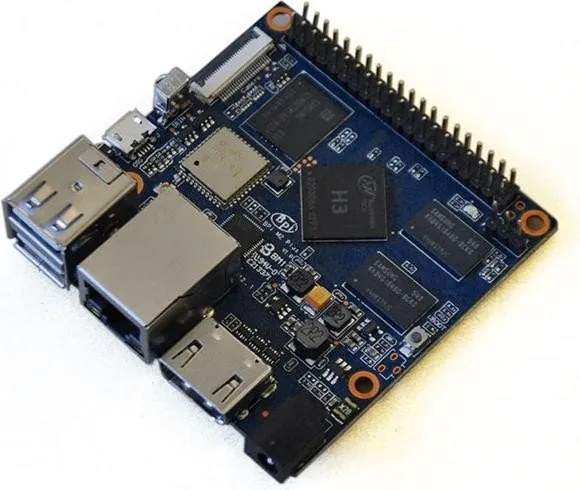
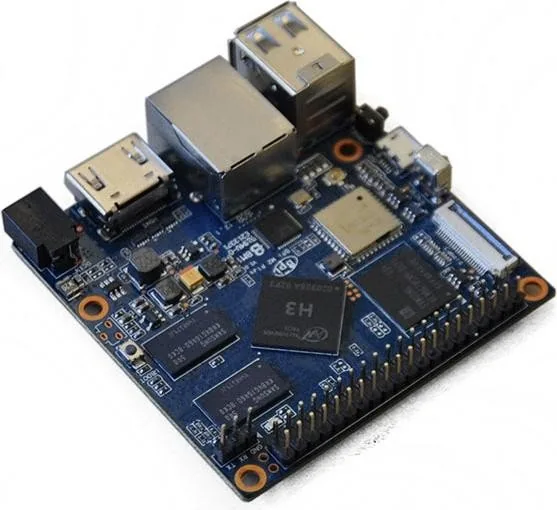
Banana Pi BPI-M2+ Manual
PDF manual · 7 Pages
English



Quick check
Incorrect answer, please try again.
Chat with your Banana Pi BPI-M2+ manual using AI
Get instant AI answers from your Banana Pi BPI-M2+ manual
Ask anything about the Banana Pi BPI-M2+. Answers come from this manual, with the pages they are based on.
Ask a Question
Do you recommend BPI-M2+?
Yes NoFrequently Asked Questions
The board requires a regulated USB power supply providing 5V at 2A (2000mA). Using lower wattage adapters like those for GSM phones may cause instability even if they claim 5V.
Is this answer helpful?
Yes, standard USB keyboards and mice work well. However, some wireless devices that draw significant power might require a powered USB hub to function reliably.
Is this answer helpful?
Use specific tools based on your OS. For Android, use Phoenix Card. For Linux on Windows, use Win32 Disk Imager. On Linux, use the dd command to write the image file directly to the SD card device node.
Is this answer helpful?
No, it is optional. You can boot and operate the board without a network connection, but an Ethernet cable makes downloading software and updating the system much easier.
Is this answer helpful?
Always use the GUI shutdown option or run 'sudo halt' or 'sudo shutdown -h' in the terminal. Cutting power directly can corrupt the SD card file system.
Is this answer helpful?
A minimum of 8GB is recommended for booting the operating system. The card should also be Class 10 or higher for optimal performance.
Is this answer helpful?
Advantages and Disadvantages
Advantages

- Supports multiple operating systems including Android and Linux
- Compact size ideal for portable and embedded projects
- Easy setup process with clear documentation
- Cost-effective solution for learning and development
- Compatible with standard HDMI and USB peripherals
Disadvantages

- Requires separate purchase of power supply and SD card
- High-power USB devices may need a powered hub
- No built-in storage; relies entirely on external media
- Setup process can be complex for absolute beginners
- Performance limited compared to modern desktop computers
Product Specification
Platform
Allwinner H3 based boards
Manufacturer
Banana Pi
Type
Mainboard
SoC
Allwinner H3, 4x 1.20GHz (ARM Cortex-A7)
Memory
1GB DDR3 RAM, 8GB Flash (eMMC)
Power Supply
1x Barrel Jack 4.0/1.7mm (Center Positive), 5.0V/2.0A
GPU
Mali-400 MP2
Video Outputs
1x HDMI 1.4
Video Inputs
1x MIPI CSI
Audio
1x HDMI (shared)
External Connectors
2x USB-A 2.0, 1x USB 2.0 Micro-B, 1x Cardreader (microSDHC)
Internal Connectors
N/A
GPIO
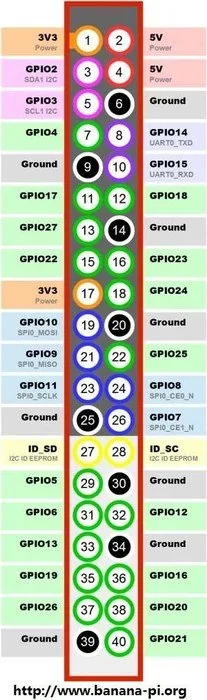
40-Pin digital I/O
GPIO Standards
UART, SPI, CSI, I2S, PWM
Wireless
WLAN 802.11b/g/n (AP6212), Bluetooth 4.0, 1x MHF/UFL
LAN
1x Gb LAN (RTL8211E)
Other Interfaces
3-Pin Debug TTL (UART)
Dimensions
2.56x2.56in (WxD)
Weight
1.69oz
Features
Power Button, Reset Button, Uboot Button, Diagnostic LED, CIR Header
Package Contents
1x Mainboard, 1x WLAN Antenna
Product Description
Discover the Power of Banana Pi M2+
The Banana Pi M2+ is a versatile single-board computer designed for enthusiasts, developers, and hobbyists who need a compact yet powerful solution for various computing tasks. This board serves as an excellent alternative to other popular SBCs, offering robust performance and flexibility for home automation, media centers, and educational projects. Getting started with your new device is straightforward when you have the right accessories and follow the proper setup steps.
To begin your journey, ensure you have the essential components ready. A MicroSD card with at least 8GB capacity and Class 10 speed rating is crucial for booting the operating system. While not mandatory, having an HDMI cable allows you to connect the board to a monitor or TV for visual output. Standard USB peripherals like a keyboard and mouse are necessary for navigation, though high-power wireless devices might require a powered hub. For networking, an Ethernet cable simplifies software updates and connectivity. The power supply must be reliable, providing a steady 5V/2A to ensure stable operation without risking damage to the board.
Once your hardware is gathered, the next phase involves preparing the storage medium. You will need to download the appropriate operating system image from the official Banana Pi website. Whether you are using Windows or Linux, formatting the SD card correctly is vital. On Windows, tools like SD Formatter can quickly prepare the card, while Linux users can utilize command-line utilities like fdisk and mkfs. After formatting, writing the OS image requires specific tools such as Phoenix Card for Android images or Win32 Disk Imager and dd commands for Linux distributions. Patience during this process ensures a clean installation.
With the SD card prepared, physical assembly is simple. Insert the card into the slot on the underside, connect the HDMI cable to the display, plug in your USB peripherals, attach the Ethernet cable if needed, and finally, connect the regulated power adapter. Upon powering up, the system should boot within minutes, displaying the graphical interface of your chosen OS. Always remember to shut down properly using GUI commands or terminal instructions like sudo halt to prevent file system corruption before cutting power.
Important Notes
- Always use a quality power supply rated at 5V/2A to avoid instability.
- Ensure the SD card is formatted correctly before writing the image.
- Avoid using unregulated chargers meant for small mobile phones.
- Use proper shutdown procedures to protect data integrity.
Search for 67,706 Manuals online


Type-in Brand or Model