para no posicionar los soportes en la
zona de las resistencias del calentador
(zona de calefacción).
A Compruebe que el calentador
está totalmente vertical.
FUNCIONAMIENTO DEL
CALENT
- Regule la temperatura deseada en el
botón A (fig.2).
- Para evitar el choque térmico, antes de
enchufar el calentador a la red eléctrica,
debe introducirlo en el acuario y esperar
algunos minutos para alcanzar la
temperatura del agua.
- Verifique si el indicador luminoso C
(fig.2) está encendido. Una vez alcanzada
la temperatura deseada, el calentador se
desligará, y volverá a ligarse automáticamente
cuando la temperatura del agua fuera
inferior a la escogida.
A El nivel mínimo del agua es
el demostrado en B (fig. 2). Aconsejamos
la verificación regular de la temperatura
de su acuario con ayuda de un
termómetro.
GARANTIA
El calentador tiene una garantía de 24
meses (a partir de la fecha de compra),
para los componentes defectuosos ó los
defectos de fabricación. Además, esta
garantía excluye el tubo de cristal,
reclamaciones provocadas por una mala
instalación ó utilización del calentador y
falta de manutención que pueda
influenciar el bueno funcionamiento del
calentador
responsabilidad en los productos
contenidos en el acuario y se limita
solamente al calentador
En los casos donde se aplica la garantía,
el vendedor debe rellenar el certificado y
enviarlo, junto con el calentador y el
comprobante de compra, para su
distribuidor
transporte del calentador defectuoso
están a cargo del cliente.
RECICLA No depositar el
producto en la basura. Esta debe
depositarse en un centro de reciclaje
apropiado.
DEUTSCH
Vielen Dank, dass Sie sich für den Kauf
dieses T
entschieden haben.
Lesen und Befolgen Sie die
Sicherheitsanweisungen sowie alle
wichtigen in der Gebrauchsanleitung
enthaltenen Hinweise. Hierdurch erlangen
Sie ein umfassendes Produktverständnis
und eine bestmögliche Nutzung. Ein
Missachten der Anweisungen kann zur
Beschädigung des Produktes führen.
Für weitere Informationen besuchen Sie
unsere Website www.aquatlantis.com.
SICHERHEITSHINWEISE
- Bei Beschädigung des Stromkabels
oder des Steckers darf dieses Gerät nicht
mehr betrieben werden. Falls es fallen
gelassen wurde oder Anomalien bzw. Bei
einem Defekt des Stromkabels des
Heizers, bitte diesen nicht mehr benutzen
sondern ordnungsgemäss entsorgen.
Stromkabel nicht durchschneiden.
- Der Netzstecker sollte so an das
Stromnetz angeschlossen werden, dass
eine Schlaufe in der Leitung entsteht
(siehe Abbildung 1). Falls es zum Kontakt
mit Wasser kommt, tropft es an dieser
Schleife ab. Netzstecker elektrischer
Geräte dürfen nicht feucht werden!
Sollten Steckdose oder Netzstecker
feucht sein, ziehen Sie den Stecker nicht
heraus! Schalten Sie zuerst die
Sicherung der Steckdose aus. Nun
können Sie den Stecker herausziehen
und feststellen ob Wasser in die
Steckdose gelangt ist.
- Dieses Gerät ist nicht dafür bestimmt
durch Personen (einschließlich Kinder)
mit eingeschränkten physischen,
sensorischen oder geistigen Fähigkeiten
benutzt zu werden, es sei denn, sie
werden durch eine für ihre Sicherheit
zuständige Person beaufsichtigt oder
erhielten von ihr Anweisungen, wie das
Gerät zu benutzen ist.
- Kinder sollen beaufsichtigt werden, um
sicherzustellen, da sie nicht mit dem
Gerät spielen.
- Benutzen Sie dieses Gerät nur für den
vorgesehenen Verwendungszweck
Setzen Sie dieses Gerät nicht
anderw
usw.). Ersatzteile, die nicht vom
Hersteller empfohlen oder verkauft
werden, können ein Sicherheitsrisiko
darstellen und sollten aus diesem Grund
nicht ver
- Das Gerät sollte nicht bei T
unter 0 ºC betrieben bzw. verstaut
werden.
- Achten Sie darauf, dass das Gerät
sicher installiert ist, bevor Sie es in
Betrieb nehmen.
- Im Falle der Notwendigkeit kann ein
geeignetes Verlängerungskabel verwendet
werden. Falls kein geeignetes
Verlängerungskabel benutzt wird, kann
es zur Überhitzung des Gerätes kommen.
ACHTUNG: Um Beschädigungen am
Heizer zu vermeiden, betreiben Sie diesen
bitte nicht auß erhalb des Wassers.
Nach Inbetriebnahme sollte der Heizer nur
im abgekühlten Zustand aus dem
Aquariumbecken genommen werden (nach
ca. 15 Min), dies um Glasbruch durch
Thermoschock zu verhindern. Vor jedem
Wartungsvorgang oder Wasser
darauf zu achten, daß der Netzstecker des
Heizers gezogen ist.
EINBAU DES HEIZERS
- Ziehen Sie den Netzstecker aller im
Wasser betriebenen Geräte, bevor Sie
Ihre Hände ins Wasser tauchen.
water must match the indicated in B (fig.
2). We recommend that you regularly
check with a thermometer the water
temperature of your Aquarium.
MAINTENANCE
T
let it cool. Remove from the water and
clean it with running water and soft
materials.
WARRANT
The heater has 24 months warranty (from
purchase date), for any defective
components, or manufacturing faults.
This Warranty excludes break of the
glass tube, damages caused by
inappropriate installation or use of the
heater and absence of maintenance
which may influence the normal
operating of the heater
This guarantee excludes any
responsibility regarding eventual
damages in the products placed inside
the aquarium and it’
the heater damages.
The certificate must be completed by the
retailer and is to be sent with the device
in case of return, together with the
purchase receipt recording the date of
purchase.
The freight cost of this guarantee will be
supported by the client.
DISPOSAL: Do not throw away
the product in the domestic
garbage. It should be delivered in
an adequate recycling center
ESP
Gracias por elegir un producto
T
Para aprovechar al máximo la utilización
y entender el funcionamiento de este
producto, recomendamos que lean y
sigan las instrucciones de seguridad
antes de utilizarlo. Su incumplimiento
puede resultar en danos para el
equipamiento.
Para más informaciones, visite nuestra
página web www.aquatlantis.com.
INSTRUCCIONES DE SEGURIDAD
- No utilice el calentador si el cable de
alimentación estuviere dañado, ó caso el
calentador presente un funcionamiento
anormal, se lo dejó caer ó se el presenta
alguna anomalía.
En caso de daño en el cable de
alimentación del calentador
utilizar y debe eliminarse. Nunca corte el
cable de alimentación.
- Para evitar que se moja el zócalo ó el
enchufe, deberá posicionar su acuario al
lado del zócalo para evitar que el agua
entre en el mismo. Debe hacer “una
curva de goteo” con el cable. La “curva
de goteo” es la parte del cable que está
abajo el nivel del zócalo (fig.1) ó del
conector caso utilice una extensión
eléctrica, que evita que el agua escoja
por el cable y se introduzca en el zócalo.
Sí el zócalo ó el enchufe estuvieran
mojadas, no desenchufe. Desconecte en
el cuadro eléctrico el zócalo
correspondiente. Solo así podrá
desenchufar el calentador y examinar la
presencia de agua en el zócalo.
- Este aparato no está destinado para el
uso por personas (incluidos niños) con
capacidades físicas, sensoriales o
mentales disminuidas, o faltas de
experiencia o conocimiento; a menos de
que dispongan de supervisión o
instrucción relativa al uso del aparato
por parte de una persona responsable de
su seguridad.
- Debe vigilarse a los niños para asegurar
que no juegan con el aparato.
- Los niños no deben jugar con este
aparato.
- No utilice el calentador con otro fin
(por ejemplo: piscinas, jardines, cuarto
de baño, etc.) que no sea al que se
destina.
- No instale y no coloque el calentador
en sitios expuestos a temperaturas
negativas.
- Asegure que el calentador está
correctamente instalado, antes de
cualquier utilización.
- Caso sea necesario utilizar una
extensión, deberá escoger una con
características adecuadas. No debe
utilizar una extensión de corriente ó
potencia inferior al del equipo, puede
sobrecalentar
A Este calentador no debe
nunca funcionar fuera del agua. Antes de
sacarlo del agua, desenchúfelo e espere
que se enfría (≈ 15 min.). No se olvide de
desenchufarlo antes de cambiar el agua
ó cuando hiciera la manutención regular
INST
- Antes de introducir las manos dentro
del acuario (lleno de agua), desenchufe
todos los equipos de la red eléctrica.
INST
FIL
- Instale el calentador en los soportes
ubicados en el compartimiento del filtro
BIOBOX® (fig. 3).
NOT los soportes son suministrados
con el filtro BIOBOX®.
INST
DE FIL
- Debe tener especial cuidado al
manipular el calentador
si colocar junto del mismo elementos
decorativos.
- Fije el conjunto en un punto del acuario
donde haga circulación continua del
agua, para que la calefacción de la
misma sea homogénea.
- Posicione los soportes del calentador y
respectivas ventosas dentro del acuario
(fig.4). El acuario deberá estar lleno de
agua. T
Os custos inerentes ao transporte do
aquecedor defeituoso são da
responsabilidade do cliente.
RECICLAGEM: Não deite o produto
no lixo doméstico. Este deve ser
entregue num centro de reciclagem
adequado.
FRANÇAIS
Merci d’
T
Pour utiliser et comprendre au maximum
ce produit, avant de s'en servir, veuillez
lire et suivre les instructions de sécurité.
Au cas où les instructions ne soient pas
respectées, l'appareil peut être
endommagé.
Pour plus d’informations, visitez notre
site Web www.aquatlantis.com.
Consignes de sécurité
- Ne pas utiliser l'appareil si le câble est
endommagé, si l'appareil ne fonctionne
pas convenablement, si vous l'avez
laissé tomber ou bien s´il présente une
anomalie.
En cas de non fonctionnement du câble du
chauffage, il ne peut pas être utilisé et
doit être éliminé. Ne jamais couper le
câble de l'appareil.
- Pour éviter que la prise de l'appareil ou la
prise de courant se mouille, vous devez
placer votre aquarium juste apposé à la
prise de courant pour éviter que l'eau
coule dessus. Vous devez faire un col de
cygne avec le câble. Le col de cygne est
la partie du câble qui est inférieur au
niveau de la prise de courant (voir fig. 1)
ou du connecteur en cas d'utilisation
d'une rallonge, le col de cygne évite que
l'eau glisse le long du câble et s'infiltre
dans la prise de courant. Si la prise de
l'appareil ou la prise de courant est en
contact avec l'eau, ne débrancher pas
directement la prise de l'appareil à la
prise de courant. Dans le cadre général,
débranché l'interrupteur correspondant à
cette prise de courant, puis débranché la
prise de l'appareil à la prise de courant.
Ensuite, vous pouvez vérifier la présence
ou non de l’
- Cet appareil n'est pas destiné à être
utilisé par des personnes (y compris les
enfants) dont les capacités physiques,
sensorielles ou intellectuelles sont
réduites, ou par des personnes manquant
d'expérience ou de connaissances, à
moins que celles-ci ne soient sous
surveillance ou qu'elles aient reçu des
instructions quant à l'utilisation de
l'appareil par une personne responsable
de leur sécurité.
- Veillez à ce que les enfants ne puissent
pas jouer avec l'appareil.
- Ne pas utiliser le chauffage avec
d'autres finalités (ex: piscines, jardins,
salles de bain, etc...), mais qu’à celui qui
lui est destiné.
- Ne pas installer ou placer le chauffage
dans un endroit exposé à des températures
négatives.
- Avant son utilisation, vérifier que le
chauffage soit convenablement installé.
- Dans les cas de l’utilisation d’une
rallonge, vous devez en choisir une avec
les caractéristiques convenables.
L´utilisation d´une rallonge de
puissance inférieure à l'appareil peut
provoquer une surchauffe.
A Le chauffage ne doit jamais
être branché hors de l'eau. Avant de l'enlever
de l'eau, débranchez-le et patientez jusqu'a
ce qu'il refroidisse (≈ 15 min.). N'oubliez
pas de le débrancher quand vous devez
changer l'eau ou le nettoyer.
INST
- Avant de mettre les mains dans l´eau de
l'aquarium, débrancher tous les appareils
de la prise de courant.
INST
DE FIL
- Installez le chauffage sur les supports
situés dans le compartiment du filtre
BIOBOX® (fig.3).
Note: les supports sont fournis avec le
filtre BIOBOX®.
INST
DE FIL
- Faite attention à la manipulation du
chauffage, en particulier
l'emplacement d'éléments décoratifs
auprès du même.
Placer l'ensemble dans l'aquarium, où la
circulation de l'eau est suffisante et
continue, ceci permettra que l´eau soit
chauffée de façon homogène.
- Placer les supports et les ventouses
dans l’
fig.4. Faire attention de ne pas les placés
près des résistances du chauffage.
A Le chauffage doit être placé
verticalement.
FONCTIONNEMENT DU CHAUFF
- Le régulateur A (fig.2) permet le
réglage de la température souhaité.
Pour éviter un choque thermique, avant
de brancher le chauffage à la prise de
courant, veuillez patienter quelques
minutes jusqu'à ce que la température
du chauffage soit approximativement la
même que l'eau.
- Vérifié si l'indicateur lumineux D (fig.2)
est allumé. Dés que la température
choisie est atteinte, le chauffage
s'éteint. Il se rallume automatiquement
quand la température de l'eau est
inférieure à celle programmée.
A Le niveau minimum d’
doit correspondre à cet indiqué en B (fig.
2). Nous recommandons de vérifier
régulièrement la température de l’
votre aquarium avec un thermomètre.
GARANTIE
Le chauffage a une garantie de 24 mois
(à la date de l'achat), pour les
PORTUGUÊS
Obrigado por escolher um produto de
qualidade T
Para tirar o máximo partido na utilização
e compreensão deste produto, antes de o
usar
segurança. O seu incumprimento pode
resultar em danos para a unidade.
Para mais informações, visite o nosso
website www.aquatlantis.com.
INSTRUÇÕES DE SEGURANÇA
- Não utilize o aquecedor se o cabo de
alimentação estiver danificado, ou caso o
aquecedor apresente um funcionamento
anormal, se o deixar cair ou se
apresentar alguma anomalia. Em caso de
avaria do cabo de alimentação do
aquecedor
e deve ser eliminado. Nunca corte o cabo
de alimentação.
- Para evitar que a tomada ou a ficha do
aquecedor fique molhada, deverá
posicionar o seu aquário ao lado da
tomada para evitar que a água goteje
para a mesma. Deverá efectuar uma
“
gotejo” é a parte do cabo que passa
abaixo do nível da tomada (fig.1) ou do
conector caso utilize uma extensão, que
evita que a água escorra pelo cabo e
entre em contacto com a tomada. Se a
tomada ou a ficha ficarem molhadas, não
desligue a ficha. No quadro eléctrico,
desligue a corrente que alimenta essa
tomada. Só depois poderá desligar a
ficha e examinar a presença de água na
tomada.
- Este aparelho não se destina a ser
utilizado por pessoas (incluindo
crianças) com capacidades físicas,
sensoriais ou mentais diminuídas, ou com
falta de experiência ou conhecimentos,
excepto quando supervisionadas ou
instruídas relativamente à utilização do
aparelho, por uma pessoa responsável
pela sua segurança.
- As crianças devem ser mantidas sob
vigilância para garantir que não brincam
com o aparelho.
- Não utilize o aquecedor para outro fim
(exemplo: piscinas, jardins, casas de
banho, etc) que não aquele a que se
destina.
- Não instale nem coloque o aquecedor
em lugares expostos a temperaturas
negativas.
- Assegure-se que o aquecedor está
devidamente instalado, antes de o utilizar.
- Se necessitar de utilizar uma extensão,
deverá escolher uma com características
adequadas. Uma extensão indicada para
uma corrente ou potência inferior à da
aplicação, pode provocar um
sobreaquecimento.
A Este aquecedor nunca deve
funcionar fora da água. Antes de o retirar
da água, desligue-o e espere até que
arrefeça (≈ 15 min.) para evitar o choque
térmico. Não se esqueça de desligar o
aquecedor aquando a troca de água ou da
manutenção regular
INST
- Antes de colocar as mãos dentro do
aquário, desligue da corrente eléctrica
todos os equipamentos.
INST
FIL
- Instale o aquecedor nos suportes
localizados no compartimento do filtro
BIOBOX® (fig. 3).
NOTos suportes são fornecidos com o
filtro BIOBOX®.
INST
DE FIL
- Deverá ter algum cuidado no
manuseamento do aquecedor
especial, aquando da colocação, junto do
mesmo, de elementos decorativos.
- Fixe o conjunto num local do aquário
onde haja circulação contínua de água,
para que o aquecimento da mesma seja
homogéneo.
- Posicione o suporte do aquecedor e
respectivas ventosas no seu aquário já
com água de acordo com a figura 4,
tendo o cuidado de não colocar os
suportes na zona das resistências do
aquecedor
A O aquecedor tem de ser
posicionado na vertical.
FUNCIONAMENTO DO AQUECEDOR
- No botão A (fig.2) regule a temperatura
pretendida.
- Para evitar o choque térmico, antes de
ligar o aquecedor à corrente eléctrica,
coloque-o dentro da água do seu aquário
durante alguns minutos (≈ 15 min.), até
que a temperatura do aquecedor esteja
aproximada à da água.
- Verifique se o indicador luminoso C
(fig.2) fica aceso. A
temperatura escolhida, o aquecedor
desliga, voltando a ligar automaticamente
quando a temperatura da água for
inferior à seleccionada.
AO nível mínimo da água deve
ser os indicados em B (fig.2).
Aconselhamos que verifique regularmente
a temperatura do seu aquário com um
termómetro.
GARANTIA
O aquecedor tem uma garantia de 24
meses (após a sua compra), para
componentes defeituosos ou defeitos de
fabrico. Esta garantia exclui a quebra do
tubo de vidro, reclamações provocadas
por uma má instalação ou utilização do
aquecedor e inexistência de manutenção.
Exclui ainda qualquer responsabilidade
para com as matérias contidas no
aquário e limita-se unicamente ao
aquecedor
Nos casos onde a garantia se aplica, o
certificado deve ser preenchido pelo
vendedor e enviado, juntamente com o
aquecedor e o comprovativo da compra,
para o seu distribuidor
In het geval van schade aan het
ver kan het niet worden
gebruikt en moet het worden weggegooid.
Snijd de stroomkabel nooit door
-Om te voorkomen dat het stopcontact of
de stekker van de ver
dient het aquarium naast het stopcontact
te worden geplaatst. Zo voorkomt u dat er
water naar het stopcontact druppelt. U
dient een "druppelbocht" in de kabel aan
te brengen. De "druppelbocht" is dat deel
van de kabel dat zich onder het
stopcontact (zie figuur 1) of, in geval van
een verlengsnoer, onder de connector
bevindt. Hierdoor wordt voorkomen dat er
water langs de kabel stroomt en contact
maakt met het stopcontact. Als het
stopcontact of de stekker nat worden,
dient u de stekker niet uit het
stopcontact te trekken. Sluit de stroom
van dat stopcontact op het schakelbord
af. Pas dan kunt u de stekker uit het
stopcontact trekken en controleren of het
stopcontact nat is.
-Dit apparaat is niet bedoeld om gebruikt
te worden door personen (waaronder
kinderen) met verminderde fysieke,
zintuiglijke of verstandelijke vermogens
of indien zij geen ervaring hiermee of
kennis hiervan hebben, tenzij zij onder
toezicht staan of van tevoren instructies
hebben ontvangen betreffende het
gebruik van het apparaat van een voor
hun veiligheid verantwoordelijke persoon.
-Er moet toezicht op kinderen zijn, zodat
zij niet met het apparaat kunnen spelen.
-Kinderen dienen niet met het apparaat
te spelen.
-Om risico te voorkomen dient u
beweegbare of warme onderdelen niet
aan te raken, zoals verw
reflectoren, lampen enz.
-Installeer of plaats de ver
plaatsen waar de temperatuur lager is
dan 0 ºC of hoger dan 35 ºC.
-Uitsluitend voor gebruik binnenshuis
-Verzeker u ervan dat de ver
gebruik goed geïnstalleerd is.
-Indien u een verlengsnoer nodig heeft,
dient u een verlengsnoer met de juiste
kenmerken te kiezen. Een verlengsnoer
dat geschikt is voor een.
WAARSCHUWING:
Dit ver
buiten het water worden gebruikt.
Ontkoppel het ver
wacht totdat het is afgekoeld (dit duurt
ongeveer 15 min.) alvorens het uit het
water te halen. Koppel het
ver
elektriciteitsnet voordat u het water gaat
verv
gaat uitvoeren.
HET VERWARMINGSELEMENT
INST
- Koppel alle bijbehorende elektrische
toestellen van het elektriciteitsnet los
alvorens uw handen in het water te
steken.
INST
BIOBOX®-FIL
- Plaats het ver
bevestigingsklemmen in de kamer van
de BIOBOX®-filter (afb. 3).
N.B.: De bevestigingsklemmen worden
met de BIOBOX®-filter meegeleverd.
INST
BIOBOX® -FIL
Wees extra voorzichtig bij het hanteren
van het ver
wanneer u ernaast decoratie-elementen
(rotsen e.d.) plaatst.
- Bevestig het toestel op een plaats in
het aquarium waar een constante
watercirculatie is, zodat het water op
homogene wijze wordt verw
- Plaats de bevestigingsklemmen van
het ver
bijbehorende zuignappen in uw aquarium
samen met het water volgens afbeelding
4 en zorg hierbij ervoor dat de
bevestigingsklemmen niet rond de kern
van het ver
geplaatst.
LET OP: Het ver
verticaal worden geplaatst.
HET VERWARMINGSELEMENT
BEDIENEN
- Stel de gewenste temperatuur met
knop A in (afb. 2).
- Om een thermoschok te voorkomen,
plaatst u het ver
voordat u dit aan het elektriciteitsnet
aansluit, in het water en wacht u totdat
de benodigde tijd verstreken is zodat de
unit op de watertemperatuur is
afgestemd.
- Zorg ervoor dat de LED-verlichting C
(afb.2) aan blijft. Het ver
gaat automatisch uit wanneer het water
de geselecteerde temperatuur bereikt en
gaat weer aan wanneer de watertemperatuur
onder het geselecteerde niveau komt.
LET OP: Het minimum niveau van het
water moet overeenkomen met het
aangegeven in B (fig. 2). Wij raden u aan
om regelmatig met een thermometer de
watertemperatuur van uw aquarium te
meten.
ONDERHOUD:
Schakel het ver
uit en laat het daarna afkoelen om het te
reinigen. Haal het verwarmingselement
uit het water en reinig het onder
stromend water met zachte materialen.
GARANZIA
Voor het verwarmingselement geldt v
de aankoopdatum een garantie van 24
maanden bij materiaaldefecten en/of
fabricagefouten. Onze garantie is niet van
toepassing op vorderingen waarvan de
oorzaak gelegen is in installatie- en
bedieningsfouten, gebrek aan onderhoud,
verkeerd gebruik van het toestel en niet-
-professioneel uitgevoerde reparatiepogingen.
De verklaring moet door de retaildealer
worden ingevuld en dient bij retour met
het toestel te worden teruggezonden,
operazione potrete staccare la spina e
verificare se esistano eventuali
infiltrazioni d’
presa.
- Questo apparecchio non è inteso per
l'uso da parte di persone (bambini
compresi) con ridotta fisico, sensoriale o
mentale capacità, o la mancanza di
esperienze e di conoscenze, a meno che a
loro sono state date istruzioni o vigilanza
riguardante l'uso de l'apparecchio di una
persona responsabile per loro sicurezza.
- Ibambini devono essere sorvegliati al
fine di garantire che non giocare con
l'apparecchio.
- Non utilizzate il riscaldatore per un fine
diverso da quello a cui esso è destinato
(esempio: piscine,giardini, bagni, ecc).
- Non installate o collocate il
riscaldatore in luoghi esposti a
temperature negative.
- Assicuratevi che il riscaldatore sia
stato opportunamente installato prima di
utilizzarlo.
- Nei casi in cui dovesse essere
necessario ricorrere ad una prolunga,
assicuratevi che essa sia conforme. Una
prolunga indicata per una corrente o
potenza inferiore a quella dell’
potrà causare un surriscaldamento.
A Questo riscaldatore non
deve mai funzionare fuori dall’
Prima di ritirarlo dall’
ed attendete che si raffreddi (≈ 15 min.).
Non dimenticate di spegnere il
riscaldatore quando cambiate l’
quando procedete alla manutenzione
dell’
INST
RISCALDA
- Prima di introdurre le mani
nell’
apparecchiature dalla rete elettrica.
INST
DEL SISTEMA DI FIL
BIOBOX®
Installate il riscaldatore sui supporti
situati nello scompartimento del filtro
BIOBOX® (fig. 3).
NOT i supporti sono forniti assieme al
filtro BIOBOX®.
INST
SISTEMA DI FIL
- Dovrete prestare grande attenzione nel
maneggiare il riscaldatore, in particolare
quando vi collocate accanto degli
elementi decorativi (rocce, ecc).
- Fissate l’
dell’
acqua in modo che essa venga riscaldata
in modo omogeneo.
- Posizionate il supporto del riscaldatore
e le rispettive ventose nell’
cui sarà già stata versata l’
illustrato nella figura 4, facendo
attenzione a non collocare i supporti in
corrispondenza della zona delle
resistenze del riscaldatore.
A Il riscaldatore deve
essere posizionato verticalmente.
FUNZIONAMENTO DEL
RISCALDA
- Con il tasto A (fig.2) regolate la
temperatura desiderata.
- Per evitare lo shock termico, prima di
accendere il riscaldatore, collocatelo
nell’
lasciatecelo per qualche minuto, fino a
che la temperatura del riscaldatore
raggiunga quella dell’
- Assicuratevi che la spia luminosa C
(fig.2) rimanga accesa. Quando
raggiungerà la temperatura prescelta, il
riscaldatore si spegnerà, riaccendendosi
automaticamente ogni qual volta la
temperatura dell’
inferiore a quella selezionata .
A Il livello minimo dell'acqua
deve essere come mostrato in B (fig 2).Vi
raccomandiamo di verificare regolarmente
la temperatura del vostro acquario con
un termometro.
GARANZIA
Il riscaldatore ha una garanzia di 24 mesi
(a decorrere dalla data d’
componenti difettosi o difetti di fabbrica.
Essa esclude la rottura del tubo in vetro,
problemi causati da una cattiva
installazione, da un improprio utilizzo del
riscaldatore o da una negligente
manutenzione che ne comprometta il
corretto funzionamento. Esclude, inoltre,
tutto quanto possa concernere materiali
contenuti nell’
unicamente al riscaldatore.
Nei casi coperti dalla garanzia, il
certificato deve essere compilato dal
venditore ed inviato al distributore,
assieme al riscaldatore ed allo
scontrino.
I costi inerenti il trasporto del
riscaldatore difettoso sono a carico del
cliente.
RICICLAGGIO: Non gettare il
prodotto con i rifiuti domestici.
Questa deve essere depositata in un
centro di riciclaggio adeguato.
NEDERL
Dank u voor het kiezen van een
kwaliteitsproduct van T
een optimaal gebruik en begrip van dit
product dient u voor gebruik de
veiligheidsaanwijzingen te LEZEN EN OP
TE VOLGEN. Het niet-naleven hierv
schade aan het apparaat veroorzaken.
Raadpleeg voor nadere informatie onze
website www.aquatlantis.com.
VEILIGHEIDSAANWIJZINGEN
-Gebruik de ver
stroomkabel beschadigd is, de
ver
de ver
de ver
EINBAU DES HEIZERS IM
BIOBOX® FIL
- Führen Sie den Heizer an der
Innenwand der BIOBOX® durch die zwei
halboffenen Befestigungsringe (Abb. 3).
Anmerkung: Die eingebauten
Befestigungsringe befinden sich in der
Heizkammer der BIOBOX®.
EINBAU DES HEIZERS
AUSSERHALB DES BIOBOX®
FIL
- Vorsicht bei der Handhabung und
Installation dieses Geräts. Bruchgefahr
Besondere Vorsicht im Umgang mit
Aquarium-Dekorationen wie z.B. Steinen,
wenn sie sich in der Nähe des Heizers
befinden.
- Um eine optimale Wärmeableitung zu
erreichen, sollten Sie den Heizer an einer
Stelle mit regelmä
aufstellen.
- Befestigen Sie den Heizer
Saugnäpfe und der Saughalter
an eine geeignete Stelle im befüllten
Becken (Abbildung 4). Achten Sie darauf,
dass die Befestigungsclips nicht im
Bereich der Heizwendel angebracht sind.
ACHTUNG: Heizer senkrecht befestigen
und betreiben!
INBETRIEBNAHME DES HEIZERS
- Durch Drehen des Einstellrings (A) können
Sie die gewünschte Wassertemperatur
einstellen (Abbildung 2).
- Der Heizer sollte sich bereits einige
Minuten im befüllten Becken befinden,
bevor Sie ihn anschlie en. So passt
sich seine T
Aquariumwassers an, und die Gefahr
eines Thermoschocks wird unterbunden.
- Die Kontrollleuchte (C) zeigt an, dass
das Gerät in Betrieb ist (Abbildung 2).
Sobald die gewünschte Wassertemperatur
erreicht ist, stellt sich der Heizer
automatisch aus, fällt die
Wassertemperatur
wieder an.
ACHTUNG: Der Mindestwasserstand
sollte wie in B gezeigt (Abb. 2) sein.
-Wir empfehlen Ihnen die Wassertemperatur
regelmäßig mit einem genauen
Thermometer zu überprüfen.
WARTUNG
Vor der Reinigung das Gerät stets
ausschalten, den Netzstecker aus der
Steckdose ziehen und abkühlen lassen.
Erst nach dem Abkühlen aus dem
Aquarium entnehmen. Ver
Reinigung ein weiches T
fließendes Wasser.
GARANTIE
Für unsere EasyKlim Heizer leisten wir
dem Erw
Monaten ab dem Kaufdatum, sofern er
Verbraucher ist, eine Garantie für den
Fall, dass unser Produkt oder seine
Einzelteile mangelhaft sein sollten nach
Ma gabe der folgenden Bestimmungen:
Die Garantie erstreckt sich auf den
Heizer mit allen dazugehörigen
Einzelteilen.
Sie ist beschränkt auf das Produkt an
sich und erstreckt sich nicht auf
Glasbruch oder auf Schäden an
sonstigen Sachen und/oder Personen.
Voraussetzung der Garantiegewährung
ist, dass unser Produkt bestimmungsgemä
genutzt und nicht unsachgemä behandelt
oder gewartet wurde, insbesondere die
entsprechende Gebrauchsanweisung
beachtet wurde. Garantieansprüche
werden nur dann berücksichtigt, wenn
der Kassenbon bzw. die Rechnung des
Artikels vorgelegt wird. In diesem F
muss das entsprechende F
Verkäufer ausgefüllt werden und an den
Gro händler/Fabrikanten zusammen mit
dem reklamierten Produkt geschickt
werden. Die mit dem T
verbundenen Kosten sind vom Kunden zu
tragen.
ENTSORGUNG: Bitte getrennt
entsorgen und nicht mit normalen
Hausmüll. Bei Zweifel kontaktieren
Sie bitte die zuständigen Behörden.
IT
Grazie per avere scelto un prodotto di
qualità T
Per ottenere il massimo delle
prestazioni, approfondendo nel dettaglio
la conoscenza di funzionamento di
questo prodotto, siete pregati di
LEGGERE E SEGUIRE attentamente le
istruzioni di sicurezza. Il non
adempimento alle procedure ivi indicate
potrà causare danni all'apparecchio.
Per ulteriori informazioni, visitare il
nostro sito Web www.aquatlantis.com.
INSTRUZIONI DI SICUREZZA
- Non utilizzate il riscaldatore se il cavo di
alimentazione dovesse essere riscontrato
danneggiato, nel caso in cui dovesse
manifestare un anomalo funzionamento,
se lo lasciate cadere o se dovesse
presentare qualche anomalia.
In caso di guasto del cavo di
alimentazione del riscaldatore, non può
essere utilizzato e deve essere eliminato.
Il cavo di alimentazione non dovrà in
nessun caso essere tagliato.
- Per evitare che la presa o la spina del
riscaldatore si bagnino, l’
essere posizionato affianco alla presa
per evitare il rischio che vi sgoccioli
dell’
una “
percolazione” è la parte del cavo che
passa al di sotto della presa (vedi figura
1) o della piattina nei casi in cui venga
utilizzata una prolunga, in modo da
evitare che dell’
lungo il cavo entrando in contatto con la
presa. Se la presa o la spina si dovessero
bagnare, non rimuovete la spina.
Staccate la corrente che alimenta quella
presa. Solo dopo aver effettuato questa
accessoires défectueux ou tous défauts
de fabrication. Sont exclus de la
garantie, le verre cassé du tube, les
réclamations provoqués par une
mauvaise installation ou utilisation du
chauffage et le manque d’
garantie exclue aussi toute responsabilité
sur les produits se trouvant à l'intérieur
de l´aquarium qui se limite exclusivement
au chauffage.
Dans le cas ou la garantie s’
certificat doit être remplit par le
revendeur et retourné à son distributeur
avec le chauffage, le ticket de caisse ou
facture prouvant l’
Les frais et les risques de transport du
chauffage défectueux sont à la charge du
client.
RECYCLAGE: Ne pas jeter le
produit avec les ordures ménagères.
Celui-ci doit être déposé dans un
centre de recyclage adéquat.
ENGLISH
Thank you for choosing a T
product.
T
product, before using it, READ and
FOLLOW the safety instructions. F
to do so may result in damage to the
unit.
For mor
www.aquatlantis.com.
SAFET
- Do not operate the heater if it has a
damaged cord or plug, if it is malfunctioning
or if it is dropped or damaged in any manner
In case of damage of the heater cord, it
cannot be used and should be disposed.
Never cut the cord.
- T
plug or receptacle getting wet, position
the unit to one side of a wall mounted
receptacle to prevent water from
dripping onto the receptacle or plug. A
“
arranged to the receptacle. The “
loop” is that part of the cord below the
level of the receptacle or the connector if
an extension cord is used, to prevent
water from travelling along the cord and
coming into contact with the receptacle.
If the plug or receptacle does get wet, DO
NOT unplug the cord. Disconnect the
fuse or circuit breaker that supplies
power to the appliance. Then unplug and
examine for presence of water in the
receptacle.
- This appliance is not intended for use
by people (including children) with
reduced physical, sensory or mental
capabilities, or lack of experience and
knowledge, unless they have been given
supervision or instruction concerning
use of the appliance by a person
responsible for their safety
- Children should be supervised to ensure
that they do not play with the appliance.
- Do not use an appliance for other than
the intended use (i.e. don’t use on
swimming pools, garden ponds,
bathrooms, etc.). The use of attachments
not recommended or sold by the
appliance manufacturer may cause an
unsafe condition.
- Do not install or store the appliance
where it will be exposed to temperatures
below freezing.
- Make sure an appliance is securely
installed before operating it.
- If an extension cord is necessary, a cord
with a proper rating should be used. A
cord rated for less amperes or watts than
the appliance rating may overheat.
WARNING: This heater must never
operate outside water
from the water
it cools down (≈ 15 min.). Do not forget to
unplug the heater from the electrical
power before performing any water
change or regular maintenance.
HEA
- Disconnect from electrical power all
electrical appliances before you dip your
hands into the water.
INST
BIOBOX® FIL
- Set the heater in the fixation clips
located in the chamber of the BIOBOX®
filter (Fig.3)
Note: The fixation clips are supplied with
the BIOBOX® filter
INST
BIOBOX® FIL
- You must take extra car
the heater
to it decorative elements.
-Fix the set on to a place of the Aquarium
where there is a constant water
circulation, so that the heating of the
water may be homogeneous.
- Position the fixation clips of the heater
and corresponding suction cups in your
Aquarium already with water according
to figure 4, making sure that you do not
place the fixation clips on the area of the
heater core.
A The heater be must place in
the vertical position.
HOW TO OPERA
- On the button A (Fig.2) set the desired
temperature.
- In order to avoid thermo shock, and
before you connect the heater to the
electrical power, place the heater into
the water and wait the time necessar
allow the unit to adjust to the water
temperature.
- Make sure that the LED light C (Fig.2)
stays lighted. The heater turns
automatically off when the water
reaches the selected temperature and
turns on again when it falls below the
selected level.
A The minimum level of the
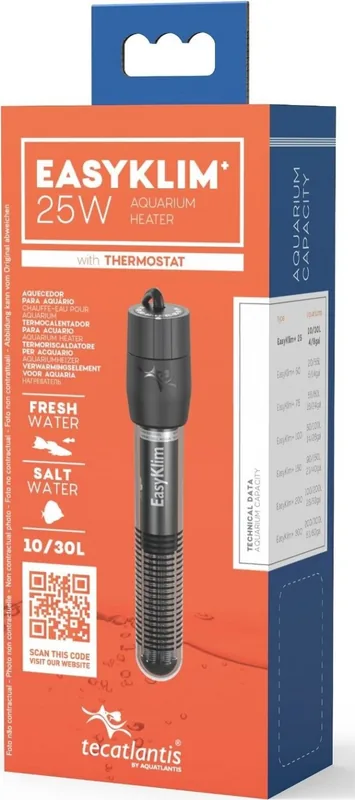
MOD
AQUARIUMS
10/30L
4/8gal
20/55L
5/14gal
55/80L
16/24gal
EasyKlim 25W
EasyKlim 50W
EasyKlim 75W
50/100L
14/26gal
EasyKlim 100W
90/150L
23/40gal
100/200L
26/53gal
200/300L
53/80gal
EasyKlim 150W
EasyKlim 200W
EasyKlim 300W
Fig. 1
Fig. 2
Fig. 4
TECHNICAL DA
A
B
C