
Andonstar A1 Manual
PDF manual · 9 Pages
English



Quick check
Incorrect answer, please try again.
Chat with your Andonstar A1 manual using AI
Get instant AI answers from your Andonstar A1 manual
Ask anything about the Andonstar A1. Answers come from this manual, with the pages they are based on.
Ask a Question
Do you recommend A1?
Yes NoFrequently Asked Questions
The Andonstar A1 is a USB handheld microscope for observing tiny objects through a camera sensor and displaying the captured image on a computer. You can view live detail, take still photos, and record short videos for inspection or documentation.
Is this answer helpful?
Use the LED light dimmer on the USB cable. Turning the dimmer changes the LED power, which helps improve contrast and definition depending on the object, lighting needs, and your viewing angle.
Is this answer helpful?
After the live image appears, you can freeze a frame using the handle snap key, the button on the dimmer cable, or the 'snap' option in the image window. If freezing fails, use the 'capture' menu and choose 'still,' then select a destination folder.
Is this answer helpful?
The focusing ring on the handle adjusts the distance between the lens and the sensor. During focusing and observation, keep the microscope head snugly touching the surface of the object for steadier results and sharper detail.
Is this answer helpful?
Yes. Use the 'capture' controls, set a time limit, choose 'use time limit,' and start capture. The recorded movie is saved in AVI format.
Is this answer helpful?
For best picture quality, the guide recommends Windows XP, Vista, or Windows 7, at least 128MB RAM, one USB port (USB 2.0 recommended), and a CD-ROM for the included software with a hard drive of 40GB or higher.
Is this answer helpful?
Cleaning is delicate. If dust shows up after magnifying, avoid DIY disassembly. If you clean, use minimal absolute alcohol with a fine cotton swab, gently wipe the sensor, ensure alcohol fully volatilizes, and do not let alcohol flow onto the circuit board or LED area.
Is this answer helpful?
Advantages and Disadvantages
Advantages

- Live preview on a computer screen for quick inspection
- LED dimmer helps optimize brightness for different materials
- Multiple photo capture options: interface, handle snap, or keyboard
- Supports still images and AVI video recording
Disadvantages

- Performance depends on Windows compatibility and USB port quality
- Image clarity varies with lighting, working distance, and viewing angle
- Careful handling is required; disassembly is discouraged
Product Specification
Type
electronic
Design
Reflected light
Magnification
1-500x
Power supply
Mains operation
Special features
LED light, 1.9 Megapixel CMOS sensor, USB
Product Description
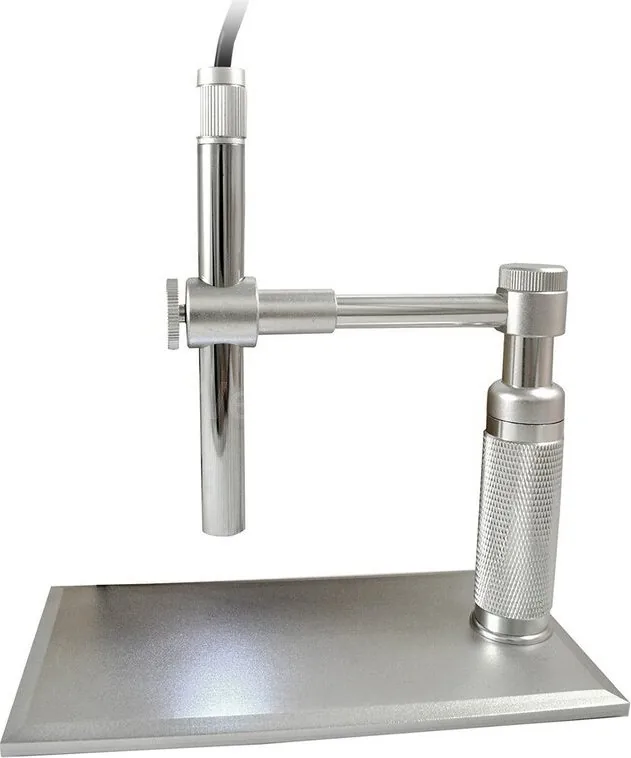
Andonstar A1 USB Handheld Microscope: Andonstar A1 Manual Essentials
The Andonstar A1 is a USB handheld microscope designed for close-up viewing of small objects on your computer screen. It combines an optical lens, a CMOS image sensor, built-in illumination, and an image transfer system that sends captured detail to your PC. With the ability to view, save, print, and share images, it is a practical choice for hobbyists, makers, educators, and anyone who wants clearer inspection without bulky lab equipment.
From stamps and coins to antiques, insects, fabrics, skin, hair, food, and even electronic circuit inspection, the Andonstar A1 is built for everyday micro-level curiosity. You focus using the focusing ring on the handle, then fine-tune brightness with the LED dimmer on the USB cable. Once the image is sharp, you can freeze a photo directly from the interface, use the handle snap key, and store results on your computer.
What you can do with the Andonstar A1
- Display live images on your monitor for real-time inspection
- Capture still photos and save them to a selected folder
- Record short videos in AVI format using a time-limited capture feature
- Adjust exposure through the LED dimmer to match different surfaces and contrast needs
Key specifications that matter
The system uses a digital image processor with a high-quality CMOS sensor. It supports resolutions up to 1600x1200, uses true color 24-bit RGB output, and can run at up to 30 frames per second (for supported modes). The magnification is listed at about 500x, with a compact lens diameter and a 1.5 meter USB cable for flexible desk setups.
Top results (from the included operation guidance)
- Clear live preview on a computer screen with straightforward capture controls.
- Fast photo freezing options via interface buttons, handle controls, or keyboard shortcuts.
- LED brightness adjustment helps improve clarity across different objects and textures.
- Video recording can save in AVI format when using the time-limited capture steps.
- Focusing while keeping the head snug to the object improves sharpness.
Pros and cons to consider
Pros:
- Real-time inspection and easy capture workflow
- LED dimmer for better image definition on varied surfaces
- Supports saving and printing images and saving videos as AVI
- Focus ring for tuning lens-to-sensor distance
Cons:
- Best performance depends on compatible Windows system requirements
- Resolution and image definition vary with lighting, angle, and contrast
- Proper care is important because the sensor and lens can be damaged by improper cleaning or disassembly
Notes
- For safety, ensure the computer USB setup is properly grounded and avoid stormy weather.
- Do not disassemble the product; warranty coverage can be void if unauthorized repairs occur.
- If dust appears on the sensor, cleaning is delicate: use minimal absolute alcohol and gentle technique, then fully volatilize before reassembly. If you lack experience, use professional maintenance support.
Search for 67,706 Manuals online


Type-in Brand or Model