
Alseye Halo AIO Manual
PDF manual · 1 Pages
English


Quick check
Incorrect answer, please try again.
Chat with your Alseye Halo AIO manual using AI
Get instant AI answers from your Alseye Halo AIO manual
Ask anything about the Alseye Halo AIO. Answers come from this manual, with the pages they are based on.
Ask a Question
Do you recommend Halo AIO?
Yes NoFrequently Asked Questions
The included mounting hardware supports multiple Intel and AMD sockets. Intel includes LGA775/115X/1366/2011/2066. AMD includes FM1/FM2/AM2/AM2+/AM3/AM3+/AM4. Use the matching back plate, brackets, and gasket layout described in the Alseye Halo AIO Manual.
Is this answer helpful?
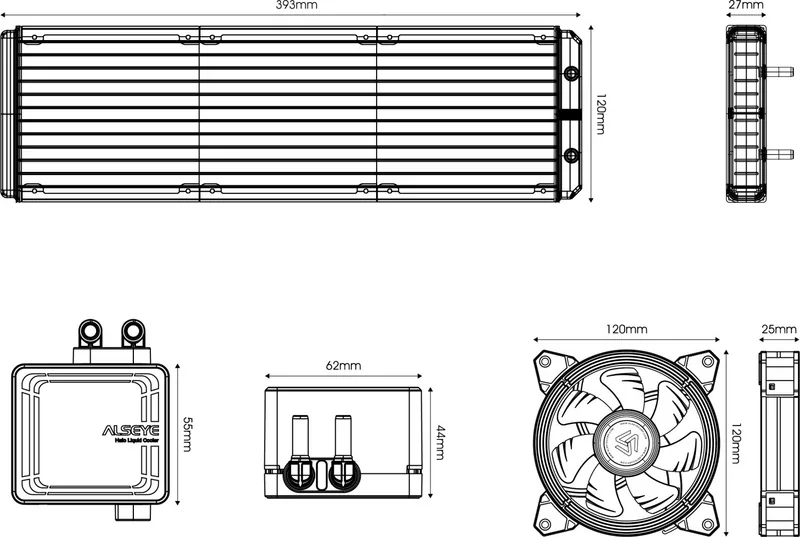
The cooler is offered with radiator sizes H120, H240, and H360. Each uses 120 x 120 x 25 mm fans. Radiator dimensions are listed as 120 x 157 x 27 mm (H120), 120 x 275 x 27 mm (H240), and 120 x 393 x 27 mm (H360).
Is this answer helpful?
For H120, connect the fan to the motherboard CPU_FAN header. For H240 and H360, connect the fans to CPU_FAN using the included adapter cables. Correct adapter usage is important so the motherboard can control the pump and fan behavior properly.
Is this answer helpful?
Yes. The manual instructs tearing off the protective sticker from the copper base of the cold plate before you mount it on the CPU. This ensures full contact between the copper surface and the thermal paste for effective heat transfer.
Is this answer helpful?
Apply thermal paste to the CPU surface, then install the cold plate and tighten using the spring nuts. The manual emphasizes keeping the cold plate flat to the CPU and tightening spring nuts tightly and evenly. This helps maintain consistent mounting pressure without gaps.
Is this answer helpful?
The Alseye Halo AIO includes rainbow LED lighting with 16 LEDs. The effect is integrated into the product, giving a visible accent once installed. If your setup has specific lighting preferences, check your system's layout and fan/radiator placement before final mounting.
Is this answer helpful?
Fans operate at 800 to 2000 RPM, delivering about 18.3 to 45.2 CFM airflow and 0.53 to 1.8 mm/H2O static pressure. Noise is listed from roughly 13.5 to 35.2 dB(A), so quieter operation typically corresponds to lower fan speeds.
Is this answer helpful?
Advantages and Disadvantages
Advantages

- Copper cold plate and a 12V pump (rated up to 2600 RPM) for strong all-in-one CPU cooling.
- Supports H120, H240, and H360 radiator sizes for flexible case compatibility.
- 16 rainbow LEDs add standout lighting with a built-in, integrated look.
- Ceramic bearing pump design helps reduce maintenance concerns over time.
- Manual-driven mounting hardware supports both Intel and AMD platforms.
Disadvantages

- Installation requires careful bracket selection, gaskets, and spring-nut tightening for a proper seal.
- For H240/H360, fan control relies on the included adapter cables and correct CPU_FAN connection.
- Noise depends on fan speed range (800 to 2000 RPM), so high-load tuning may be needed.
- Lead wire length is listed at 300 mm, which may limit routing in some cases.
Product Specification
Type
internal (closed system)
Heatsink
CPU, Copper
Compatibility
775, 1150, 1151, 1155, 1156, 1200, 1356, 1366, 2011-0, 2011-1, 2011-3, 2066, AM2, AM2+, AM3, AM3+, AM4, FM1, FM2, FM2+
Pump
12V
Ports
N/A
Lighting
LED (RGB)
Manufacturer Warranty
2 Years
Product Description
Alseye Halo AIO: Smooth Cooling with a Built-In Rainbow Glow
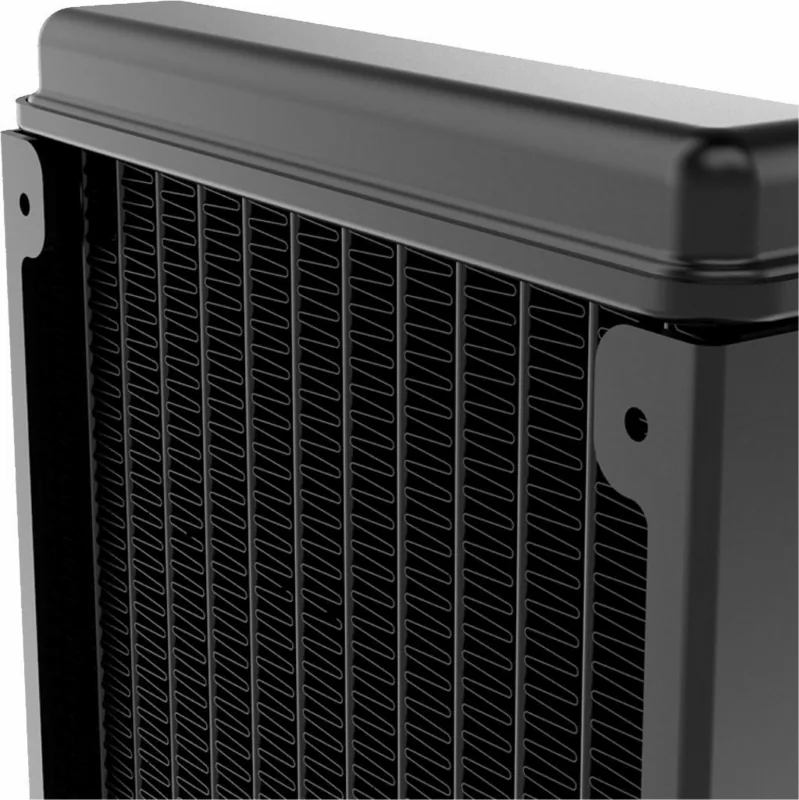
The Alseye Halo AIO is an all-in-one liquid cooler designed for clean builds and confident CPU temperatures. It pairs a copper cold plate, an aluminum radiator, and a compact water block into a black, modern setup, finished with 16 rainbow LEDs for an eye-catching look. If you want a clear walkthrough, the Alseye Halo AIO Manual covers the full mounting and connection process for multiple Intel and AMD platforms.
Performance you can feel
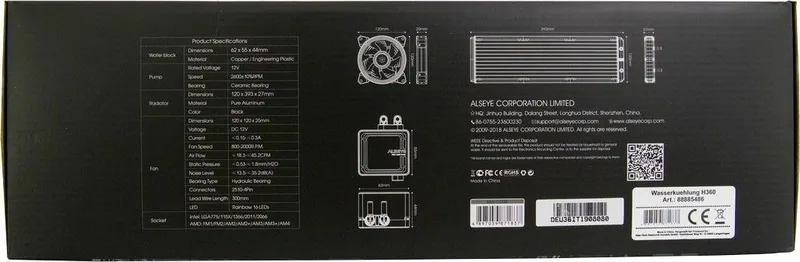
Inside the system, the water block uses a 12V pump rated up to 2600 RPM (within +/-10%), supported by a ceramic bearing. The radiator comes in 120mm (H120), 240mm (H240), and 360mm (H360) sizes, with matching radiator screw and fan hardware. Fans are 120 x 120 x 25 mm and tuned for airflow and static pressure, with a speed range of 800 to 2000 RPM, up to 45.2 CFM airflow, and 1.8 mm/H2O static pressure. Noise is rated from about 13.5 to 35.2 dB(A), depending on load.
Installation overview (the essentials)
Getting it mounted is straightforward when you follow the Alseye Halo AIO Manual. The process typically starts with selecting the correct back plate (Intel or AMD), adding the provided gaskets, and securing the bracket to the motherboard using the included nuts, screws, and spacers. After applying thermal paste to the CPU surface, the cold plate is installed by removing the protective sticker, then tightened evenly using the spring nuts for a flat, secure fit.
For cable connection, the H120 connects directly to the motherboard CPU_FAN header, while the H240 and H360 use the provided adapter cables to manage fan control from CPU_FAN.
What makes it stand out
The Halo series includes LED rainbow lighting (16 LEDs) and a set of brackets and accessories for common sockets. Included components also cover Intel and AMD mounting hardware such as brackets, back plates, spring nuts, plastic and metal gaskets, and thermal paste.
Key results
- Copper cold plate plus spring-nut mounting supports even contact pressure for reliable thermals.
- 16 rainbow LEDs deliver a premium visual upgrade without complex extra parts.
- Compatible across major Intel and AMD sockets, with the correct bracket orientation guided in the manual.
- Adapter-cable setup simplifies fan wiring on H240 and H360 systems.
- High static pressure and airflow capabilities help the radiator perform across different case layouts.
Notes
- Always use the correct Intel/AMD bracket and follow the manual for “Intel” or “AMD” orientation.
- Remove the protective sticker from the copper base before mounting.
- Tighten spring nuts firmly but keep the cold plate flat and evenly seated.
Search for 67,706 Manuals online


Type-in Brand or Model