
Alesis Nitro Mesh Kit Manual
PDF manual · 40 Pages
English



Quick check
Incorrect answer, please try again.
Chat with your Alesis Nitro Mesh Kit manual using AI
Get instant AI answers from your Alesis Nitro Mesh Kit manual
Ask anything about the Alesis Nitro Mesh Kit. Answers come from this manual, with the pages they are based on.
Ask a Question
Do you recommend Nitro Mesh Kit?
Yes NoFrequently Asked Questions
Yes. Kit and pad adjustments can be edited, but to keep them you must press Save and store them in a user kit slot (25-40). If you power off without saving, settings return to defaults.
Is this answer helpful?
Normal Mode focuses on songs: select and play songs, adjust song and drum-part volume, and use Drum Off to mute the pre-recorded drum part. Learning Mode is for practicing beats, rhythms, and patterns, with options for unscored repetition or scored accuracy.
Is this answer helpful?
Yes. In Learning Mode, choose the beat, rhythm, or pattern, then use Play/Practice to start practice without scoring. The pattern repeats after a count-in so you can focus on timing and consistency.
Is this answer helpful?
No. The USB connection sends MIDI information only. Audio playback still relies on the module outputs or the headphone output connected to your monitoring system.
Is this answer helpful?
Local Mode decides whether your electronic kit triggers sounds in the drum module (ON) or triggers an external sound module via MIDI Out (OFF). GM toggles how channel 10 uses General MIDI percussion sounds versus the module's internal drum sounds.
Is this answer helpful?
If FUL appears, the module's recording memory is full. The guide notes that you can clear or overwrite it by making a new recording. Plan shorter takes or overwrite as needed.
Is this answer helpful?
Advantages and Disadvantages
Advantages

- Realistic practice workflow with Normal and Learning modes for songs and scored/unscored training
- Extensive customization: kit controls plus pad settings like volume, pan, pitch, reverb, and sensitivity
- Timing support: metronome offers BPM, time signature, subdivisions, voice, and volume
- Versatile connectivity: MIDI In/Out and USB MIDI for computer control (MIDI data only)
- Recording features include metronome pre-count and playback for practice review
Disadvantages

- Speakers and many accessories are sold separately
- You must save changes to keep edited kits (especially user slots 25-40)
- USB connection transmits MIDI only, not audio
- On-screen memory can become full during recording, requiring overwrite via new takes
- Some functions require switching to the correct mode before you can use them
Product Specification
Sounds
40 Drum Kits, 385 Sounds, configurable
Sound Module
Nitro Drum Module (LCD)
Snare
8", Mesh Head Pad, 2 zones
Bass
Rubber Pad
Rack Tom
2x 8", Mesh Head Pad
Floor Tom
8", Mesh Head Pad
Hi-Hat
10"
Crash
10", 1 zone
Ride
10"
Hardware
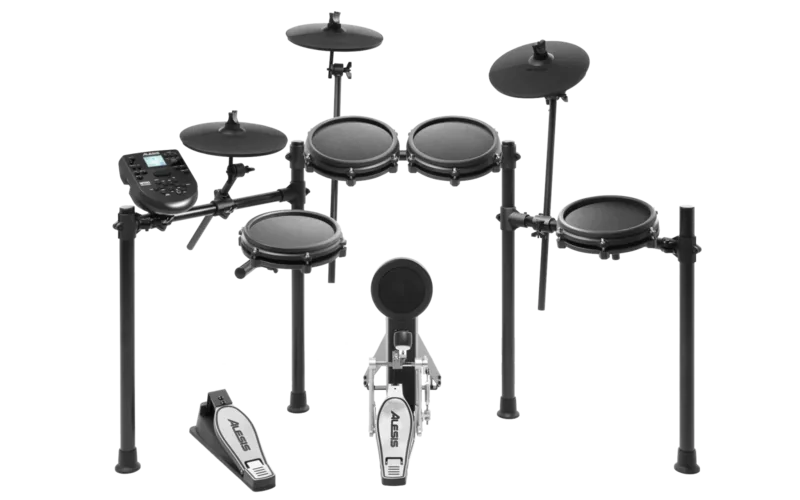
Bass Drum Control Pedal, Hi-Hat Control Pedal, Rack
Connections
Stereo Main Out (6.35mm jack), AUX In (3.5mm jack), Headphones (3.5mm jack), 2x Trigger In, MIDI In/Out, USB-B
Features
MIDI Recorder, Play-along Songs
Product Description
Alesis Nitro Mesh Kit Manual: A Practical Guide to Getting the Most From Your Practice Kit
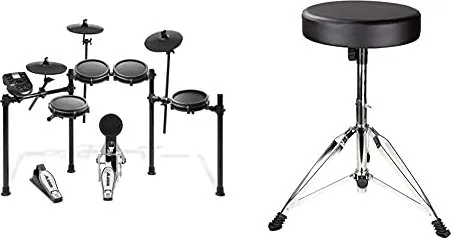
If you want tight timing, realistic pad response, and flexible practice tools in one compact setup, the Alesis Nitro Mesh Kit is built for exactly that. The unit described here supports plug-and-play wiring for your electronic drum pads and cymbals using a cable-snake style connection, plus convenient monitoring through dedicated outputs and a 1/8-inch headphone jack. Using guidance like the Alesis Nitro Mesh Kit Manual helps you move quickly from first connection to confident playing.
Start by routing your pads into the module inputs (with optional extras for additional toms or crash cymbals). Once powered on, you can select preset kits (01-24) or user kits (25-40), preview individual voices, and dial in overall kit tone with volume, reverb, and EQ controls. Volume also affects both the main outputs and your headphone level, making it easy to practice quietly or at band-rehearsal volume.
Beyond basic kit selection, the workflow supports both song-style practice and guided rhythm training. In Normal Mode, you can choose songs, control song and drum-part volumes, and use Drum Off to mute the pre-recorded kit so you can focus on your own hits. In Learning Mode, you can practice beats, rhythms, or patterns and switch between unscored repetition (with automatic practice recording) and scored sessions that evaluate your accuracy.
The module also includes a built-in metronome with adjustable BPM, time signature, subdivision interval, metronome voice, and volume. For deeper customization, Utility settings let you fine-tune pad sensitivity, threshold, crosstalk, velocity curve, rim sensitivity, and hi-hat splash behavior. Save actions are required to keep kit edits in user slots.
Connectivity is another highlight. You get MIDI In and Out for controlling external sound modules and routing performance data, while USB sends MIDI information to a computer (no audio over USB). Recording can capture performances with options like pre-count, time signature, tempo, and selecting background songs.
Top takeaways (key results)
- Quick setup: connect pads/cymbals to the module inputs, add speakers or headphones, then start playing with kit selection.
- Practice modes: Normal Mode for songs and Learning Mode for beats/rhythms/patterns with optional scoring.
- Custom sound: adjust kit and pad parameters such as EQ, reverb, sensitivity, threshold, and velocity curve.
- Timing tools: metronome supports BPM, signature, subdivisions, and adjustable metronome voice.
- Flexible control: MIDI routing (LOC/GM) plus USB MIDI for computer integration.
Pros
- Detailed kit and pad editing (EQ, reverb, pan, pitch, sensitivity settings).
- Learning Mode supports beats/rhythms/patterns and scored or unscored practice.
- Strong connectivity: MIDI In/Out and USB MIDI.
- Convenient monitoring: main outputs plus dedicated headphone output.
- Recording and practice playback are integrated into the workflow.
Cons
- You typically need external speakers and/or headphones sold separately.
- Edits must be saved to user kit slots to persist.
- USB sends MIDI only, not audio.
- Recording memory can fill up (requires new recordings to overwrite).
- Menu navigation depends on being in the correct mode (Normal vs Learning).
Notes
- During inactivity, the module can auto-shut down after about 30 minutes (adjustable in Utility).
- When syncing with another MIDI device, this module acts as master, not slave.
Search for 67,706 Manuals online


Type-in Brand or Model