b. Si votre passerelle ne prend pas en charge SmartStart;
i. Placez votre passerelle Z-Wave en mode 'ajouter un périphérique'.
Reportez-vous au manuel de la passerelle si vous n'êtes pas sûr de la
manière d'effectuer cette étape.
ii. Appuyez 3 fois sur l'interrupteur d'autoprotection du capteur en 1,5
seconde ; il est situé en bas à droite avec la pile dirigée vers l'avant.
iii. Lorsque Door / Window Sensor 7 Pro rejoint votre réseau Z-Wave, son
voyant LED clignote en vert et rouge.
iv. Si l'appairage est réussi, il passera à une couleur verte pendant 3
secondes avant de s'éteindre.
Si l'appairage échoue, le voyant LED rouge clignote 3 fois, il n'a pas pu
rejoindre votre réseau Z-Wave ; répétez l'étape ou contactez-nous pour
une assistance supplémentaire si nécessaire.
4. Après avoir testé le Door / Window Sensor 7 Pro à l'emplacement de
montage choisi, fixez la plaque arrière du capteur principal avec les vis
fournies ou le ruban adhésif double face. S'assurer que le repère de
marquage est aligné sur l'emplacement d'installation de l'aimant.
Important. Veillez à ce que le Door / Window Sensor 7 Pro soit
complètement fermé sur la plaque de montage, sinon la batterie de votre
capteur s'épuisera en quelques jours en restant complètement active.
5. Installez l'aimant en face du capteur principal. S'assurer que le repère de
ligne est aligné avec celui du capteur principal.
Le Door / Window Sensor 7 Pro fait maintenant partie intégrante de votre
système de commande domestique Z-Wave. Vous pouvez le configurer ainsi
que ses automatismes via votre système Z-Wave ; veuillez-vous référer au
manuel d'utilisation de votre logiciel pour des instructions précises.
Deutsch.
Wichtige Sicherheitsinformationen.
Bitte lesen Sie dieses Dokument und die Anleitung(en) unter
support.aeotec.com/dws7p sorgfältig durch. Den festgelegten Empfehlungen
der Aeotec Limited nicht zu folgen, kann gefährlich sein oder gegen ein
Gesetz verstoßen. Der Hersteller, Importeur, Vertreiber und / oder Verkäufer
haftet nicht für den Verlust oder Schaden, der durch die Nichtbeachtung der
Vorschriften in dieser Anleitung oder in anderen Material entsteht.
Door / Window Sensor 7 Pro ist nur für den Innengebrauch bestimmt.
Verwenden Sie den Door / Window Sensor 7 Pro nicht in einer dunstigen,
feuchten oder nassen Umgebung.
Enthält Kleinteile, von Kindern fernhalten.
Optimale Platzierung des Door / Window Sensor 7.
Door / Window Sensor 7 Pro wurde konzipiert für die Montage in der Ecke
einer Tür oder eines bewegten Fensters. Um den Sensor optimal zu
installieren, beachten Sie bitte Folgendes:
●
Der Door / Window Sensor 7 Pro muss so angebracht werden, dass seine
beiden Teile (Magnet und Sensor) sich trennen, wenn die Tür oder das
Fenster geöffnet wird.
●
Da der Sensor eine drahtlose Kommunikation verwendet, kann es sein,
dass der Door / Window Sensor 7 Pro nicht optimal arbeitet, wenn er an
einer Metalltür oder einem Metallrahmen angebracht wird. Überprüfen Sie
deshalb die Funktion des Door / Window Sensor 7 Pro vor der Montage,
indem Sie ihn mit Testklebestreifen anheften.
●
Wenn Sie den dünnen Magneten mit dem Door / Window Sensor 7 Pro
Diagram 1: Door / Window Sensor 7 Pro with Thick Magnet.
Max distance-20mm
Diagram 2: Door / Window Sensor 7 Pro with Thick Magnet.
Notch
Notch
Thick Magnet
Notch
Max distance (when window closed) -20mm
Thick
Magnet
PIN: 12345
Note: QR Code used for SmartStart inclusion. DSK Code can be
found on packaging. Do not remove or damage them.
Remarque: code QR utilisés pour l'inclusion SmartStart. Le code
DSK peut être trouvé sur l'emballage. Ne les enlevez pas et ne
les endommagez pas.
Hinweis: Der QR-Code wird für die SmartStart-Einbindung
verwendet. Der DSK-Code ist auf der Verpackung zu finden.
Entfernen oder beschädigen Sie diesen nicht.
/3
%
Quick check
I'm not a robot
Incorrect answer, please try again.
Chat with your Aeotec Door Window Sensor 7 Pro manual using AI
Get instant AI answers from your Aeotec Door Window Sensor 7 Pro manual
Ask anything about the Aeotec Door Window Sensor 7 Pro. Answers come from this manual, with the pages they are based on.
Ask a Question
0/1000
Do you recommend Door Window Sensor 7 Pro?
YesNo
Frequently Asked
Questions
A
It detects whether a door or moving window is open or closed by monitoring the distance between the sensor body and its magnet. This status can be used by a connected Z-Wave system for notifications and automations.
Is this answer helpful?
A
No. The sensor is intended for indoor use in dry locations only. It should not be installed in damp, moist, or wet environments.
Is this answer helpful?
A
When the door or window is closed, the sensor and magnet should be aligned with their markers facing each other and separated by no more than 20 mm, or 0.79 inches.
Is this answer helpful?
A
For SmartStart-compatible gateways, scan the sensor QR code with the gateway app. Otherwise, set the gateway to add-device mode and press the sensor tamper switch three times within 1.5 seconds.
Is this answer helpful?
A
A green LED that remains lit for about three seconds indicates successful inclusion in the Z-Wave network. Three red flashes indicate that pairing failed and the process should be repeated.
Is this answer helpful?
A
Testing confirms reliable detection and wireless communication before permanent mounting. This is particularly important on metal frames, where the sensor may not perform optimally.
Is this answer helpful?
M: gpt-5.6-terra
Advantagesand
Disadvantages
Advantages
Detects door and window opening or closing for Z-Wave smart home automations.
Supports SmartStart inclusion through QR-code scanning on compatible Z-Wave gateways.
Includes screws and double-sided tape for flexible mounting choices.
LED status feedback helps confirm power, pairing success, and pairing failure.
Compact white sensor design is suited to discreet indoor placement.
VS
Disadvantages
Designed only for dry indoor locations and should not be used in wet or humid areas.
Metal frames may reduce wireless magnetic sensor performance.
Sensor and magnet markers must align within a maximum 20 mm gap.
An incompletely closed sensor housing can cause battery drain within days.
M: gpt-5.6-terra
Product
Specification
Type
Sensor
Standard
Z-Wave Plus, Z-Wave
Function
Open/close sensor, tilt sensor
Topology
Star
Dimensions
2.8 x 0.75 x 0.71 in (sensor), 0.79 x 0.43 x 0.31 in (magnet)
Features
Battery-powered, app-controlled
M: gpt-5.6-terra
Product
Description
Aeotec Door Window Sensor 7 Pro White, Closing/Opening Sensor - Read, Download & Print Free
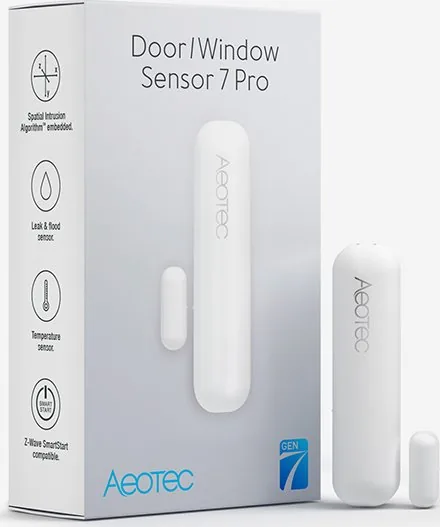
The Aeotec Door Window Sensor 7 Pro White is a compact Z-Wave closing and opening sensor designed to help make everyday smart home monitoring more responsive. Mounted on a door or moving window, it uses a separate magnet and sensor body to detect when the two pieces move apart or come back together. This simple action can become a useful trigger for alerts, lighting, security routines, and other automations configured through a compatible Z-Wave controller.
Designed for practical indoor monitoring
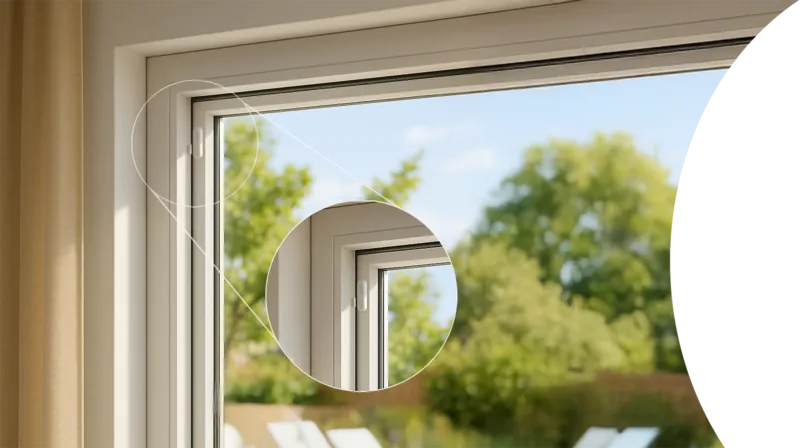
With its clean white finish and discreet two-piece design, the sensor can blend into many interior door and window frames. It is intended for dry indoor locations and includes mounting options for different installation preferences. The main unit can be secured using the supplied double-sided tape or screws, while the magnet is fitted opposite the sensor body.
Correct alignment is important for dependable operation. The line markers and notches on both pieces should face one another, with a gap of no more than 20 mm when the door or window is closed. Testing the chosen location before permanent installation is especially helpful, as metal frames may affect the performance of a wireless magnetic sensor.
Z-Wave setup with SmartStart support
The Aeotec Door Window Sensor 7 Pro White, Closing/Opening Sensor can join a Z-Wave network through SmartStart when supported by the gateway. Simply scan the sensor's QR code in the gateway app to begin automatic inclusion. For gateways without SmartStart, the sensor can be added manually by placing the controller in add-device mode and pressing the tamper switch three times within 1.5 seconds.
LED feedback provides a clear indication during setup. A green light confirms a successful pairing, while red flashes indicate that the joining attempt did not complete. Once connected, the sensor can be configured through the Z-Wave system to support routines suited to a home's needs, such as receiving a notification when a window opens or activating selected devices when a door closes.
Installation details that matter
The product uses pre-installed batteries activated by removing the pull tab. After attaching the rear mounting plate, the sensor body must be fully closed onto it. If it is not completely enclosed, the sensor can remain active and drain its battery within a few days. This small installation check is essential for efficient operation.
Notes
Use the sensor only indoors in dry locations.
Keep small parts away from children.
Retain the QR code and packaging DSK information for SmartStart setup.
Confirm Z-Wave gateway compatibility before installation.