
Aeotec Door Window Sensor 6 Manual
PDF manual · 3 Pages
English



Quick check
Incorrect answer, please try again.
Chat with your Aeotec Door Window Sensor 6 manual using AI
Get instant AI answers from your Aeotec Door Window Sensor 6 manual
Ask anything about the Aeotec Door Window Sensor 6. Answers come from this manual, with the pages they are based on.
Ask a Question
Do you recommend Door Window Sensor 6?
Yes NoVideo Manual
How to pair Aeotec Recessed Door Sensor ZW187-A with Ezlo Hubs?
Frequently Asked Questions
Put your primary Z‑Wave controller into inclusion/adding mode, bring the sensor near the controller, then press the sensor’s Action Button once. The LED indicators will confirm successful inclusion; follow the controller’s prompts for final setup.
Is this answer helpful?
Use the small magnet with a maximum gap of 1.6 cm or the larger magnet with a maximum gap of 2.5 cm. The main sensor mounts on the door or window and the magnet on the frame; they must separate when opened to trigger events.
Is this answer helpful?
The device uses a rechargeable 3.7 V, 500 mAh lithium battery charged via micro‑USB (5V/1A). Under normal use the battery can last up to six months; charging LED states indicate charge progress and completion.
Is this answer helpful?
Yes. To include it as a secure device, use a security‑enabled controller and press the Action Button twice within one second when the controller starts inclusion. This enables encrypted Z‑Wave communications.
Is this answer helpful?
Remove the sensor from its back mount and press the Action Button. Press and hold for three seconds to keep it awake for 10 minutes; this allows the controller to send configuration commands or firmware updates.
Is this answer helpful?
Clean both surfaces thoroughly with a damp towel to remove oil and dust; allow them to dry completely before applying tape to ensure a secure bond.
Is this answer helpful?
To remove use your Z‑Wave controller’s device removal mode and press the sensor’s Action Button when prompted. For factory reset, press and hold the Action Button for 20 seconds until the LED indicates a successful reset.
Is this answer helpful?
Advantages and Disadvantages
Advantages

- Compact, elegant design that blends with home decor and offers reliable opening/closing detection.
- Supports secure and non‑secure Z‑Wave inclusion plus OTA firmware updates for future improvements.
- Rechargeable battery with micro‑USB charging and up to six months runtime under normal use.
- Configurable reporting, association groups and multiple parameters for flexible automation and alerts.
- Easy mounting options: screws or double‑sided tape with two magnet sizes to fit varying gaps.
Disadvantages

- Indoor use only (IP20) — not suitable for exposed outdoor or high‑moisture locations.
- Mounting on metal frames may impair performance and is not recommended.
- Battery life depends on usage; frequent wake-ups or heavy reporting may reduce runtime.
- Some advanced features require a security‑enabled controller and manual wake‑ups for configuration.
- Small components and magnets pose a swallowing hazard for children if not properly secured.
Product Specification
Type
Sensor
Standard
Z-Wave Plus
Function
Opening/Closing Sensor
Topology
mesh
Dimensions
3.91x2.83x0.35 in
Special features
battery-powered, app-controlled, IP20
Product Description
Aeotec Door Window Sensor 6 — Closing/Opening Sensor Manual
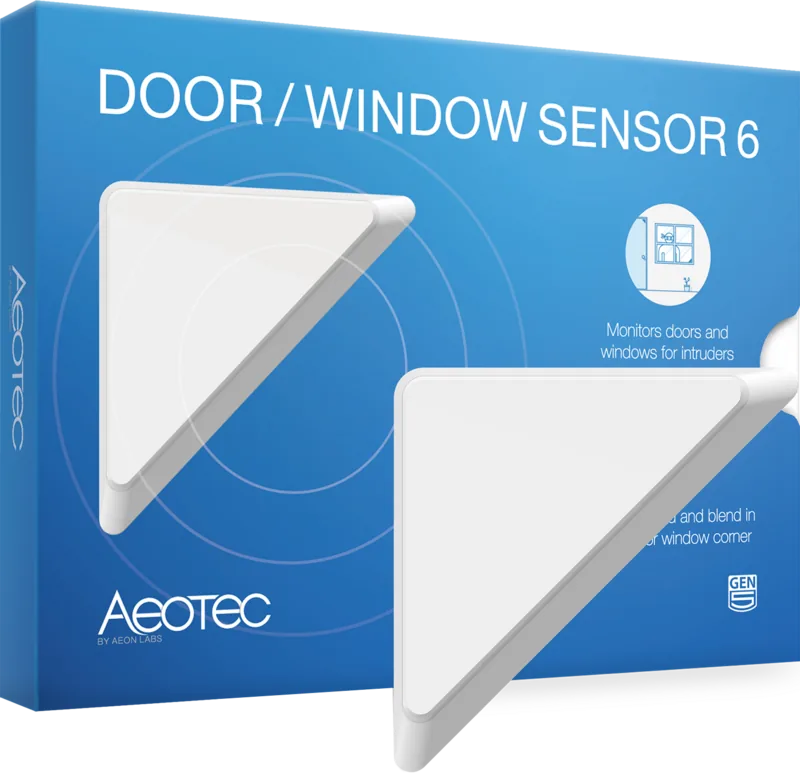
The Aeotec Door Window Sensor 6 is a compact, elegant Z‑Wave contact sensor designed to bring reliable door and window monitoring to modern smart homes. Sleek and unobtrusive, the device combines a main sensor and a separate magnet to detect opening and closing events and report them securely to a Z‑Wave gateway or controller. With support for Over‑The‑Air (OTA) firmware updates and secure inclusion modes, it fits both basic automation setups and security‑focused installations.
Installation is straightforward: mount the main sensor on the door or window and the magnet on the frame, ensuring the gap stays within the specified distance depending on which magnet you use (small magnet: up to 1.6 cm; large magnet: up to 2.5 cm). Position the sensor indoors away from moisture and avoid metal frames that could interfere with operation. The back mounting plate attaches via screws or double‑sided tape; clean surfaces before applying tape for best adhesion. After physical installation, add the sensor to your Z‑Wave network by placing your primary controller in inclusion mode and pressing the sensor’s Action Button once. LED feedback guides successful inclusion, and you can choose secure or non‑secure inclusion (press twice quickly for secure mode when your security controller begins inclusion).
The Sensor 6 runs on a built‑in rechargeable 3.7 V, 500 mAh lithium battery that lasts up to six months in normal use. Recharge through the micro‑USB port (5V/1A) and watch the LED states to know when charging is complete. The device supports wake‑up notifications and can be manually woken by pressing the Action Button; holding it for three seconds forces a 10‑minute awake period. For firmware, configuration, and advanced parameter changes, wake the sensor so your controller can deliver updates.
Advanced functionality includes configurable reports (Basic Set, Sensor Binary Report, Notification), adjustable low‑battery thresholds, configurable reporting behavior, and parameter locks. The unit supports associations so it can send direct reports to nodes in your network when triggered. If you need to remove or reset the device, follow the controller’s removal instructions or perform a factory reset by holding the Action Button for 20 seconds.
Safety and compliance notes: the sensor is for indoor use only (IP20), operates between 0–40°C, and complies with FCC Part 15. Keep magnets away from children and do not submerge the unit. Warranty coverage and technical support are available through Aeotec’s support channels and the vendor you purchased from.
Notes:
- Two magnet sizes are provided; pick the one that fits your mounting gap.
- Clean mounting surfaces before applying tape to ensure adhesion.
- Use a security‑enabled controller for encrypted communication if you require secure reporting.
Search for 67,706 Manuals online


Type-in Brand or Model